Can You Wash a Toaster with Soap and Water? Safe Cleaning Guide
Discover safe, practical ways to clean your toaster without submerging it in water. Learn why soap and water near electrical components is risky, which parts you can clean, step-by-step methods, and maintenance tips to extend your toaster’s life.

Can you wash a toaster with soap and water? Generally no. Unplug the unit, let it cool, and wipe the exterior with a dry microfiber cloth. Avoid soaking the body or submerging the appliance. If needed, use a barely damp cloth with a small amount of mild soap only on the exterior, never inside the slots. The crumb tray can be washed separately.
Why cleaning a toaster with soap and water is risky
When homeowners ask, 'can you wash a toaster with soap and water,' the simple answer is usually no. Toaster bodies contain exposed wiring, heating elements, and snug electrical components that can be compromised by moisture. A splash or submersion can trap water inside the chassis, leading to short circuits, electrical shock, or fires. Even if the exterior seems dry, water can wick into crevices through airflow slots. According to ToasterInsight, moisture can linger in tiny gaps long after a wipe, increasing the risk of damage when you plug the appliance back in. The safest approach is to keep soap and water away from the internal electronics and heating elements and instead rely on dry cleaning methods. This guideline helps protect your investment and your kitchen safety while maintaining performance over time.
What parts you should clean and what you should avoid
Not all toaster components tolerate water equally. The exterior surfaces and the removable crumb tray are the most forgiving parts to clean, but water should never flow into the slots or the interior. The crumb tray is designed to be removed and washed separately; you can use warm water and a tiny amount of dish soap, then rinse and dry thoroughly before reattaching. Exterior plastics and metal finishes respond well to a dry microfiber wipe for everyday upkeep. When you encounter stubborn smudges, use a barely damp microfiber cloth and avoid spraying soap directly onto the appliance. The interior and heating elements are sensitive to moisture, so avoid moisture in those areas entirely. ToasterInsight researchers emphasize moisture control to preserve safety, performance, and longevity across model types.
Safe cleaning methods that minimize moisture
The safest way to tackle crumbs and grime is to minimize moisture exposure. Use a dry microfiber cloth to wipe the exterior and a soft-bristle brush or compressed air to dislodge crumbs from slots. For sticky spots on the exterior, dampen the cloth slightly with water and a tiny amount of mild soap, then immediately wipe dry. Never run soap or water directly into the interior or around electrical contacts. Keep the toaster upright during cleaning to reduce any risk of liquid seeping into internal components. After cleaning, allow a few minutes of air-drying before reassembling. Regular maintenance—such as wiping crumbs after use and keeping the area around the toaster dry—helps extend the appliance’s life and keeps performance consistent.
Cleaning removable components: crumb tray and accessories
Remove the crumb tray before cleaning. Wash it in warm water with a small amount of dish soap if needed, rinse well, and dry completely before reinserting. Avoid soaking the tray for long periods; a quick wash is sufficient. If the tray has rust or cracks, consider replacing it rather than risking further damage. Use a cotton swab or soft brush to remove stubborn debris from small crevices. The goal is thorough dryness, not moisture saturation, so after rinsing, dry with a lint-free towel and let air-dry completely.
Aftercare, drying, and storage to extend toaster life
After cleaning, ensure every part is completely dry before reassembly. Reinsert the crumb tray and plug the toaster back in only after you are confident there is no moisture anywhere near electrical components. Store upright in a dry, low-humidity area away from sinks and humid environments. Regular visual inspection for signs of wear or corrosion helps you act quickly and reduce risk. By following these practices, you can maintain consistent toasting performance and reduce the frequency of deep cleanings.
Tools & Materials
- Microfiber cloth(Soft, lint-free; use dry for most surfaces)
- Soft-bristle brush or toothbrush(For crumbs in slots and crevices)
- Compressed air canister(Optional for slot cleaning)
- Mild dish soap(Use only on crumb tray or exterior in minimal amount)
- Warm water(Only for tray; avoid liquid near interior)
- Lint-free towel(For thorough drying)
- Small screwdriver (if needed)(Only for model-specific disassembly)
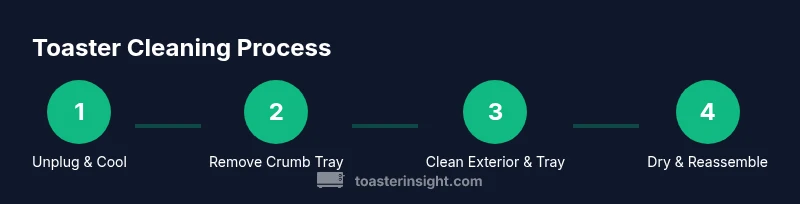
Steps
Estimated time: 30-40 minutes
- 1
Unplug and cool completely
Before touching any part of the toaster, unplug it from the wall and let it cool fully. This reduces shock risk and prevents heat-related damage when you handle components.
Tip: Wait at least 10 minutes after unplugging, especially if used recently. - 2
Remove crumb tray
Gently slide out the crumb tray from the bottom. Inspect for any buildup or rust, which should be addressed before reassembly.
Tip: Keep tray level to avoid spilling crumbs. - 3
Wash crumb tray separately
Wash the tray in warm water with a small amount of dish soap if needed, rinse, and dry completely before reinserting.
Tip: Dry with a lint-free towel and air-dry fully before reuse. - 4
Dust interior and brush crumbs
Use a soft-bristle brush or compressed air to remove loose crumbs from the interior and around the crumb channel without disassembling the heating elements.
Tip: Do not insert liquids into the interior; moisture can damage electronics. - 5
Wipe exterior with microfiber
Wipe the exterior surfaces with a dry microfiber cloth. If needed for stubborn smudges, use a barely damp cloth with a drop of mild soap, then immediately wipe dry.
Tip: Never spray soap or water directly onto the toaster. - 6
Clean slots with care
Use a soft brush or compressed air to dislodge crumbs from the slots. Avoid liquid contact with the slot openings.
Tip: Keep the toaster upright during this step to prevent liquid from entering the interior. - 7
Reassemble and dry
Return the crumb tray and any removed parts to their positions. Allow a few minutes for any residual moisture to evaporate before plugging in.
Tip: If you suspect moisture inside, wait longer before testing. - 8
Test safely without bread
Plug in and run a quick short cycle with no bread to ensure there is no unusual odor or smoke. If everything is clear, perform a normal test with bread to confirm performance.
Tip: If you smell burning or notice overheating, unplug immediately and reassess for moisture.
Your Questions Answered
Is it safe to wash a toaster with soap and water?
Generally not. Submerging or spraying water near the interior risks electrical damage. Use dry methods and only mild soap on removable parts like the crumb tray.
It’s usually not safe to wash a toaster with soap and water; avoid water near the interior and use dry cleaning techniques instead.
Can I wash the crumb tray in the sink?
Yes. Remove the tray, wash with warm water and a small amount of dish soap if needed, rinse, and dry completely before reinserting.
Yes, you can wash the crumb tray in the sink, just dry it thoroughly before putting it back.
What should I do if water gets into the slots?
Unplug the toaster and let it dry completely before attempting to use it again. Do not operate while any moisture remains near electrical parts.
If water gets into the slots, unplug it and wait until it’s completely dry before using again.
Can I use a dishwasher for toaster parts?
No. Dishwashers can damage the toaster's electronics and mechanical parts. Wash only removable components by hand when appropriate.
No, avoid the dishwasher for toaster parts.
How often should I clean my toaster?
Clean as needed, typically when crumbs are visible or sticky residue appears. Regular dry-wipe maintenance reduces deep cleans.
Clean when you see crumbs or residue; regular dry wiping helps keep it performing well.
Are toaster ovens cleaned differently?
Yes. They may have different racks and interior spaces; follow the manufacturer’s manual for any model-specific cleaning. Many guidelines apply, but the interior should still avoid moisture near heating elements.
Toaster ovens have different parts; check the manual for model-specific cleaning.
Watch Video
Key Takeaways
- Unplug before cleaning and avoid soaking the device.
- Clean the exterior and crumb tray; interior moisture is risky.
- Wash the crumb tray separately and dry completely.
- Use dry methods and compressed air for slot cleanliness.
- Test with no bread to confirm the unit is dry and safe.