How to Clean a Toaster Inside and Outside Safely
Learn how to clean a toaster inside and outside with a safe, step-by-step method. This guide covers unplugging, removing crumbs, brushing interiors, cleaning the exterior, and proper drying to maintain performance and extend appliance life.

You’ll learn how to clean a toaster inside and outside safely and effectively. This quick guide covers unplugging, removing the crumb tray, dislodging crumbs, and wiping the exterior without soaking the unit. Follow 4 practical steps to refresh browning and extend your toaster’s life. It also emphasizes safety, tool choices, and drying time to prevent electrical issues.
Why Regular Cleaning Matters for Toaster Longevity
Maintaining a clean toaster is more than aesthetics; it directly impacts performance and safety. Crumbs accumulate quickly, creating hot spots that can scorch bread and produce smoke or odors. Over time, a built-up crumb tray and interior debris can hinder heat distribution, leading to uneven browning and longer toasting times. Regular cleaning helps prevent these issues, preserves seal integrity, and extends the life of interior mechanisms. According to ToasterInsight, adopting a simple, repeatable cleaning routine reduces the risk of malfunction and preserves browning consistency. By addressing both the interior and exterior, you ensure your toaster operates efficiently and safely, even with daily use.
Safety First: Unplug, Cool, and Prep
Before you touch any part of the appliance, unplug it from the wall outlet and let it cool completely. While it may be tempting to rush, hot components can cause burns and damage if liquid gets near heating elements. Prepare a protective work area with a towel or tray to catch crumbs. Remove the crumb tray and inspect the interior gap around the slot to identify loose crumbs. Have a damp cloth, a soft brush, and a dry towel at the ready. Safety is the foundation of a successful cleaning session; rushing can cause leaks, corrosion, or electrical hazards.
Tools and Materials You’ll Need
Gather a few simple supplies before you begin to minimize interruptions. A soft microfiber cloth is essential for wiping without scratching surfaces. Mild dish soap, warm water, and a soft-bristle brush (or an old toothbrush) help clean stubborn grime without damaging coatings. A small vacuum with a nozzle attachment is useful for loose crumbs you can’t reach by hand. Paper towels or lint-free towels, a dry cloth for drying, and a towel or mat to protect your countertop complete the setup. Optional: isopropyl alcohol for stubborn residues and a cotton swab for tight crevices.
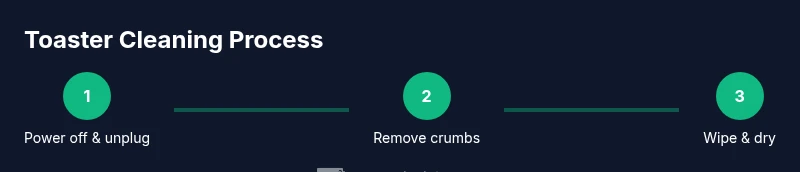
Step 1: Empty the Crumb Tray and Shake Out Crumbs
Start by unplugging the toaster and removing the crumb tray. Empty the tray into the trash or a bowl for shaking crumbs into a dustpan. Gently tap the tray to loosen any stuck debris and wipe it with a damp cloth. If there’s sticky residue, soak the tray in warm soapy water for a few minutes, then rinse and dry thoroughly before reattaching. This step reduces smoke risk and improves air flow inside the toaster when in use.
Step 2: Vacuum or Brush the Interior Carefully
Using a small vacuum with a narrow nozzle is ideal for lifting loose crumbs from the interior chute and housing. If a vacuum isn’t available, use a soft brush to brush crumbs toward the tray opening, then wipe away with a damp cloth. Be careful to avoid contact with heating elements and any exposed wires. A light, patient touch prevents scattering debris further into the unit and avoids damage.
Step 3: Clean the Exterior Without Water Damage
Wipe the outside surfaces with a damp microfiber cloth and a little mild soap if needed. Do not immerse the toaster or allow water to pool around the base or controls. For stubborn spots on metal, rub gently with a small amount of cleaner formulated for kitchen appliances. Dry the exterior with a clean towel to prevent water spotting. Cleaning the exterior helps remove fingerprints, oil, and crumbs accumulated during use.
Step 4: Clean the Interior Surfaces (Avoid Heating Elements)
If you can safely access the interior without disassembling the unit, use a damp cloth or a small brush to remove any remaining crumbs near the slots. Never spray water into the slot or directly onto heating elements. For hard-to-reach places, a cotton swab lightly moistened with mild soap solution can help without over-wetting. Allow air to circulate inside for a few minutes after cleaning to evaporate any moisture.
Step 5: Dry Thoroughly Before Use
Before plugging back in and toasting again, ensure all components are completely dry. Wipe any remaining moisture from the crumb tray, interior walls, and exterior joints. Leave the toaster open for a few minutes if you suspect hidden damp spots. Reattach the crumb tray, plug in, and perform a test toast on a dry setting to confirm there are no residual issues. A thorough dry-down prevents shorts and smoky odors.
How Often to Clean Your Toaster and Maintenance Tips
Frequency depends on usage: a light toaster used daily may need a quick wipe weekly and a deeper clean every 1–2 months. If you notice burnt crumbs or dust buildup, increase cleaning frequency. Set a simple routine: quick exterior wipe after use, crumb tray emptying every few days, and a deeper interior clean monthly. Establishing a routine reduces the risk of neglect and ensures consistent browning quality over time.
Dealing with White Residue and Burnt Debris
Some minerals from hard water or mineral-rich foods can leave white residue on the interior or exterior. A gentle wipe with a mixture of equal parts water and white vinegar can help dissolve mineral deposits; rinse and dry thoroughly afterward. If residue persists, repeat with a mild soap solution and a soft brush. Avoid acidic cleaners on non-stick coatings unless the manufacturer specifies safe use.
Common Mistakes and How to Avoid Them
Avoid soaking parts or submerging the toaster in water. Do not use abrasive pads that can scratch finishes or remove coating. Never disassemble the heating assembly; this can void warranties and cause safety hazards. Do not rush the drying process, and avoid turning the appliance on while damp. Finally, don’t ignore the crumb tray—clean it regularly and inspect for cracks or warping that could impact safety and performance.
Quick Maintenance Routine and Storage Tips
Create a 5-minute weekly routine: unplug, wipe exterior, empty crumb tray, and run a quick toaster cycle on a dry setting to ensure vents stay clear. Store the toaster in a clean, dry area away from heat and moisture. Regular maintenance keeps aroma and browning predictable and reduces the likelihood of residue buildup that affects efficiency.
Tools & Materials
- Soft microfiber cloth(Lint-free, non-abrasive)
- Mild dish soap(Dissolves grease without residue)
- Soft-bristle brush or old toothbrush(Reach crumbs in crevices)
- Vacuum with narrow nozzle(Loosens interior crumbs)
- Paper towels or lint-free towels(For drying and blotting)
- Old towel or protective mat(Prevents countertop mess)
- Isopropyl alcohol (optional)(For stubborn grime—dilute and test)
- Cotton swabs(Tight crevices)
Steps
Estimated time: 20-30 minutes
- 1
Unplug and Cool
Power off the toaster and unplug it from the wall. Allow the appliance to cool completely before handling. This prevents accidental burns and protects you from electric shock during cleaning.
Tip: If the toaster has been in use, give it at least 15 minutes to cool fully. - 2
Remove Crumb Tray and Empty
Take out the crumb tray and dump crumbs into the trash. Wipe the tray with a damp cloth and soapy water if needed. Dry the tray completely before reinserting to avoid moisture near electrical components.
Tip: Tap the tray gently to loosen stubborn crumbs before washing. - 3
Loosen Interior Crumbs
Use a soft brush or a small vacuum to lift loose crumbs from the interior chute and walls. Avoid touching heating coils and keep movements gentle to prevent scattering debris further inside.
Tip: Work from the outside edges toward the crumb tray to minimize debris escape. - 4
Wipe Exterior Surfaces
Dust and fingerprints on the exterior can be wiped away with a damp microfiber cloth and a small amount of mild soap. Avoid water near controls or vents. Dry thoroughly with a separate cloth.
Tip: For metal finishes, wipe in the direction of the grain to prevent streaks. - 5
Clean Interior Surfaces (If Accessible)
If you can reach interior areas safely, wipe with a barely damp cloth or use a cotton swab for tight spots. Never spray liquid into the unit or soak components. Let any damp areas dry completely.
Tip: Never disassemble the heating assembly; this could be hazardous and void warranties. - 6
Dry and Reassemble
Ensure all parts are dry, then reinsert the crumb tray and plug the toaster back in. Run a short, empty cycle on a dry setting to confirm safe operation and clear vents of any remaining moisture.
Tip: If you detect a lingering smell, run the toaster on a clean cycle with no bread to vent out moisture. - 7
Establish a Cleaning Rhythm
Set a routine that matches your usage level: quick exterior wipe after daily use and deeper cleaning every 1–2 months. This keeps browning consistent and prevents large build-up.
Tip: Attach a reminder to your calendar for the monthly deep clean. - 8
Handle Stubborn Residues
If mineral deposits or grime persist, use a small amount of white vinegar solution, then rinse and dry. Avoid harsh solvents and always test a small area first to ensure finish safety.
Tip: Always finish with a dry, lint-free wipe to prevent moisture entrapment.
Your Questions Answered
Is it safe to use water to clean the toaster?
Water should not be sprayed into the toaster or used to soak the interior. Use a damp cloth on the exterior and a barely damp cloth or brush for interior areas that are accessible. Always unplug and ensure complete dryness before reuse.
No, avoid spraying water into the toaster. Use a damp cloth and make sure everything is completely dry before plugging it back in.
Can I put the toaster in the dishwasher?
No. The toaster is not dishwasher-safe. Submerging components or exposing electrical parts to water can damage the unit and pose a safety risk. Clean with a damp cloth and mild soap as needed.
Dishwashers are not safe for toasters. Clean with a damp cloth instead and let it dry fully.
How often should I clean my toaster?
Clean the crumb tray weekly, wipe down the exterior after use, and perform a deeper interior clean every 1–2 months, or sooner if you notice residue or smoke.
Weekly tray cleaning, monthly interior checks, and a quick exterior wipe after use keeps it performing well.
What if my toaster starts smoking after cleaning?
If smoke appears, unplug immediately and inspect for remaining crumbs or moisture. Dry thoroughly before use, and ensure the crumb tray is properly seated. If the issue continues, consider professional service or replacing the unit.
Unplug, check for crumbs, dry completely, and test again. If it keeps smoking, seek professional help.
Can vinegar or lemon juice help with mineral deposits?
A diluted vinegar solution can help dissolve mineral deposits on exterior or accessible interior surfaces. Rinse with a damp cloth and dry completely. Do not let acidic solutions sit on coatings or reach heating elements.
Diluted vinegar can help with deposits; rinse and dry well afterward.
How can I keep browning consistent after cleaning?
Regular cleaning removes residue that can affect heat distribution. After cleaning, run a test cycle on a bread setting to verify browning consistency and adjust settings if needed.
Clean regularly, then test with a small toast to confirm even browning.
Watch Video
Key Takeaways
- Unplug and cool before cleaning.
- Remove and wash the crumb tray regularly.
- Clean exterior with a damp cloth; avoid soaking.
- Use gentle brushes and avoid inside heating elements.
- Dry thoroughly and establish a routine.