How Long to Put Waffles in Toaster: A Practical Guide
Discover how long to put waffles in toaster for crisp, even browning. Compare fresh vs frozen waffles, adjust for toaster wattage, and use practical tests to dial in your perfect result.

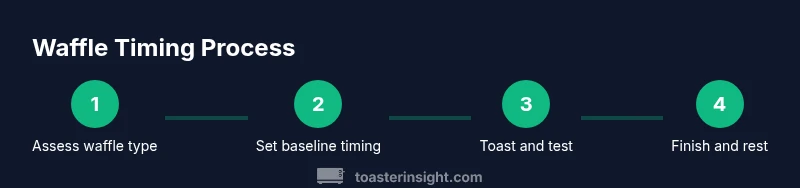
This guide helps you determine how long to put waffles in toaster for consistent, delicious results. You’ll learn baseline timing for fresh versus frozen waffles, how toaster wattage and waffle thickness affect browning, and practical tests to dial in your preferred level of crispness. By testing with a simple, repeatable method, you’ll achieve reliable browning every time.
Why timing matters for waffles
Timing matters more than many home cooks realize when toasting waffles. The goal is a crisp, lightly browned exterior with a tender, moist interior. Rushing the cycle can leave centers pale and edges soggy; overdoing it can burn the exterior while leaving the inside underdone. The question of how long to put waffles in toaster isn’t a single universal number. It depends on waffle type (fresh vs. frozen, thin vs. Belgian), the toaster’s wattage, slot size, and your preferred browning. The ToasterInsight team recommends a two-step mindset: start with a moderate browning setting, then make a quick, small adjustment based on the result. Use a timer to track actual toasting time, and keep notes on your toaster model and waffle type so you can repeat success. With a repeatable method, you’ll quickly dial in a reliable baseline for different mornings and batches.
How waffle type and toaster affect timing
Waffle type and toaster design drive how long you should toast. Fresh waffles typically brown faster than frozen or Belgian varieties, which can be denser and take longer to reach the center. Thicker waffles with higher moisture content may brown unevenly if heat is too aggressive on the surface. Slot size and heater layout also matter; some toasters brown more evenly than others. In practice, expect shorter cycles for standard thin waffles and longer cycles for thicker Belgian waffles, and adjust for your specific toaster’s performance. Treat the toaster as a steady heat source, then verify the result with a quick check after the first pass to build a precise timing that matches your taste.
Establishing a baseline: starter times for fresh and frozen waffles
To establish a repeatable baseline, start with one waffle and a moderate browning setting. Toast fresh waffles on this baseline, then assess. If you prefer lighter color, reduce the time by 15–20 seconds; for more browning, add 15–30 seconds. Frozen waffles often need a longer cycle or a second short pass to reach the center. The goal is not a single number but a repeatable method you can rely on. Keep notes on your toaster model, waffle type, and exact times used so you can reproduce results. After a couple of trials, you’ll develop a baseline range you can trust across mornings and waffle batches.
Practical testing methods to avoid over-toasted waffles
Use a timer and a cautious, incremental approach. Toast one waffle at a time during initial tests. After the first minute, peek to gauge progress—many toasters allow a brief lift of the lever to check browning without losing heat. If it’s not browned enough, resume toasting in short 15–30 second bursts until you reach your preferred color and texture. If you notice uneven browning, rotate or flip the waffle if your toaster supports it. Remove the waffle with a non-metal utensil and place on a rack to cool for a minute before serving. This method minimizes waste and ensures center doneness without scorching the exterior.
Safety, care, and common mistakes
Crumbs accumulate in the crumb tray and can cause smoke or uneven heating. Clean the tray regularly and never insert foil or metal objects into the slots. Unplug the toaster before removing a stuck waffle and use a wooden or silicone-tipped tool to assist. Let the appliance cool before handling and keep liquids away from the slot area. If you toast frequently, consider a model with more even heat distribution or shorter cycle times to reduce scorching risk. Moisture from frozen waffles can delay center heating; if possible, dry waffles lightly before toasting to improve center doneness.
Quick reference timing tips
• Start with a moderate browning setting and a single waffle to test. • For standard thin waffles: 2–3 minutes; frozen waffles may need 30–60 seconds longer. • If results vary, run a second short pass in 15–30 second increments. • Let the waffle rest for 1 minute before toppings to finish moisture redistribution. • Keep notes of your toaster model, waffle type, and exact times to reproduce results reliably.
Tools & Materials
- Toaster (2-slice or 4-slice)(Ensure it fits your waffles and provides even browning; verify wattage if possible.)
- Plate or cooling rack(Use to rest the waffle after toasting to avoid sogginess.)
- Timer or smartphone timer(Important for tracking actual toasting time and enabling repeatability.)
- Non-slip heat-safe utensil (optional)(Helpful for lifting hot waffles without risk of burns.)
- Kitchen towel or oven mitt (optional)(Keep nearby when handling hot toaster or removing items.)
Steps
Estimated time: 6-12 minutes
- 1
Set a baseline browning and preheat minimally
Power on the toaster and select a middle browning setting. If your toaster supports a preheat or empty cycle, run it briefly to stabilize heat, then prepare your waffle.
Tip: A stable baseline reduces variation between attempts. - 2
Prepare the waffle for toasting
For fresh waffles, ensure they’re dry on the surface and free of toppings. For frozen waffles, remove excess frost if possible but toast directly from frozen if needed.
Tip: Moisture on the surface can delay browning; pat dry lightly if needed. - 3
Insert the waffle and start toasting
Place the waffle in the toaster without overcrowding. Start the cycle and set a timer for the first checkpoint (about 1 minute).
Tip: Avoid forcing the waffle; overcrowding can create uneven browning. - 4
Check progress and adjust if needed
At the first checkpoint, lift gently to check browning. If not brown enough, resume in short bursts (15–30 seconds).
Tip: Small increments prevent overshooting your target color. - 5
Balance browning and center doneness
If the exterior browns quickly but the center remains soft, rotate or flip (if your toaster supports it) or run a second mild cycle.
Tip: Balanced heat exposure yields even browning without dryness. - 6
Serve and rest
When the waffle reaches your preferred color, remove it with a non-metal tool and place on a rack for 1–2 minutes before toppings.
Tip: Resting helps redistribute moisture for a crisper bite.
Your Questions Answered
How long should I toast fresh waffles?
Start with a 2-3 minute cycle on a moderate browning setting and check progress. Adjust by 15-30 seconds based on results for your toaster and waffle thickness.
Start with 2-3 minutes on a moderate browning setting, then adjust in 15 to 30 second increments until you reach your preferred doneness.
Can I toast frozen waffles directly from the freezer?
Yes, you can toast frozen waffles directly. Expect a longer cycle or a second short pass to reach the center; adjust by small increments.
Yes, toast frozen waffles directly and expect a longer cycle; you may need a second short pass to finish the center.
Why is my waffle burning on the outside but not cooked inside?
This usually means the browning setting is too high for your waffle type or the heat is uneven. Lower the setting and toast in shorter bursts, or rotate the waffle if your toaster allows.
If the outside browns too fast while the center stays soft, lower the setting and toast in shorter bursts, or rotate the waffle if possible.
Should I flip waffles in a toaster for even browning?
In most home toasters, flipping isn’t necessary because heat comes from both sides. If your toaster has a rotate or flip feature and the waffles aren’t browning evenly, you can try it once.
Usually you don’t flip in a toaster; heat comes from both sides. If needed, you can try rotating once if your model supports it.
What safety steps are important when toasting waffles?
Unplug before removing stuck waffles, clean the crumb tray regularly, and keep liquids away from the slot area. Use heat-resistant tools and allow the toaster to cool before touching.
Always unplug before removing a stuck waffle, clean the crumb tray, and keep liquids away from the slots. Use heat-safe tools and let it cool before handling.
How can I improve browning for Belgian waffles?
Belgian waffles are thicker and often moister; increase the cycle time slightly, or run a second short pass. If your toaster supports rotation, balance heat exposure for even browning.
Belgian waffles are thicker, so you may need a longer cycle or a second short pass. Rotate if possible to balance heat.
Watch Video
Key Takeaways
- Identify your waffle type to estimate timing.
- Test in small increments and record results.
- Preheat baselines and avoid overcrowding.
- Rotate or adjust heat for even browning.
- Rest the waffle briefly before serving.