Cabinet Solutions for a Toaster Oven: A Practical Home Guide
Learn how to choose, size, ventilate, and install a cabinet for your toaster oven. This guide covers space planning, material choices, safety tips, and maintenance for compact kitchens.

To maximize kitchen efficiency and safety, learn how to pair a toaster oven with a dedicated cabinet. This guide covers how to measure for fit, choose ventilation-friendly materials, select a style that matches your cabinets, and install it securely. By following expert tips from ToasterInsight, you’ll reduce countertop clutter and keep your appliance easily accessible.
Assessing Your Space: Do You Need a Cabinet for Your Toaster Oven?
In many kitchens, a dedicated cabinet for the toaster oven helps reclaim precious countertop space and reduces clutter. Before you buy or build anything, map out where the unit will live, taking into account clearance for heat, ventilation, and user access. Think about workflow: where will you retrieve toast, spread toppings, and wipe spills without stepping on cords or bumping doors? According to ToasterInsight, homeowners who allocate a specific cabinet for their toaster oven report improved safety and more organized counters. Start by measuring the appliance’s footprint and the available wall and base space. If the oven sits on a shelf, confirm there’s room for air to circulate behind and around it. For small kitchens, a compact cabinet with a ventilated rear panel can dramatically cut counter clutter while preserving quick access to the appliance.
Key questions to answer:
- What are the exact width, height, and depth of your toaster oven?
- How much clearance is needed above and behind the unit for heat dissipation?
- Will the cabinet be built-in or freestanding?
- Is there a nearby electrical outlet and cord management plan?
Sizing the Cabinet: How to Choose the Right Dimensions
The cabinet must accommodate the toaster oven with comfortable clearance for user operation and air flow. Start with the oven’s exterior footprint, then add at least a small margin to prevent tight fits. Typical configurations favor a cabinet depth that matches standard countertop depth and width that allows for a pull-out tray or shelf. If you’re designing a built-in unit, ensure the opening aligns with your oven’s ventilation requirements and the cabinet’s interior dimensions. Consider a slightly taller option to provide a small above-aperture shelf for accessories like baking sheets or crumb trays. Don’t forget door swing: a door that collides with the countertop or nearby cabinet hardware creates daily friction. Use a plan view drawing to verify all clearances and adjust before any cutting begins. In all cases, err on the side of extra space rather than crowding.
Practical steps to determine size:
- Measure oven width, depth, and height precisely.
- Add 1–2 inches on depth for airflow and 0.5–1 inch on width for side clearance.
- Decide if a full-height cabinet or a partial-tower unit fits your layout.
Ventilation and Placement: Avoid Overheating and Odors
Ventilation is essential when you enclose a toaster oven. Without adequate air exchange, heat and humidity can linger, affecting nearby cabinets and causing odors to concentrate. Plan for a vented cabinet with perforated back panels, or place the oven within a cabinet with a clear gap behind and above it. If you choose to back the cabinet, keep vent openings aligned with the oven’s exhaust vent. Position the cabinet near an outlet but away from cords that can heat up. If you’re using a built-in cabinet, consider installing a small vent grille and a heat-resistant barrier between the oven and the cabinet sides. For freestanding setups, a shallow base with a removable panel makes inspection and cleaning easier and reduces heat buildup. Always refer to the manufacturer’s clearance recommendations and avoid sealing the oven entirely into a dry, enclosed space.
Ventilation best practices:
- Install a vented back with perforations or a removable rear panel.
- Maintain a minimum gap above the oven for heat to escape.
- Use heat-resistant barriers on adjacent surfaces.
Materials and Finishes: Heat-Resistant Choices
Cabinets vary in material with heat resistance becoming a deciding factor when placing a toaster oven nearby. Solid hardwoods with proper finishs can work, but heat and humidity from cooking can warp or fade over time. Plywood or medium-density fiberboard with a moisture-resistant core, finished with a heat-rated sealant, often performs well in kitchen environments. For the exterior, consider durable finishes like heat-resistant enamel or laminate that withstands splashes and wipes. If you’re worried about direct heat exposure, install a slim metal strip or tile backing behind the oven to guard against radiant heat. Hardware should be rust- and heat-resistant, and doors should have soft close hinges to reduce stress from frequent use. When building from scratch, reinforce shelves and sides with extra bracing to resist warping over time. Safety testing of your chosen materials before installation helps ensure long-term performance.
Recommended material checks:
- Heat-resistant backing behind the oven area
- Sealed edges to prevent moisture ingress
- Durable, easy-to-clean finishes on exterior surfaces
Built-In vs Freestanding: Choosing Your Cabinet Style
A built-in cabinet creates a seamless look and can maximize floor space, but it often requires more planning, precise measurements, and possibly professional installation. Freestanding cabinets offer flexibility and easier retrofits; they are typically simpler to remove or reconfigure if you move. If you’re building in, ensure your cabinet aligns with surrounding cabinetry in height and depth and provides adequate ventilation. If freestanding, ensure it won’t tip when the toaster oven is opened; add anti-tip hardware or recessed base feet. Consider a hybrid approach: a tall cabinet with an integrated pull-out tray or shelf can combine built-in aesthetics with the flexibility of freestanding units. Regardless of style, ensure the cabinet is anchored to resist movement and that doors clear the oven when opened. A well-chosen cabinet style should complement your kitchen’s existing design while prioritizing airflow, stability, and safety.
Design cues to consider:
- Matching cabinet doors and hardware
- Consistent material quality with adjacent cabinetry
- Visible venting and accessible power outlets
Step-By-Step Installation Readiness
Before you begin physical work, create a precise shopping and build plan. Draft a layout that includes the oven footprint, cabinet dimensions, ventilation paths, and mounting locations. Gather required tools, confirm you have a stable surface for assembly, and protect the work area from dust and debris. If you’re converting existing cabinetry, check for compatibility with shelf heights and interior dimensions. Turn off the power to nearby outlets during any wiring checks, and never route cables through heat-affected zones. A well-prepared plan reduces the risk of miscuts and misaligned doors, ensuring a smooth installation and predictable results. Finally, verify weight limits and load-bearing capacity if you’re adding shelves or drawers that will support pans and accessories.
Important prep tasks:
- Create a scaled plan and cut list
- Check power outlet accessibility
- Prepare protective equipment and workspace
Assembly and Mounting: Practical Guidance
As you assemble, use square corners and a level to ensure the cabinet sits evenly on the floor or against the wall. Start with the base cabinet first if you’re combining multiple units; then align upper panels and doors. Secure to wall studs if possible to prevent tipping and maintain stability when opening hot oven doors. Install ventilation components or back panels before final assembly to avoid rework. Use weather- and heat-resistant fasteners and ensure that all electrical cords have safe clearance and strain relief. Finally, test the toaster oven’s fit by opening and closing doors, sliding the unit in and out, and checking for any interference. If there’s any friction or misalignment, adjust hinges or shims to achieve smooth operation.
Tips for precise mounting:
- Use a carpenter’s square for room angles
- Fasten to studs where strong support is available
- Leave adequate air gaps for cooling
Maintenance and Safety: Extending Cabinet Life
Maintaining a cabinet that houses a toaster oven involves routine cleaning, inspection, and occasional refreshes. Wipe interior surfaces with a damp cloth and mild cleaner to remove grease splatter; avoid harsh abrasives that could scratch finishes. Periodically check door hinges, latches, and alignment; re-tighten screws if doors become loose. Inspect ventilation paths for dust build-up and clear any blockages. Keep a heat-resistant barrier in place and schedule a periodic review of clearances as your kitchen setup changes. Routine maintenance helps prevent heat-related damage, reduces fire risk, and keeps your cabinet functioning as intended. If you notice discoloration, warping, or unusual smells, reassess the setup and consult a professional if needed.
Maintenance checklist:
- Clean interior and exterior surfaces regularly
- Inspect for signs of heat damage or warping
- Re-tighten hardware and adjust doors as needed
Design Ideas by Kitchen Style: Small Space, Modern, Farmhouse
A cabinet solution for a toaster oven can be adapted to suit various kitchen aesthetics. In small spaces, opt for a compact, pull-out tray with a ventilated back panel to maximize airflow while minimizing footprint. For a modern kitchen, choose a cabinet with clean lines, neutral finishes, and hidden hardware to maintain a streamlined look. In a farmhouse kitchen, consider distressed wood finishes, warm tones, and open shelving combined with a cabinet that integrates with existing cabinetry. Regardless of style, keep the cabinet color and materials cohesive with the rest of the kitchen. Lighting inside the cabinet and under-cabinet illumination can enhance usability and highlight your design choices. A well-planned cabinet not only houses the toaster oven but also serves as a functional element in your daily routine.
Final Thoughts: Putting It All Together for Your Space
A cabinet for a toaster oven is more than a storage solution; it’s a practical upgrade that affects safety, usability, and the overall flow of your kitchen. By carefully considering space, ventilation, materials, and mounting, you can create a dedicated home for your toaster oven that reduces counter clutter and simplifies daily tasks. The most successful installations balance form and function, matching your kitchen’s style while prioritizing heat resistance and airflow. With deliberate planning and the right materials, your new cabinet will feel integrated rather than tacked on, supporting a tidier, more efficient cooking space.
Tools & Materials
- Measuring tape(At least 6 feet; measure width, depth, and height of oven and cabinet space)
- Pencil or marker(For precise layout marks)
- Carpenter’s square(Ensures right angles during layout)
- Level(Bubble level for flat installation)
- Drill with bits(For pilot holes and screws)
- Screwdriver set(Flat and Phillips head)
- Stud finder(Helpful for wall-mounted installs)
- Wood screws (stainless/steel)(Corrosion-resistant; lengths 1 inch+ depending on material)
- Wood shims(For leveling cabinet on uneven floors)
- Ventilation grille or perforated back panel(Improves airflow behind oven)
- Heat-resistant barrier panel(Protects adjacent cabinetry from heat)
- Plywood or cabinet-grade plywood sheets(If building a custom cabinet; choose 3/4 inch thickness)
- Sealant or silicone(Seal gaps around edges to resist moisture)
- Safety goggles and gloves(Personal protection during cutting and mounting)
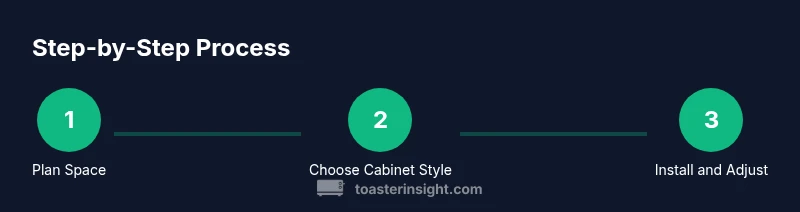
Steps
Estimated time: 2-5 hours
- 1
Measure and plan
Record the toaster oven’s exact footprint and the cabinet space. Create a simple layout showing clearances for air flow, door swing, and cord access. Draft a cut list if you’ll build; confirm if you’ll modify existing cabinetry.
Tip: Double-check all dimensions twice to prevent fabricating a non-fit cabinet. - 2
Choose cabinet style and materials
Decide between built-in or freestanding, and pick materials that resist heat and humidity. Ensure the interior shelves support weight and have easy-to-clean surfaces.
Tip: Opt for heat-resistant finishes and rust-proof hardware for long-term durability. - 3
Prepare space and ventilation
Clear the area, remove nearby obstructions, and plan ventilation paths. If needed, install a small vent grille or perforated backing to promote airflow.
Tip: Keep a clear gap behind and above the oven for heat to escape. - 4
Assemble cabinet frame or position ready-made unit
Assemble from manual or position the freestanding cabinet in place. Check alignment with adjacent cabinets and ensure the base is level.
Tip: Use shims to correct any uneven floor surfaces. - 5
Secure cabinet and connect ventilation
Anchor the cabinet to wall studs if possible and install any ventilation components. Make sure cords have safe routes and no pinch points.
Tip: Avoid running cords through heat zones or behind doors. - 6
Test fit and adjust
Slide the toaster oven into place, open/close doors, and verify clearance. Adjust hinges or pulls as needed for smooth operation.
Tip: Test with a light load (tray, pan) to ensure stability. - 7
Seal edges and perform final safety checks
Apply sealant where edges meet walls or countertops; inspect for gaps or sharp edges. Re-check all fasteners and confirm no heat exposure on adjacent surfaces.
Tip: Keep a small routine to inspect for heat damage every few months.
Your Questions Answered
Do I need to vent a toaster oven inside a cabinet?
Yes, proper ventilation is essential. Enclosed spaces can trap heat and odors; plan a vented back panel or small grille to allow air flow.
Yes. Ventilation is essential to prevent heat buildup inside the cabinet and to keep odors from lingering.
What materials work best near a toaster oven cabinet?
Use heat-resistant finishes and moisture-resistant core materials. Metal backs or heat shields plus sealed edges help protect surrounding cabinetry.
Choose heat-resistant finishes and moisture-resistant cores; add a heat shield where appropriate.
Can I retrofit an existing cabinet for a toaster oven?
In many cases, yes. Check interior space, door clearance, and ventilation. You may need to adjust shelves or add vented panels.
Yes, but you may need to adjust shelves and add venting for safety.
Is a built-in cabinet better than a freestanding option?
Built-in offers a seamless look and potential space savings but requires precise measurements and installation. Freestanding is flexible and easier to modify.
Built-in looks integrated but needs careful planning; freestanding is easier to adjust.
How do I maintain a cabinet that houses a toaster oven?
Regularly clean interior and check hinges and ventilation. Look for heat damage and reseal edges as needed.
Keep it clean, check hinges, and watch for heat damage.
What is a safe way to mount the cabinet?
Anchor to wall studs where possible; use appropriate hardware and avoid over-tightening that could crack wood.
Anchor to studs with proper hardware and avoid over-tightening.
Watch Video
Key Takeaways
- Plan space and ventilation before buying.
- Choose materials that heat and moisture resist.
- Built-in vs freestanding: weigh aesthetics against complexity.
- Secure the cabinet to ensure stability and safety.
- Maintain the cabinet with regular checks.