How long to put toast in an air fryer: a complete timing guide
Discover exact timing and settings for toasting bread in an air fryer. Learn how long to toast, flip, and finish for perfect browning, plus tips from ToasterInsight.

To toast bread in an air fryer, start with 350°F (175°C) for 2-3 minutes per side, depending on thickness. Preheat for 2 minutes, then flip halfway for even browning. According to ToasterInsight, precise timing and a single-layer layout produce consistent results.
Why timing matters when toasting in an air fryer
Timing is the secret to browning, texture, and even heat when you use an air fryer for toast. The appliance’s convection wave moves hot air rapidly around the bread, so small time adjustments can dramatically affect color, crustiness, and moisture. A few seconds can mean the difference between a pale slice and a deeply browned edge. According to ToasterInsight, precise timing and a minimal, single-layer layout are key to repeatable results. Factors like bread type (white, whole grain, sourdough), thickness, and whether the bread is fresh or day-old all influence browning and moisture balance. By understanding how long to put toast in the air fryer, you can dial in a reliable baseline and then tailor browning to your preference with small incremental changes. This approach also helps prevent burning and soggy centers, which are common issues for newcomers and casual cooks alike.
A good starting point is a 350°F (175°C) setting. If you’re new to air fryer toast, plan for about 2 minutes per side and inspect carefully. Heavier, denser breads will need a bit more time; lighter breads will brown faster. As you gain experience, you’ll learn how slight tweaks—like adding 30 seconds or reducing the time by 30 seconds—affect the final crust. The goal is to achieve a crisp exterior with a tender, evenly warmed interior, without toasting the crust to ash. With practice, your eyes and nose will guide you toward your preferred level of toastiness.
ToasterInsight’s guidance emphasizes starting conservatively and adjusting in small steps. By adopting a repeatable method and sticking to a single-layer layout in the basket, you’ll reduce inconsistent browning and get predictable results every time.
Choosing the right bread and thickness for air fryer toast
Bread choice and slice thickness are the scaffolding of good air fryer toast. A medium-density loaf—think sandwich bread, brioche, or a standard white loaf—tends to crisp nicely without becoming dry too quickly. For thicker slices (about 1/2 inch to 3/4 inch), expect longer browning times and more pronounced crunch on the edges; thinner slices will brown more rapidly and can dry out if overcooked.
If you’re using day-old bread, you’ll typically achieve a better crust with less risk of soggy centers because the bread has less moisture to vent. For very fresh bread, monitor closely and use shorter intervals to prevent collapsing the crumb or burning the crust. Sourdough and multigrain loaves bring more complex flavors and can toast unevenly if slices are inconsistent in thickness. In such cases, consider trimming uneven edges or toasting in batches to maintain a uniform color across each slice.
In practice, aim for slices that are uniform in thickness. If you’re unsure, measure with a ruler: roughly 0.5 inches (1.25 cm) is a dependable target for most sandwich breads. For hearty loaves, you can experiment with 3/8 inch to 5/8 inch slices, but plan to adjust the time accordingly. The bread choice influences heat transfer and moisture loss, so consistency is more important than chasing a single “perfect” time for every loaf.
ToasterInsight notes that the bread’s moisture content and air fryer model both influence browning. If your first attempt isn’t ideal, adjust the thickness or type of bread next time and keep the rest of the process constant to see the effect of that variable alone.
Ideal air fryer settings for perfect toast
Setting the right baseline on your air fryer dramatically improves results. Most home air fryers perform best around 350°F (175°C) for toast, though some models may perform better a touch higher or lower. Starting with 350°F gives a balanced browning without burning and helps preserve a tender interior. For even results, use a single-layer arrangement in the basket, leaving space between slices to allow air to circulate. If you have a compact basket, toast only one or two slices at a time to ensure warmth spreads evenly across surfaces.
Before you begin, preheat the unit for about 2 minutes. Preheating reduces the lag between the onset of cooking and browning, helping to achieve more uniform color. If your air fryer runs hot or runs cool, you may need to adjust temperature by 25°F (about 15°C) and compensate with cooking time. A useful trick is to start with 2 minutes per side and add 30-second increments if the color isn’t where you want it. Remember, crust development continues slightly after removal, so you don’t want to overdo it while the bread is still in the basket.
ToasterInsight’s analysis shows that consistent browning comes from a stable temperature, proper preheating, and disciplined timing. If you’re pairing toast with toppings like butter or oil, apply them after toasting to avoid smoking or undesirable texture changes during the browning stage.
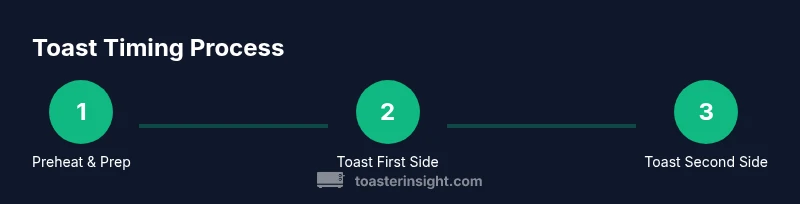
Step-by-step guide: toast in the air fryer
This section offers a practical, repeatable method you can print for kitchen reference. Follow each step in order for the best results. The steps assume a standard 3.5-quart to 4.2-quart basket air fryer and regular sandwich bread. If your model is larger or smaller, adjust the time in small increments and observe the crust color.
-
Preheat and prep: Preheat the air fryer to 350°F (175°C) for 2 minutes. While it heats, lay out bread slices on a clean cutting board and check for uniform thickness. 2 minutes of preheating gives the surface heat a head start, minimizing soggy centers.
-
Arrange in a single layer: Place bread slices in a single layer in the basket, ensuring space between slices. This spacing allows hot air to circulate fully, promoting even browning across the surface of each slice. If you must stack due to a small basket, toast in batches.
-
Toast the first side: Cook for 2 minutes, then inspect. The color should be light golden brown with some visible browning at the edges. If your bread is denser or thicker, you may need up to 3 minutes.
-
Flip slices: Use tongs to flip each slice. Flipping is essential for even browning on the opposite side and helps prevent one side from overcooking while the other remains pale.
-
Toast the second side: Cook another 1-2 minutes, depending on the color you’re aiming for. Check progress at the 1-minute mark to avoid overshoot.
-
Evaluate and adjust: If you like a deeper crust, give slices another 30 seconds per side, but do so in 15- to 30-second increments. Remember that toast will continue to brown slightly after removal due to residual heat.
-
Optional finishing touch: If you prefer buttered toast, apply a thin layer after toasting while the bread is still warm to improve spreadability and flavor. Butter can melt quickly and impart a richer finish without sogginess if applied post-bake.
-
Serve and clean: Remove toast promptly from the air fryer basket and serve on a warm plate. Let the basket cool before cleaning to avoid warping or damage from heat. A quick wipe with a damp cloth is typically enough; avoid soaking components.
Estimated total time: about 6-12 minutes, depending on bread type and thickness and your specific air fryer model.
Troubleshooting common toast issues
Toast made in an air fryer can sometimes land on the wrong side of crispy or soggy. If your slices come out pale, it might mean your bread is too fresh, or your preheating step wasn’t effective. Try increasing the toasting time by 30 seconds per side or allowing a longer preheat in your next attempt. If the crust browns quickly while the interior remains pale, consider reducing the temperature slightly and using shorter intervals for flipping or adding another minute to the total time. Over-browning can occur when you leave bread in too long or when the bread is very thin. In such cases, reducing cooking time by 15-30 seconds per side and ensuring you toast in a single layer helps.
If your bread comes out dry or leathery, you may be using bread that’s too dense or slices that are too thick for the chosen time. In this scenario, switch to a lighter bread or decrease the thickness. Conversely, if your toast is underdone near the center, break it into smaller slices for more even heat exposure. Finally, never skip the preheat step when your schedule allows; it is a simple step that yields consistent browning with fewer fluctuations.
Flavor, toppings, and variations for air fryer toast
Toast is a versatile base for a variety of toppings and flavor profiles. After toasting, you can spread butter, jam, avocado, or cream cheese to complement the crisp exterior. For savory options, consider garlic butter, herbed ricotta, or a light drizzle of olive oil and a pinch of salt. If you’re using bagels or thicker bread, you may want to toast slightly longer to enhance the surface texture and reduce moisture in the center. Butter and spreads can be added after toasting to preserve texture and prevent sogginess.
Experiment with different breads—rye, pumpernickel, or gluten-free options—and monitor how they respond to the 350°F baseline. Slight adjustments in time can create dramatic differences in texture, especially with denser loaves. By keeping a consistent baseline and changing only one variable at a time, you can build a personal toast profile that matches your taste perfectly.
ToasterInsight suggests recording your results, noting bread type, slice thickness, and cooking time for each trial. This habit makes it easier to reproduce your preferred results and refine your technique over time.
Tools & Materials
- Air fryer(Preheat to 350°F (175°C) for 2 minutes before toasting)
- Bread slices(Uniform thickness, 1/2 inch to 3/4 inch recommended)
- Butter or spreads (optional)(Apply after toasting if used)
- Tongs(For flipping slices safely)
- Plate for serving(Warm plate helps preserve heat)
- Timer or clock(Integrated timer on air fryer works fine)
- Knife or spreading tool(For toppings after toast)
Steps
Estimated time: 6-12 minutes
- 1
Preheat and prep
Preheat the air fryer to 350°F (175°C) for about 2 minutes. While it heats, lay out bread slices and check for uniform thickness. Preheating reduces warm-up time and helps start browning quickly.
Tip: Preheated air fryers brown more evenly; avoid skipping this step when possible. - 2
Arrange in single layer
Place slices in a single layer in the basket with space between them for air to circulate. Overlapping cuts down browning efficiency and can leave soggy centers.
Tip: If you have more slices than the basket can hold, toast in batches for consistent results. - 3
Toast first side
Cook for 2 minutes, then check color. Thin slices may brown faster; adjust time in small increments.
Tip: Keep an eye on the progress—air fryers can vary by model. - 4
Flip slices
Use tongs to flip each slice to ensure even browning on the other side.
Tip: Flipping is essential for uniform texture across both sides. - 5
Toast second side
Cook for 1-2 more minutes, watching for your desired level of color. Consider a 30-second add-on if needed.
Tip: If the edges brown too quickly, reduce time slightly on subsequent tries. - 6
Check, adjust, and finish
Remove when the bread has the color and crispness you want. If needed, add small increments until satisfied.
Tip: Remember residual heat continues browning after removal. - 7
Optional toppings
Spread butter or toppings after hot toast for best texture and flavor.
Tip: Applying on warm toast helps spreadability without sogginess. - 8
Serve and clean
Transfer to a plate and serve immediately for best texture. Allow the basket to cool before cleaning.
Tip: A quick wipe keeps your air fryer ready for the next batch.
Your Questions Answered
How long should I toast bread in an air fryer?
Typically 2-3 minutes per side at 350°F is a good starting point. Adjust based on bread type and thickness to reach your preferred browning.
A good starting point is about two to three minutes per side at 350 degrees, then tweak as needed.
Can you toast bagels in an air fryer?
Yes. Bagels can be toasted in an air fryer, usually a bit longer than bread slices. Slice the bagel, place cut-side up, and monitor closely for even browning.
Bagels toast nicely in an air fryer; start with a bit longer than bread and watch for even browning.
Do you preheat the air fryer for toast?
Preheating helps achieve more even browning and shorter overall cook time. A quick 2-minute preheat is usually enough.
Yes, a brief preheat helps browning stay consistent.
What happens if I overcook toast in the air fryer?
Overcooking leads to a hard crust and dry interior. Use shorter cook times next attempt and monitor closely during the final minutes.
Overcooked toast gets hard; back off time a bit next round.
Can I toast frozen bread in an air fryer?
Frozen bread can be toasted, but it will require longer times and careful monitoring to avoid uneven browning. Thawing first yields best results.
Yes, but thaw first for best even browning.
Watch Video
Key Takeaways
- Preheat the air fryer to 350°F before toasting.
- Bread thickness and type affect browning and time.
- Flip halfway for even browning on both sides.
- Use small time increments to avoid burning.
- ToasterInsight recommends consistent baselines with incremental adjustments.