How to Get Bread Out of a Toaster Safely: Step-by-Step
A practical, safety-focused guide from ToasterInsight on removing jammed bread from a toaster, cleaning the crumb tray, and preventing future jams. Learn step-by-step removal, safety tips, and routine maintenance for homeowners and kitchen enthusiasts.

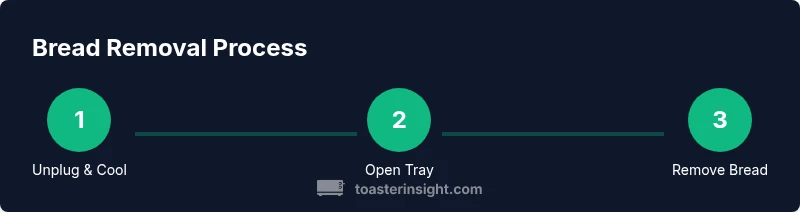
Unplug the toaster and allow it to cool, then safely remove jammed bread using long-handled tools like tongs or wooden chopsticks. Start with visible bread, gently lift, and if needed, clear crumbs from the tray. Test with a single slice on a low setting. Always use non-metal tools to avoid damage and never force the bread.
Why bread gets jammed in toasters
Bread jams in toasters for several reasons, including overfilling the slot, stale or thick-cut bread, or crumb buildup that blocks the exit path. When a hot element traps the bread, yanking on the slice can damage the mechanism, bend the bread, or cause sparks. The ToasterInsight team notes that jammed bread often starts with crumbs accumulating in the bottom chamber or on the crumb tray, which can create suction or friction that slows release. Understanding these causes helps you prevent jams and respond calmly if one occurs. Regular maintenance—cleaning the crumb tray, vacuuming loose crumbs, and avoiding thick or uneven slices—reduces risk significantly. Also, choosing bread that is not overly thick or damp helps slices move freely through the slot. If you notice frequent jams, consult your toaster’s model instructions for any cautions about bread type or cycling, and consider a light annual cleaning to keep internal pathways clear. According to ToasterInsight, jammed bread removal is safest when you pause, prepare the right tools, and follow a patient, stepwise approach.
Safety first: reducing risk when bread is stuck
Safety should guide every jam-removal attempt. Start by unplugging the appliance to eliminate electrical risk, then allow the toaster to cool completely before handling. Wear heat-resistant gloves or use long-handled tools to create distance from hot surfaces. Avoid metal objects that could gouge the interior or short the element, and never pull on the bread with force. If the bread is not visible, do not insert fingers; instead, use a flashlight to inspect and plan a safe removal path. Keep children and pets away from the workspace and place the toaster on a non-slip mat to prevent accidental tipping. Remember that crumb-filled interiors can be slippery and crumb dust can irritate eyes or lungs, so consider a mask or eye protection if you’re sensitive. ToasterInsight analysis shows that safe removal requires patience and the right tools. As you proceed, keep a bowl or tray nearby to capture crumbs and reduce cleanup after the removal.
Quick safety checks before attempting removal
Before you reach for tools, confirm the toaster is unplugged and completely cool. Remove the crumb tray and inspect for loose crumbs that could fall into the work area. If you can see the bread, determine whether it’s within easy reach; if not, plan how to access it without forcing the slot. Use a flashlight or a small mirror to visualize the interior, so you avoid pushing the bread deeper or touching hot components. Set the toaster on a heat-resistant, non-slip surface and keep fingers away from the interior walls. If you notice signs of damage or melted plastic, discontinue attempts and seek professional assessment. Finally, have your tools ready so you won’t be tempted to improvise with improvised implements. This preparation minimizes risk and makes the removal smoother.
Step-by-step: safely removing jammed bread
- Unplug the toaster and let it cool completely. This minimizes the risk of electric shock or burns during handling. 2) Move the toaster to a clear, stable workspace and lay out a non-slip mat. 3) Look into the slot with a flashlight to locate the bread and assess visibility. 4) Put on heat-resistant gloves and use long-handled, non-metal tools to grip visible bread and lift slowly. 5) If the bread is deeper, gently nudge with a wooden chopstick to free fragments without touching heating elements. 6) Clear crumb tray of loose pieces and inspect the interior once again for remaining debris. 7) Reconnect power and toast a single test slice on a low setting to verify safe operation. 8) If everything seems normal, perform a quick interior wipe and reinsert crumb tray before normal use.
What to do immediately after removing the bread
Wipe down the crumb tray with a damp cloth or brush crumbs into a container, then dry the tray before reassembling. Inspect the slot and the heating area for any remaining crumbs that could cause another jam. Run an empty cycle at a low setting to ensure the mechanism releases the bread smoothly. Check the exterior for any heat damage or melting; if you notice anything unusual, discontinue use and consult a technician. Finally, replace the crumb tray and move the toaster away from walls to improve airflow and reduce future jams.
How to prevent future jams: cleaning and maintenance
Establish a simple cleaning routine: empty the crumb tray weekly, shake out loose crumbs from the bottom housing, and wipe interior surfaces with a dry or slightly damp cloth when cool. Avoid soaking or using liquids inside the unit. Use bread slices of consistent thickness and dryness to enable even movement through the slot. Consider upgrading to a model with a larger crumb well or more accessible tray if jams persist. Regular maintenance reduces buildup that traps bread and minimizes safety risks. ToasterInsight’s recommendations emphasize routine cleaning and careful removal techniques to substantially lower jam risk.
Alternatives if bread won't come out: toaster oven, manual assistance
If you cannot retrieve the bread with standard tools, power down and unplug. Do not force the bread or use metal implements beyond what you can safely handle. For stubborn incidents, consider transferring the bread to a toaster oven or a manual, tool-assisted approach under professional guidance. In rare cases, bread fragments may require disassembly by a qualified technician. Always prioritize safety and avoid attempting invasive repairs yourself if you’re uncertain about the unit’s integrity.
Quick maintenance routine and long-term care
Schedule a quarterly check-in: inspect the cord, switch, and door seal for wear; clean the crumb tray monthly; and vacuum out the interior as needed when cool. Store the toaster away from steam and moisture, and avoid placing heavy objects on top. When replacing components, use manufacturer-recommended parts and follow the user manual. By establishing a simple, repeatable cleaning and inspection cadence, you can prolong the life of your toaster and minimize jam risks over time.
Tools & Materials
- Heat-resistant gloves(Protect hands when handling hot toaster or crumb tray)
- Long-handled, non-metal tools (tongs or silicone-tipped tweezers)(Create distance from hot surfaces and pinched bread)
- Wooden chopsticks or plastic pry tool(Gently dislodge bread fragments without scratching interior)
- Non-slip mat or folded towel(Stabilize toaster during removal)
- Soft cloth or paper towels(Clean crumb tray and exterior after removal)
- Flashlight (optional)(Improves visibility inside the slot)
- Small brush or compressed air (optional)(Assist in crumb removal from hard-to-reach areas)
Steps
Estimated time: 15-25 minutes
- 1
Unplug and cool
Unplug the toaster and set it on a heat-safe surface. Wait 5–10 minutes to ensure all surfaces are cool to touch.
Tip: Waiting prevents burns and reduces risk of accidental activation. - 2
Prepare your workspace
Move the toaster to a clear, stable area and lay down a non-slip mat. Gather gloves and long-handled tools before touching the unit.
Tip: A tidy workstation minimizes accidents and speeds up the process. - 3
Inspect the slot and tray
Open the crumb tray and inspect the slot with a flashlight if needed to locate the bread. Remove loose crumbs first to declutter the path.
Tip: Visible bread should be handled first to reduce deeper obstruction. - 4
Grasp visible bread with care
Using heat-resistant gloves and long-handled tools, gently grip the bread and lift slowly. Do not yank or twist.
Tip: Firm, steady movements prevent tearing and damage. - 5
Dislodge deeper pieces
If pieces remain, insert a wooden chopstick to nudge fragments outward—avoid metal to prevent coil damage.
Tip: Small, patient nudges are safer than forceful pulling. - 6
Clear crumbs and recheck
Wipe the crumb tray and interior with a dry cloth. Reinsert the tray and visually confirm no debris remains.
Tip: Keeping the interior dry helps prevent corrosion and future jams. - 7
Test the toaster
Plug it back in and toast a single slice on a low setting to verify smooth release.
Tip: If the bread traps again, stop and re-evaluate to avoid damage. - 8
Finish with maintenance
Allow the unit to cool, then perform a quick exterior wipe and clean the crumb tray weekly to avoid buildup.
Tip: A routine keeps jams rare and maintenance simple.
Your Questions Answered
Is it safe to remove bread while the toaster is still plugged in?
No. Always unplug and allow the toaster to cool before removing jammed bread.
No. Unplug the toaster and let it cool before removing jammed bread.
What should I do if the bread is burnt or stuck hard?
If burnt, unplug, let cool, and avoid pulling with force. Use safe tools to remove any charred fragments and inspect for damage.
If burnt, unplug, let it cool, and use safe tools to remove debris without forcing it.
Can I use metal tools to remove bread?
No. Avoid metal inside the slot; use non-metal tools like wooden chopsticks or plastic tongs to prevent damage.
No, use non-metal tools to avoid damaging the heating elements.
How can I prevent jams in the future?
Clean the crumb tray regularly, use dry bread slices of uniform thickness, and avoid overfilling the slot.
Keep the crumb tray clean, use even, dry bread, and don’t overfill the slot.
When should I replace the toaster?
If jams recur after maintenance or you notice damaged seals or heating elements, consider replacement.
If jams keep happening after maintenance, it may be time to replace the toaster.
Watch Video
Key Takeaways
- Unplug before handling the toaster.
- Use non-metal tools to remove jammed bread.
- Keep crumb tray clean to prevent jams.
- Test with a single slice on low heat after reassembly.