How to Stop a Toaster Safely: A Practical Guide
Learn safe steps to stop a toaster quickly, unplug, clean, and prevent overheating. This comprehensive guide from ToasterInsight covers maintenance, safety checks, and professional care when needed.

By following these clear steps, you’ll learn how to stop a toaster safely and effectively, reducing fire risk and preventing damage. This guide covers unplugging, cooling, cleaning, and routine maintenance to keep your toaster operating smoothly. Whether you’re dealing with a stuck crumb, overheating, or general safety checks, you’ll have a practical method for every situation.
Why Toaster Safety Matters
Toasters are convenient kitchen workhorses, but they carry inherent risks if misused or neglected. A simple crumb buildup, a frayed cord, or a stuck lever can escalate into smoke or fire in seconds. The goal of this guide is not just to stop a toaster in the moment but to implement habits that minimize risk over time. According to ToasterInsight, routine cleaning and mindful power handling dramatically reduce the chances of crumb fires and electrical faults. By understanding the core concept of how to stop a toaster, homeowners gain a practical framework for safe operation, quick response, and longer-lasting appliances. This isn’t about fear; it’s about predictable, repeatable practices that protect your family and your kitchen. As you read, you’ll see how small, consistent actions add up to real safety benefits. The ToasterInsight team found that simple checks—unplugging before cleaning, drying thoroughly, and avoiding water near the controls—make a meaningful difference in everyday use. The aim is clarity: stop hazards at the source and keep your toaster ready for reliable, delicious toast.
What It Means to Stop a Toaster
Stopping a toaster safely means more than turning the power off. It means reducing immediate hazards (burns, electric shock, and fire) while preserving the appliance’s longevity. In practical terms, you unplug the unit, allow it to cool completely, and perform a targeted check for crumbs, damage, or moisture that could reignite problems. When we say how to stop a toaster, we’re talking about a process that prioritizes timing, physical space, and proper cleaning. A safe stop also involves understanding the device’s design—coils, thermostats, and crumb trays—and knowing which steps will prevent reoccurrence. Remember that the goal is not to hurry but to do each action correctly and safely, especially if you’ve just encountered excessive heat, smoke, or a strange smell. This approach aligns with ToasterInsight’s best practices for responsible home appliance care.
Immediate Steps You Can Take When a Toaster Overheats
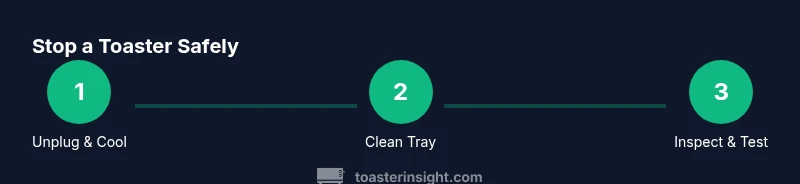
Overheating can occur due to crumb buildup, a faulty thermostat, or obstructed airways around the heating elements. The fastest, safest way to stop a dangerous event is to unplug the toaster immediately and move the unit away from the counter edge. After it cools, inspect the crumb tray and interior for blocks or melted debris. Do not resume use until you’ve confirmed there’s no odor, smoke, or unusual heat. If you notice damage to the cord or plug, or if the unit continues to overheat after cleaning, discontinue use and seek professional assistance. This sequence—unplug, cool, inspect, and decide on repair or replacement—embodies the core technique behind learning how to stop a toaster safely.
Safe Handling: Unplugging, Cooling, and Cleaning First Aid
Power-off safety is the first line of defense. Unplug the toaster before handling any components. Allow a full cooldown period—ideally 10–15 minutes—so metal parts and wiring are safe to touch. Remove the crumb tray and shake out loose debris into a trash receptacle. Use a soft brush to dislodge crumbs from hard-to-reach areas, then wipe with a lightly damp cloth. If there is sticky residue, a small amount of dish soap on the cloth is acceptable, followed by thorough drying. Never immerse the unit or pour water directly into vents. Drying is essential because residual moisture can cause short circuits or electric shock when you power up again. This careful sequence reduces risk and paves the way for safe re-use or repair decisions.
Preventive Techniques to Avoid Overheating
Preventing overheating starts with routine maintenance and sensible use. Empty crumb trays after each use and perform a deeper clean weekly if you toast frequently. Ensure vents remain unobstructed; keep the toaster away from heat sources and water splashes. Use lower toast settings until you’re confident the device performs consistently, then gradually experiment with higher settings as needed. Regular inspections for cord wear, plug damage, and loose screws on the housing can reveal issues before they escalate. Proper ventilation around the appliance matters; a cluttered countertop can trap heat and hinder airflow. Implementing these preventive measures supports longer life and steadier performance, aligning with the practical approach ToasterInsight recommends for mindful kitchen care.
Maintenance Routine: Regular Care That Extends Lifespan
A simple routine can dramatically extend a toaster’s life. Set a recurring schedule to: (1) unplug and cool before any cleaning, (2) remove and clean the crumb tray weekly, (3) wipe exterior with a damp cloth and mild soap if needed, (4) inspect the power cord for fraying and the plug for discoloration, and (5) store the appliance in a dry, stable location away from water. Documenting each cleaning session helps you notice gradual changes—like increasing crumb buildup or weakened switches—so you can act before a failure occurs. If you rely on automation or a busy kitchen, a checklist on the fridge can serve as a constant reminder. Consistency matters just as much as method, and a steady routine reduces the chance of emergencies that require a factory repair or early replacement.
Troubleshooting Common Scenarios
Being prepared for typical problems makes it easier to stop a toaster safely without panic. If bread gets jammed, switch off and unplug, then gently nudge the lever and remove the item using a non-metal tool, avoiding force that could bend internal components. If you notice uneven toasting or smells like burnt insulation, stop using the unit and recheck for debris around the coils. For tripping breakers or visible damage, unplug and consult a professional. A frequently observed scenario is crumb accumulation in the crumb tray and interior, which impedes airflow and may cause overheating. Regular cleaning and careful use reduce these issues and keep your toaster functioning reliably. ToasterInsight emphasizes careful observation, timely cleaning, and slow, deliberate action when problems arise, rather than rushing through a fix.
When to Seek Professional Help
Not every toaster problem is a DIY fix. If the appliance produces smoke, emits sparks, or takes unusually long to heat or cool, discontinue use and seek service. A professional technician can diagnose thermostat or wiring issues, test safety switches, and determine whether a replacement is more cost-effective than repair. Warranties and service plans may cover certain failures, so check the user manual or manufacturer site for guidance. If you rely on a high-usage toaster for special occasions, professional inspection at planned intervals can prevent sudden outages and extend appliance life. Remember that electrical repairs require appropriate safety procedures and tools; never attempt internal fixes while the device is powered or unplugged. The decision to repair versus replace should balance safety, cost, and long-term value.
Choosing a Safer Toaster: Features for Peace of Mind
Modern toasters offer features designed to reduce risk and improve reliability. Look for high-quality thermostats with automatic shut-off, thermal fuses, and heat-resistant exteriors that stay cooler to the touch. Crumb tray seals and easy-to-clean interiors minimize the buildup that leads to overheating. Non-slip feet and robust power cords reduce the risk of accidental unplugging or tipping during operation. If you regularly cook multiple items, a wider slot or a model with independent side controls can help manage heat more evenly. Reading reviews and comparing safety certifications can guide a smarter purchase. The takeaway is clear: prioritize safety-conscious design, regular maintenance, and accessible service options to keep your kitchen both efficient and safe.
Tools & Materials
- Screwdriver set (Phillips and flathead)(Varied sizes; 1 small set suffices for most models)
- Heat-resistant gloves(Protect hands when handling hot components)
- Soft cloth or sponge(Non-abrasive; for cleaning exterior and tray)
- Isopropyl alcohol (70%+)(For sticky residue cleanup; avoid pouring into electronics)
- Dish soap and warm water(Gentle cleaner for crumb tray and exterior)
- Soft brush(Reach into crevices without scratching surfaces)
- Owner's manual(Model-specific guidance)
Steps
Estimated time: 60-90 minutes
- 1
Power off and unplug the toaster
Before touching any parts, switch off and unplug the unit to remove all electrical risk. If the cord is hot, allow it to cool briefly before handling.
Tip: Wearing heat-resistant gloves can prevent burns during this step - 2
Let it cool completely
Wait until the exterior and interior are at room temperature. A hot toaster can cause steam burns and damage to cleaning tools.
Tip: Observe a minimum 10-minute cooling window to be safe - 3
Remove crumb tray and shake out crumbs
Carefully slide out the crumb tray and empty crumbs into a trash bin. Wipe the tray with a damp cloth and dry before reinstallation.
Tip: Do this over a sink or trash can to avoid mess - 4
Inspect interior for debris or melted bits
Open access panels if your model allows and look for burnt bits. Remove any foreign material with a dry brush.
Tip: Avoid using metal tools that could damage coils - 5
Clean exterior and interior surfaces lightly
Wipe exterior with a damp cloth and a small amount of dish soap if needed. Do not soak or immerse the unit in water.
Tip: Keep liquids away from control knobs and power inlet - 6
Check power cord and plug for damage
Inspect for cuts, kinks, or exposed wires. If you see damage, stop using the toaster and seek repair.
Tip: Damaged cords are a fire risk and should be replaced - 7
Reconnect and perform a low-temperature test
Plug the toaster back in and run a low-toast test without food to verify safe operation. Listen for unusual noises or smells.
Tip: If you hear buzzing or see sparking, unplug immediately - 8
Evaluate recurring overheating or jams
If overheating or jams keep returning, the unit may need professional service or replacement.
Tip: Do not continue to use a malfunctioning toaster - 9
Document routine maintenance
Keep a simple log of cleanings and checks to catch trends over time and prevent future issues.
Tip: Set a quarterly reminder to clean and inspect
Your Questions Answered
Is it safe to use a toaster after it overheats?
If a toaster overheats, unplug it, let it cool completely, and inspect for damage. Do not use until you’ve identified the cause and ensured it’s safe. If in doubt, seek professional assessment.
If a toaster overheats, unplug it and let it cool, then check for damage before using again.
What causes a toaster to overheat?
Common causes include built-up crumbs blocking airflow, a malfunctioning thermostat, or a jammed lever. Regular cleaning and avoiding obstructed vents help prevent overheating.
Crumbs blocking airflow and faulty thermostats are common overheating causes.
Can I fix a toaster myself?
Some exterior cleaning and basic checks are safe for homeowners. Internal component repair requires expertise and can be dangerous; if unsure, contact a qualified technician.
Simple cleaning is okay, but interior repairs should be left to professionals.
Should I replace the crumb tray or the whole toaster?
If the crumb tray is damaged or warped, replacing it is practical. If the heating elements or wiring show damage, consider replacing the whole unit.
Tray replacement is fine if it’s bent or warped; major damage means a new toaster.
How often should I clean a toaster?
Aim for a light clean every few uses and a deep clean monthly or when you notice buildup. Regular maintenance helps prevent issues.
Clean crumbs weekly to keep things safe and working.
What is the best practice to prevent fires?
Keep the area around the toaster clear, clean crumb trays, and never leave it unattended while in use. Unplug when not in use.
Clear the area and unplug when not using it.
Watch Video
Key Takeaways
- Unplug and cool before any maintenance
- Clean crumbs regularly to reduce fire risk
- Inspect cords and plug for damage
- Follow a routine maintenance schedule