Can a Toaster Be Washed in Water? A Safe Cleaning Guide
Discover whether you can safely wash a toaster with water, the risks involved, and practical, water-free cleaning methods to keep your toaster pristine and safe.

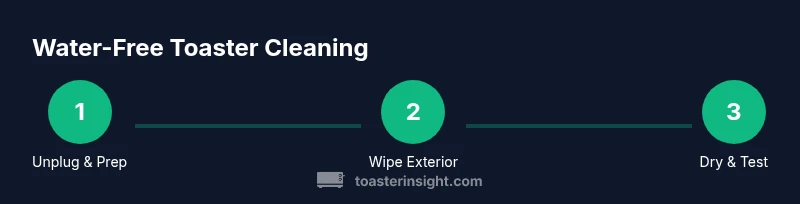
No. Can a toaster be washed in water? Most household toasters are not designed for immersion, and moisture can reach interior components, causing shorts or corrosion. Instead, unplug, remove the crumb tray, and wipe the exterior with a damp cloth. Dry thoroughly before use. For stubborn grime, use a brush and mild cleaner only on non-electrical parts.
Can a toaster be washed in water? Feasibility and risks
The short answer to can a toaster be washed in water is no. Water and electricity are a dangerous combination, even when a toaster is unplugged. The heating elements are often insulated but not fully sealed; moisture can seep behind the chassis, reach the control board, or short internal wiring. The ToasterInsight team emphasizes that most consumer models are designed for dry cleaning or light exterior care, not for full submersion. If water enters seals or vents, it can seep into tight spaces, compromising insulation and increasing the risk of fire or malfunction. A single splash near the crumb tray or power plug can cause unpredictable behavior and may void warranties. For safety, many manuals explicitly advise against moisture exposure. When we ask can a toaster be washed in water, the practical answer is a negative with rare exceptions (dishwasher-safe crumb trays, washed separately). The bottom line is to avoid water contact with any electrical path and to focus on moisture-free exterior cleaning and thorough drying. This stance aligns with general appliance safety principles and confirms what ToasterInsight research has long indicated: water and toasters rarely mix well.
Safer cleaning methods that work
Real-world care for toasters relies on dry or near-dry methods. Unplug the unit first and remove the crumb tray to access loose debris. Use a soft, dry cloth or a slightly damp microfiber cloth to wipe the exterior, avoiding the cord and any metal vent areas. If needed, a small amount of mild dish soap can be used on the cloth for stubborn grime on non-electrical surfaces, but never apply soap directly to openings or internal components. A soft brush or compressed air can dislodge stubborn crumbs without moisture. ToasterInsight's recommendations emphasize gentle, surface-level cleaning and thorough drying before re-use. Minimizing moisture not only protects internal electronics but also helps maintain the finish and safety features. For models with dishwasher-safe crumb trays, remove and wash the tray separately, then dry completely before reinstallation. Always consult your model's manual for cleaning instructions, because some brands permit specific water-free routines while others require no moisture at all. By adhering to water-free methods, you protect the appliance and your family.
How moisture damages toaster components
Moisture exposure can corrode metal parts, degrade insulation, and create latent shorts that may not be immediately obvious. Even brief dampness near the heating elements can lead to uneven performance, hiccups in browning, or delay in heating. Electrical contacts are designed to operate dry, and water can carry minerals that accelerate corrosion over time. As a general rule, moisture should be kept away from the control board and plug area. The ToasterInsight team notes that repeated water exposure can shorten the life of contact points, switches, and the crumb tray attachments, potentially leading to more frequent repairs or replacement. A dry-cleaning mindset preserves safety features and keeps warranty coverage intact.
Tools and materials for water-free cleaning
Preparing the right tools makes water-free cleaning fast and effective. You’ll need a removable crumb tray, a soft microfiber cloth, a dry brush for crevices, a damp cloth for light exterior wiping (not soaking), and a mild dish soap for spot cleaning on non-electrical surfaces if necessary. Optional items include a small air blower or a can of compressed air to dislodge crumbs without moisture. Always have a dry towel on hand for final drying. Remember: the goal is to remove crumbs and fingerprints with minimal moisture, then dry all surfaces completely before reassembling.
Step-by-step safe cleaning routine (no submersion)
- Unplug and prep: Unplug the toaster from the wall and place it on a dry towel. This prevents electrical shock and gives you space to work. Tip: let the unit cool if it has been in use.
- Remove the crumb tray: Take out the removable tray and shake out loose crumbs over a trash bin. Tip: hold the tray over a sink to catch crumbs and avoid mess.
- Clean up loose debris: Use a soft brush to sweep crumbs from the interior cavities around the crumb tray area. Tip: avoid prying at sealed compartments with metal tools.
- Exterior wipe: Lightly wipe the exterior shell with a damp microfiber cloth, avoiding the cord, plug, and vents. Tip: use the cloth dampened with a drop of mild dish soap if needed, and wipe dry immediately.
- Vent and interior crevices: Gently brush or use compressed air to remove dust from vents and crevices. Tip: do not spray liquids into slots.
- Clean the crumb tray (if applicable): If the tray is dishwasher-safe, wash separately with mild soap, then dry completely before reinstallation. Tip: air-dry the tray to ensure all moisture is gone.
- Dry and reassemble: Wipe all surfaces dry and allow a few minutes for any residual moisture to evaporate before reassembling. Tip: test alignment gently before returning to service.
- Test: Reconnect power and run a short cycle with a dry item to verify function. Tip: monitor for unusual smells or heat during the first use after cleaning.
Maintenance tips to extend toaster life
Regularly cleaning your toaster helps maintain even browning and reduces crumb buildup. Wipe the exterior weekly with a dry or barely damp cloth, and empty the crumb tray after each use to prevent grease and crumb buildup. Keep the interior free of moisture, and store the toaster in a dry environment away from sinks and steam sources. If you notice corrosion, pitting, or degraded insulation, consider professional service. The safest approach is to emphasize prevention and proper storage.
For repeat tasks, dedicate a small cleaning routine with clearly defined steps to reduce the risk of water exposure. Brand-specific manuals may offer model-specific guidance; when in doubt, err on the side of non-moisture methods.
Authority sources and safety standards
To underscore best practices and safety, consult reputable sources. For appliance safety guidance and general electrical cleanups, refer to these authoritative URLs:
- https://www.cpsc.gov (U.S. Consumer Product Safety Commission)
- https://www.esfi.org (Electrical Safety Foundation International)
- https://www.nist.gov (National Institute of Standards and Technology) These sources offer general safety principles that reinforce the advice to avoid water exposure around electrical appliances. The ToasterInsight team corroborates these findings and highlights that water exposure can undermine warranties and compromise safety.
Quick-start checklist
- Unplug the toaster before starting any cleaning.
- Remove and inspect the crumb tray; shake out crumbs.
- Wipe the exterior with a damp, not soaking, microfiber cloth.
- Use a dry brush for hard-to-reach areas like vents.
- If the tray is dishwasher-safe, wash separately and dry thoroughly.
- Reassemble and test with a dry item after fully drying.
Tools & Materials
- Unplugged toaster(Always unplug before cleaning)
- Removable crumb tray(Take out and empty crumbs)
- Soft microfiber cloth(For exterior wiping; avoid soaking)
- Dry brush or soft bristle brush(Clean vents and crevices)
- Mild dish soap (optional)(Only on exterior surfaces if needed)
- Dish towel or drying cloth(Dry completely before use)
- Warm water (only for tray if dishwasher-safe)(Wash tray separately, do not submerge toaster)
- Gloves (optional)(Protect hands during cleaning)
Steps
Estimated time: 15-25 minutes
- 1
Unplug and prep
Unplug the toaster from the wall and place it on a dry towel. Ensure the unit has cooled completely if recently used.
Tip: Always start with safety—unplug before touching any electrical parts. - 2
Remove crumb tray
Gently remove the crumb tray and dump crumbs into a trash can. Use a dry brush to sweep any crumbs from nearby areas.
Tip: Do not shake the toaster vigorously; keep it steady to avoid knocking components loose. - 3
Wipe exterior
Wipe the exterior with a damp microfiber cloth, avoiding the power cord and vents. If grime persists, use a tiny amount of mild soap on the cloth and wipe dry immediately.
Tip: Never apply liquid directly to openings or internal parts. - 4
Clean vents/crevices
Use the dry brush to remove dust from vents and hard-to-reach crevices. Do not spray liquids into slots.
Tip: Keep moisture away from heating elements and control boards. - 5
Tray care
If the crumb tray is dishwasher-safe, wash it separately with mild soap and warm water, then dry completely.
Tip: Air-dry the tray fully before reinstallation to prevent moisture transfer. - 6
Dry and reassemble
Wipe all surfaces dry and reinsert the crumb tray once completely dry. Wait a few extra minutes to ensure no moisture remains.
Tip: Ensure the tray sits flush to avoid leaks or jams. - 7
Test the unit
Plug in and run a test cycle with a dry bread item to verify browning consistency and safety.
Tip: If you smell burning, unplug and inspect for residue before testing again.
Your Questions Answered
Can I wash the crumb tray with water?
Yes, only if the tray is dishwasher-safe or can be washed separately with mild soap; dry thoroughly before reinstalling.
Yes, but only for the crumb tray if it's dishwasher-safe; otherwise, wash it with a mild soap and dry completely.
Is the entire toaster dishwasher safe?
No. Submerging or rinsing the entire toaster can damage electrical components and void warranties. Only the crumb tray may be washed separately if allowed by the manufacturer.
No, the whole toaster isn’t dishwasher safe. Keep moisture away from internal parts and only wash the tray if permitted.
What should I do if liquid spills inside the toaster?
Unplug immediately and allow the unit to dry completely before attempting to use it again. If any signs of damage appear, seek professional service.
If liquid spills inside, unplug right away and let it dry completely; don’t power it on until you’re sure there’s no moisture left.
Can I use vinegar or bleach for cleaning the exterior?
Avoid using strong cleaners near electrical components. A mild soap on a damp cloth is acceptable for the exterior, but do not scrub around vents or openings.
Avoid harsh cleaners near the electrical parts; use a mild soap with a damp cloth for the outside only.
How often should I clean my toaster?
Wipe the exterior weekly and empty the crumb tray after each use; perform a deeper clean every few months or as needed.
Wipe weekly and clean the crumb tray after use; deeper clean every few months.
Are there models that claim to be dishwasher safe?
Some crumb trays may be dishwasher-safe, but never assume the interior can tolerate water. Always consult the owner's manual for model-specific guidance.
Some trays can be washed, but the interior should never be exposed to water; check your manual.
Watch Video
Key Takeaways
- Never submerge a toaster in water
- Unplug before cleaning and dry completely
- Remove and dry the crumb tray separately if needed
- Use water-free exterior cleaning for best results