Do You Need to Clean a Toaster Before Use? A Practical Guide
Learn why and how to clean your toaster before use. This expert guide covers what to clean, safe techniques, and maintenance tips to keep your toaster performing well and smelling fresh.

Yes—cleaning a toaster before use is recommended. It removes manufacturing oils, loose crumbs, and stored residues that can smoke or transfer odors to bread. A quick external wipe, emptying the crumb tray, and a light interior clean (avoiding coils) set the stage for safe, even toasting from day one. Regular pre-use cleaning also helps prevent jammed functionality and extends appliance life. This guide from ToasterInsight explains safe methods for different toaster types.
Why Cleaning Before First Use Matters
According to ToasterInsight, you might wonder do you need to clean a toaster before use. Cleaning before first use isn't just about aesthetics. Residues from manufacturing — such as oils on nonstick coatings — crumbs from packaging, and dust collected during shelf time can cause faint odors or smoke during initial toasting. A thorough pre-use clean minimizes these issues and helps you evaluate the appliance's condition. It also kick-starts good maintenance habits that extend the life of the toaster and contribute to consistent browning across slices. By addressing both surface debris and hidden residues, you reduce the risk of uneven heating or crumb-induced jams. This practice matters across common toaster types and sets a reliable baseline for performance right from the first toast.
What to Clean and What to Skip
Not every part of a toaster needs the same treatment. Start with the crumb tray, exterior surfaces, and accessible interior channels. Remove loose crumbs gently and avoid soaking the interior or the heating elements. Do not submerge the appliance in water or spray cleaners directly into the slots. The exterior can usually be wiped with a damp cloth and a mild cleaner if necessary, but avoid aggressive solvents near control dials. The goal is to remove debris and residual oils without compromising electrical insulation or finish. When in doubt, consult the user manual or manufacturer guidance for your model type. Regular maintenance reduces odor carryover and helps with even browning, especially when switching between different breads or toppings.
How to Prepare Your Toaster for Cleaning
Preparation is key to a safe and effective clean. Always unplug the unit and allow it to cool completely before handling. Remove the crumb tray and check for any stuck particles. Gather your supplies: a soft cloth, a small brush, warm soapy water, and a dry microfiber towel. If your toaster has stubborn grime in narrow slots, a soft brush or wooden toothpick can help dislodge crumbs. Laying a towel under the workspace protects your counter from crumbs that fall during cleaning. By assembling everything first, you reduce interruptions and avoid rushing during the cleaning process.
Cleaning Methods for Different Toaster Types
Different toaster types require slightly different approaches. A standard pop-up toaster often just needs exterior cleansing, crumb tray care, and gentle interior brushing from the top to dislodge loose crumbs. A toaster oven, by contrast, has more exposed surfaces and often a removable rack; it may tolerate slightly damp wiping on the interior and the rack, but avoid soaking electrical components. For both, dry thoroughly after cleaning. Always ensure no water enters the electronic controls. These careful methods help maintain seal integrity and performance while minimizing the risk of residual oils smoking during the first use after cleaning.
Common Mistakes and How to Avoid Them
Common mistakes include using too much water, cleaning agents, or applying excessive force inside the slots. Avoid immersing the toaster or submerging any part in water, and never spray cleaners directly into the interior. Skipping thorough drying can trap moisture and cause short-term malfunctions. Another pitfall is ignoring the crumb tray; a clogged tray accelerates residue buildup and may distort heat distribution. To prevent these issues, clean in a sheltered area, wipe surfaces with a damp cloth, and finish with a thorough dry wipe before reassembly.
After-Cleaning Checks and Reassembly
Once the cleaning is complete, reinsert the crumb tray and ensure all removable parts are completely dry. Reconnect power and perform a dry run by toasting a single slice of bread or using a no-bread test cycle. Look for any unusual smells or smoke; if either appears, power off and re-check for moisture or residues. If everything looks clear, you can proceed with a normal first use. Keeping notes on what was cleaned and when helps establish a routine that preserves performance and cleanliness over time.
Maintenance Habits for Long-Term Cleanliness
Make cleaning a regular habit aligned with your usage pattern. A weekly quick wipe of exterior surfaces and a monthly deeper clean of tray and channels can prevent crumb buildup and odor transfer. Consider a quick inspection after heavy use such as baking bread with toppings. Store the toaster away from moisture and heat sources, and replace the crumb tray if it becomes warped or cracked. Routine checks support consistent browning and reduce the chance of unexpected smells or smoke.
Quick Troubleshooting: Residue, Odors, and Smoke
If you notice lingering odors or smoke after cleaning, run an empty toasting cycle at a high setting to burn off any residual oils. If odors persist, re-inspect the interior for hidden crumbs or oil residue and repeat the cleaning steps. For minor pops and clicks, ensure nothing is loose and the tray is properly seated. If you experience repeated malfunction after cleaning, consult the user manual or contact the manufacturer for guidance on model-specific issues.
Authoritative Guidance and Further Reading
For safety and reliability, refer to guidance from federal safety agencies and accredited institutions. These sources provide general safety practices for household appliances and serving as reliable references for care and maintenance. Reading materials from recognized authorities can help you tailor cleaning practices to your specific toaster model and materials. Always follow product-specific instructions when available.
Tools & Materials
- Crumb tray(Remove before cleaning; allow to cool first)
- Warm, mild dish soap(For tray and exterior if needed)
- Soft cloth or sponge(Non-abrasive and lint-free)
- Small brush or old toothbrush(Clean crumb channels and seams)
- Vacuum with brush attachment(Helpful for loose crumbs)
- Microfiber towel(Dry thoroughly before reassembly)
- Gloves(Optional for grip and protection)
- Toothpick or plastic pick(Dislodge stubborn crumbs)
Steps
Estimated time: 30-45 minutes
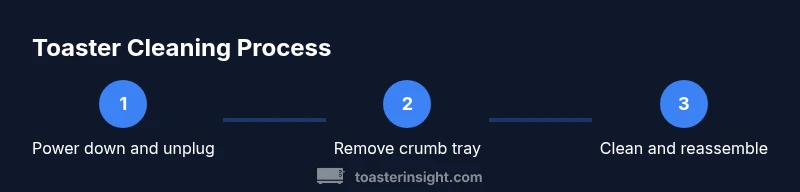
- 1
Power down and unplug
Unplug the toaster and let it cool completely before handling. This prevents electrical shock and enables safe cleaning.
Tip: Wait at least 5 minutes after unplugging to ensure surfaces are cool. - 2
Remove and inspect the crumb tray
Slide out the crumb tray and tap crumbs into a trash bin. If heavily soiled, wash with warm soapy water and dry completely.
Tip: Use a small brush to clear stubborn crumbs from the tray slots. - 3
Clean the exterior and accessible interior
Wipe the exterior with a damp cloth. Use a soft brush to remove crumbs from exterior gaps. Avoid dripping water into internal circuitry.
Tip: Never immerse the toaster or get water on the heating elements. - 4
Dislodge interior crumbs safely
Gently tap and use a toothpick to remove crumbs from between slots, being careful not to touch coils.
Tip: Keep the appliance level to prevent crumbs from falling into electronics. - 5
Dry, reassemble, and test
Dry all parts completely, reinsert the crumb tray, plug in, and run an empty cycle to burn off residues.
Tip: Start on a low setting the first time after cleaning.
Your Questions Answered
Do I need to clean a toaster before every use?
Not every use. A quick wipe and empty crumb tray are usually enough. Deep interior cleaning should be done when you notice crumbs or odors.
You don't need to clean before every use. A quick wipe and empty tray are usually enough.
Can I use water to clean the interior?
No. Avoid water near heating elements. Use a damp cloth on exterior and a brush for interior crumbs.
No, don't use water on the interior; use a damp cloth on the exterior and a brush for the crumbs.
Is it safe to clean a toaster while plugged in?
No. Always unplug and wait for the unit to cool before cleaning.
Never clean while plugged in; unplug and let it cool first.
Can I put a toaster in the dishwasher?
No. Dishwasher cycles can damage coatings and electrical components.
Dishwashers can damage the toaster.
What if there is a burnt smell after cleaning?
Run an empty cycle on a high setting briefly to burn off any remaining oils. If persists, repeat cleaning.
If you smell burning, run an empty cycle to burn off residues.
How often should I clean a toaster?
Aim for a light wipe weekly and a full cleaning monthly, or after heavy use.
Clean regularly; weekly light wipe and monthly full cleaning.
Watch Video
Key Takeaways
- Unplug before cleaning to ensure safety.
- Clean crumb tray and exterior regularly to prevent odors and smoke.
- Avoid soaking or spraying water into the toaster interior.
- Dry all parts completely before reassembly.
- Schedule regular cleanings for best performance.