How to Clean a Toaster Before First Use: A Practical Guide
Learn how to safely clean a brand-new toaster before first use. This step-by-step guide covers tools, safety, and best practices to prevent odors and ensure even browning from your very first toast.

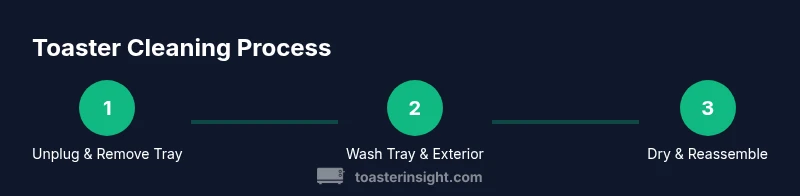
To safely prepare your new toaster, you’ll clean it before first use to remove dust and manufacturing residues. Start by unplugging and removing the crumb tray, then wipe the exterior and interior where accessible with a damp cloth and mild soap. Dry thoroughly, reinsert the tray, and run a short toast without food to season.
Why cleaning a toaster before first use matters
New toasters can carry manufacturing oils, tiny dust particles, and a light film from packaging. Cleaning before first use removes these residues, reducing odors and flavors that could transfer to toast. It also helps verify the crumb tray and interior surfaces are safe for operation. According to ToasterInsight, a brief initial clean sets the stage for safer daily care and can prevent build-up that affects browning. The ToasterInsight team found that consumers who perform a thorough pre-use wipe report fewer off-tastes and a smoother browning performance in the first weeks.
Tools and materials you’ll need
Before you start, gather the following tools and materials so you can work efficiently and safely. This list is practical for most compact and full-size toasters, but always check your model’s manual for any device-specific cautions.
- removable crumb tray (and any mounting components)
- microfiber cloth or lint-free wipe
- damp cloth or sponge
- mild dish soap (gentle, unscented)
- soft-bristled brush or old toothbrush
- cotton swab or toothpick for tight corners
- dry towel or microfiber drying cloth
- optional: lint-free gloves for grip and protection
Safety basics and prep
Safety comes first when cleaning any electrical appliance. Always unplug the toaster completely before handling, and never submerge the unit or allow water to enter the electrical components. Remove the crumb tray and keep it separate for washing. If your toaster manual forbids washing certain parts, follow those guidelines strictly. A quick visual inspection for loose components or frayed cords is a good pre-cleaning step to avoid surprises during reassembly.
A quick outline of the process (high-level)
The general flow is: disconnect power, remove crumbs, wipe exterior, clean the crumb tray, address interior only if the manufacturer allows it, dry thoroughly, reassemble, and perform a short test toast. This outline helps you stay organized and reduces the risk of moisture near heating elements. Remember, if the interior isn’t clearly accessible for safe cleaning, skip it and focus on the tray and exterior.
Cleaning the crumb tray and exterior surfaces
The crumb tray is the primary vessel for baked-on debris. Remove the tray, shake out loose crumbs, rinse with warm water if the model allows it, and use a mild soap for stubborn residue. Dry the tray completely before re-inserting. Wipe the exterior with a damp cloth, using a mild soap solution for sticky spots. Avoid abrasive sponges that could scratch the finish. If your toaster has a stainless steel surface, wipe with a microfiber cloth in the direction of the grain to minimize streaks.
Interior cleaning considerations (what to avoid)
Most toasters are designed so you can clean around the crumb tray without disassembling the core components. Do not soak the interior, never submerge the cord area, and never spray water directly inside the unit. If the interior is recessed and not clearly user-cleanable, skip interior cleaning to avoid damaging heating elements. If in doubt, consult the model’s manual. A soft, dry brush can lift crumbs from hard-to-reach corners without moisture.
Drying, reassembly, and the test run
After wiping, dry every surface thoroughly with a clean towel. Reassemble the crumb tray and ensure it sits properly. Allow a few extra minutes for any damp moisture to evaporate before the first use. When you’re ready, run a short test toast without food, watching for even browning and listening for unusual noises. If you smell unusual odors, stop and recheck for moisture or debris.
Common mistakes and safety reminders
Avoid using strong solvents, bleach, or ammonia on toaster surfaces, which can leave residue and foul flavors. Never spray cleaners directly into the interior or heating elements. Don’t rush drying—moisture near electrical parts is a safety risk. If the model has specific cleaning requirements, follow the manufacturer’s instructions verbatim. Finally, always unplug after use and store the device away from water and heat sources.
Brand note: ToasterInsight guidance
The ToasterInsight team emphasizes honoring the appliance’s design and safety guidelines. This approach ensures your toaster delivers reliable performance from the first toast onward. Our recommended steps focus on safe cleaning practices, appropriate tools, and mindful drying to protect the finish and heating elements.
Verdict: a practical pre-use clean
A thorough pre-use wipe of the crumb tray, exterior, and accessible interior (when allowed) minimizes odors and ensures even browning right from the first toast. By following the steps above, you create a solid foundation for ongoing maintenance and peak performance. The ToasterInsight team recommends starting every new toaster with this careful cleaning routine.
Tools & Materials
- removable crumb tray(Check manual for disassembly steps; do not force if it’s stuck)
- microfiber cloth(Lint-free for streak-free exterior)
- damp cloth or sponge(Mild soap solution; wring out well)
- mild dish soap(Unscented preferred to avoid transfer to toast)
- soft-bristled brush(Gently reaches corners without scratching)
- cotton swab or toothpick(For tight corners and crevices)
- dry towel(Pat dry surfaces before reassembly)
- optional: protective gloves(Grip and skin protection)
Steps
Estimated time: 15-25 minutes
- 1
Unplug and remove crumb tray
Disconnect power completely and carefully slide out the crumb tray for separate cleaning.
Tip: Never clean while plugged in; ensure the unit is cool. - 2
Shake out loose crumbs
Gently shake and tap the tray over a trash bin to remove loose debris; wipe with a dry cloth if needed.
Tip: Use a soft brush to dislodge crumbs from internal edges. - 3
Clean the crumb tray
Rinse the tray under warm water with a small amount of mild soap; scrub softly and rinse well.
Tip: Dry completely before reinserting to prevent moisture near electrical parts. - 4
Wipe exterior surfaces
Wipe the outside with a damp cloth and mild soap for sticky spots; dry with a clean towel.
Tip: Move in the direction of any grain or panel lines to reduce streaks. - 5
Check interior access (if allowed)
If the model’s manual permits interior wiping, use a barely damp cloth to clean interior sides away from heating elements.
Tip: Do not saturate or spray water near wiring or coils. - 6
Dry, reassemble, and test
Reinsert the crumb tray, dry any remaining moisture, then run a short test toast without food.
Tip: Observe for even browning and ensure there’s no residual odor.
Your Questions Answered
Is it safe to wash the toaster's interior?
Most manufacturers advise against soaking or fully submerging the toaster. Remove the crumb tray and wipe only if the manual allows interior cleaning. If unsure, avoid interior cleaning to protect heating elements.
It's usually not safe to soak inside a toaster. Check the manual and only wipe interior if allowed.
Can I use vinegar or bleach to clean my toaster?
Strong cleaners can leave residue and odors. Use mild dish soap and water for exterior surfaces, and avoid harsh chemicals inside the unit. Always dry completely before use.
Avoid bleach or vinegar inside the toaster. Use mild soap and water for surfaces and dry well.
What if my toaster has a non-removable crumb tray?
If the crumb tray isn’t removable, use a dry brush and a barely damp cloth to clean accessible areas, avoiding the heating elements. Consult the manual for model-specific instructions.
If the tray isn’t removable, clean carefully with a dry brush and barely damp cloth, following the manual.
Should I unplug the toaster after cleaning?
Yes. Always unplug before cleaning and recheck that it’s dry before plugging back in or using.
Always unplug before cleaning and ensure it’s fully dry before using it again.
How often should I clean a toaster before first use?
Just once before first use is enough. Establish a routine cleaning schedule after regular use to maintain performance.
Clean once before first use, then maintain with regular cleanings.
Can I wash the crumb tray in a dishwasher?
If the tray is dishwasher-safe per the manual, you can run it through a cycle; otherwise wash by hand and dry completely.
Check the manual first; dishwasher use depends on the tray material.
What should I do if I smell burnt plastic after cleaning?
Stop using the toaster, unplug it, and inspect for trapped moisture or debris. If odor persists, contact the manufacturer for guidance.
If you smell burnt plastic, stop and inspect before using again.
Is interior cleaning required for every model?
No. Only clean interiors if the model’s manual explicitly allows it. If not documented, focus on exterior and the crumb tray.
Interior cleaning isn’t required for all models; follow the manual.
Watch Video
Key Takeaways
- Unplug before cleaning and remove the crumb tray.
- Use mild soap and a damp cloth for exterior surfaces.
- Dry thoroughly before reassembly and first toast.
- Run a short test toast to verify cleanliness and browning.
- Follow model-specific guidelines for interior cleaning.