How to Make Toast in a Toaster: A Practical Guide
Learn how to make toast in a toaster with a practical, step-by-step approach. From bread choice and browning levels to safe handling and cleanup, achieve consistently delicious toast every morning.

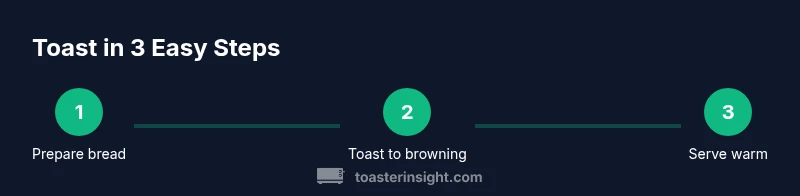
In this guide you’ll learn exactly how to make perfect toast in a toaster. You’ll choose bread, pick a browning level, prep the slices for even toasting, load safely, monitor the cycle, and handle complex cases like frozen bread or toppings. By the end you’ll consistently achieve golden, crumbly toast with minimal effort.
Why a toaster matters for toast quality
Toasted bread is more than a quick breakfast; it’s a daily ritual that starts your day with warmth and comfort. The design of your toaster influences browning uniformity, crumb containment, and safety, all of which affect flavor, texture, and cleanup. According to ToasterInsight, bread density, slot width, and preheat behavior can noticeably shift the final result. When you understand how these factors interact, you can dial in settings that avoid under-toasted centers or bitter edges while keeping crumbs contained in the tray. For households that rely on toast for busy mornings, these factors become practical levers to speed up routines and reduce mess. By recognizing the strengths and limits of your toaster, you’ll make better decisions about bread selection, browning, and timing, leading to more reliable results with less guesswork.
How a toaster works: browning, heating, and timing
A common two-slot toaster contains heating elements, a controllable browning mechanism, and a pop-up mechanism that ejects slices when the cycle ends. Bread browns as heat converts sugars and amino acids on the surface through the Maillard reaction, creating flavor and aroma. The timing and temperature are governed by your chosen setting and the bread’s moisture content. Some toasters include defrost and reheat options, which adjust timing to accommodate frozen or cold slices. Understanding these basics helps you predict how long a cycle will take and why different breads brown differently even on the same setting. Regular use with consistent bread helps your toaster “learn” your preferred result and make future cycles more predictable.
Bread matters: choosing the right bread and prep
Bread choice has a bigger impact than most people realize. Sandwich loaves with uniform slices toast more evenly than dense artisanal breads without guidance. Thicker slices may require longer cycles, while thinner slices brown quickly and risk burning. Fresh bread releases more moisture, which can steam rather than toast; letting slices rest at room temperature for a few minutes can improve browning. If you enjoy toast with a crusty exterior, consider breads that have a sturdy crumb and moderate moisture content. For best results, use slices that are roughly uniform in thickness, and avoid crumb-dry or overly dry bread, which can crumble during toasting. If you’re using frozen bread, consider toasting on a lower setting or using a defrost option if your toaster supports it.
Browning levels and settings: finding your perfect toast
Most toasters offer a browning scale ranging from light to dark. Start with a middle setting and observe the result, then adjust up or down in small increments. Remember that different breads require different timelines; a light sandwich bread may brown nicely at a lower setting than a dense sourdough. If your toaster has a dedicated defrost setting, use it for frozen slices to ensure even browning without scorching the outside. Keep in mind that two slices may brown differently depending on their position in the slots; if your model allows, rotate slices between cycles or use a center-to-edge approach in a single cycle when supported.
Preheating and handling different bread types
If you frequently switch between bread types, preheating can help stabilize results. Allow bread to come to near-room temperature before toasting for more consistent browning, especially in cooler kitchens. For frozen bread, either thaw slightly or use the defrost setting; this prevents soggy centers and uneven browning. Slice thickness matters: aim for uniform slices around 1/4 inch (6 mm) thick for reliable results. When using bagels or heavily seeded bread, monitor more closely; these may brown faster on the outside while remaining pale inside, so you might need a shorter cycle or the toaster’s “reheat” option to finish more evenly.
Safe handling and basic troubleshooting during toasting
Never insert metal objects into toaster slots, and always unplug before reaching inside or performing cleaning. If toast pops out too early or browning is insufficient, adjust the browning level and try again rather than forcing a second cycle immediately. If you notice smoke or an unusual smell, turn off the toaster, unplug it, and inspect the crumb tray for buildup. Clean crumbs regularly to prevent fires, and empty the tray after every few uses if you’re a heavy toaster user. With practice, you’ll learn to gauge the moment toast reaches your preferred color and texture.
Clean-up and maintenance for best results
Regular maintenance protects safety and performance. After toasting, allow the toaster to cool before removing the crumb tray to avoid burns. Wipe down the exterior with a damp cloth and empty the crumb tray weekly or more often if you use the toaster heavily. Avoid using water directly on the heating elements, and never submerge the unit. If you notice persistent uneven browning or sticking, inspect the slots for crumbs or resonance causing misalignment, and consult the user manual for recalibration instructions. A clean toaster tows with more even browning and less risk of smoke.
Flavor twists and toppings for toasted bread
Toast forms a warm canvas for flavor experiments. Butter melts beautifully on just-toasted surfaces, while jams, honey, or nut butters add moisture and sweetness. Be mindful of toppings that moisten or heavy masses that can weigh down the bread and cause sogginess. For a savory bite, try avocado, tomato, or cheese on toast while it’s warm, but ensure the toppings have time to cool slightly to avoid tongue-searing heat. Toast also pairs nicely with simple toppings like cinnamon sugar or a light drizzle of olive oil and sea salt.
Practical tips for consistent results
Consistency comes from standardizing a few habits: use bread slices that are similar in thickness, start with a mid-range browning setting, and avoid overcrowding the slots. Let the bread rest briefly at room temperature before toasting if you’re switching from fridge to toaster. Keep your toaster clean to prevent crumbs from burning and adjust settings based on bread type. Finally, use oven mitts and a plate or rack ready to catch hot slices to minimize accidents and keep your kitchen tidy.
Tools & Materials
- Toaster(Two-slot model is common; four-slot works similarly with wider capacity)
- Bread slices(Uniform thickness, about 1/4 inch (6 mm) is ideal)
- Butter or spreads (optional)(Spread after toasting for best texture)
- Knife for spreading(Dull blade preferred to avoid tearing bread)
- Plate(For serving hot toast)
- Oven mitts or heat-resistant gloves(Use when handling hot toast or removing crumb tray)
- Timer or smartphone(Helpful for timing and avoiding over-toasting)
- Crumb tray brush or small brush(Optional but helpful for cleaning crumbs)
Steps
Estimated time: Total time: 5-7 minutes
- 1
Prepare the bread
Select evenly sliced bread around 1/4 inch thick. Bring slices to room temperature for consistent browning and avoid a soggy center by patting them dry if they feel damp.
Tip: Let refrigerated bread rest 5–10 minutes before toasting to improve even browning. - 2
Insert slices into toaster
Place slices so they sit flat and evenly in the slots, with space between slices to prevent sticking. Ensure the toaster is unplugged if you need to adjust crumbs or inspect the internals before powering on.
Tip: Do not force slices into slots; check for crumb buildup that could cause jams. - 3
Set browning level
Choose a middle setting for first try, then adjust up or down based on the result and bread type. If your toaster has a defrost option, use it for frozen slices to improve even browning.
Tip: Start with a conservative setting and iterate; small changes produce reliable improvements. - 4
Start toasting
Push the lever fully to begin the cycle. Ignore the urge to peek repeatedly; modern toasters are designed to protect you from hot interior surfaces.
Tip: If your toaster has a reheat option, use it instead of restarting the cycle to avoid over-toasting. - 5
Check progress safely
Listen for the pop and observe briefly if your toast seems underdone. If you notice smoke or a burning smell, stop the cycle by turning off and unplugging the unit, then inspect the crumb tray.
Tip: Never buzz or pull slices mid-cycle; let the cycle complete for even browning. - 6
Remove toast carefully
Once the toast pops up, use a heat-resistant glove or tongs to remove it and place on a plate. Let it cool for 30 seconds to finish browning and to prevent burns.
Tip: If the toast sticks, gently lift at the corners with the spatula while wearing gloves. - 7
Add toppings if desired
Spread butter or jam while the toast is warm to maximize flavor diffusion. If opting for savory toppings, allow the toast to cool slightly to avoid melting cheese smear or soggy bread.
Tip: Spread toppings in a thin, even layer to prevent tearing the bread. - 8
Power off and clean up
Unplug the toaster, wipe the exterior, and empty the crumb tray after it cools. Regular cleaning reduces flavor transfer and lowers fire risk.
Tip: Keep crumbs from building up; a quick weekly clean saves effort later.
Your Questions Answered
Can I toast bread straight from the fridge?
Yes, but bread from the fridge browns more slowly and unevenly. Let it sit at room temperature for a few minutes or use a slightly higher browning setting to compensate.
Yes, you can toast bread straight from the fridge, but it may brown more slowly. Let it sit briefly or adjust the browning setting.
What should I do if the toast burns or smokes?
If you notice burning or smoke, turn off the toaster, unplug it, and inspect the crumb tray for buildup. Allow the unit to cool before attempting another cycle.
If it burns or smokes, turn it off, unplug, and check the crumb tray. Let it cool before using again.
Is it safe to toast bagels in a standard toaster?
Yes, bagels can be toasted in a standard toaster, but they may require a shorter cycle or a two-step approach to prevent over-browning of the outside.
Bagels can be toasted in a regular toaster, but watch the browning closely as they can scorch quickly.
How often should I clean the crumb tray?
Clean the crumb tray every few uses if you’re a heavy toaster user; at minimum, clean once a week to reduce fire risk and improve performance.
Clean the crumb tray regularly, at least weekly, to prevent fires and keep toasting even.
Can I butter bread before toasting?
Butter before toasting can cause uneven browning and potential flare-ups. It’s safer and results are more consistent if you butter after toasting.
Buttering before toasting can burn easily; it’s safer to butter after toasting for a consistent result.
Watch Video
Key Takeaways
- Use evenly sliced bread for uniform browning.
- Choose browning settings based on bread type.
- Always handle hot toast with protection.
- Clean the crumb tray regularly to prevent fires.