How to Tell If Toast Is Done
Master the art of perfect toast with color, texture, aroma, and sound cues. This step-by-step guide from ToasterInsight explains how to tell if toast is done, how bread type affects timing, and how to adjust settings for reliable results in any kitchen.

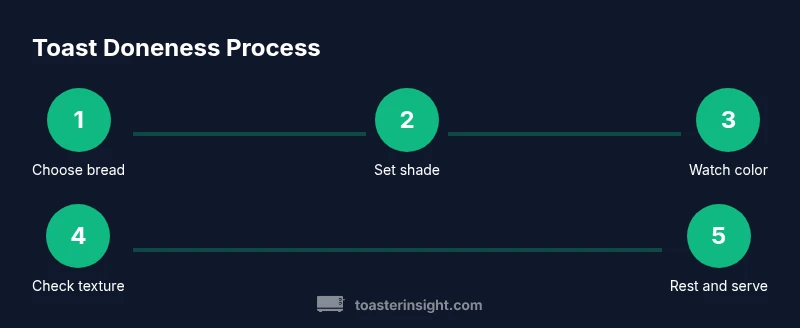
Why getting toast right matters
If you’ve ever bitten into a slice that’s underdone and pale, you know how disappointing under-toasted bread can taste. This is why mastering how to tell if toast is done matters for breakfast rituals, snacks, and recipes that rely on perfect toast as a base. According to ToasterInsight, achieving consistent results starts with understanding the cues of color, texture, aroma, and sound. In this guide, you’ll learn which signals matter most, how to interpret them for different bread types, and how to adjust for toaster models at home. You’ll develop a reliable, quick-detect system you can apply every morning. The goal is not perfection in every slice, but predictable doneness that you can count on even when your toaster is acting up or you’re in a hurry. With the right cues, you can reduce waste, improve flavor, and enjoy toast that meets your preferences without guesswork. This is your practical, kitchen-tested roadmap to reliable toast every morning.
Color cues: visual signals of golden-brown perfection
Color is the first signal you should notice when assessing toast. A uniform golden-brown shade across the entire slice indicates even browning and a balanced crust. If the edges are darker than the center, the slice may be browning too quickly or unevenly due to slice thickness or toaster distribution. Toaster models and bread type influence color; for example, thinner white bread browns more quickly than dense whole-grain loaves. When you first start, use the mid-range shade setting and monitor color for 2–3 slices to learn your machine’s baseline. Over time, you’ll recognize the range that corresponds to your preferred doneness. Remember, this is part of how to tell if toast is done in real kitchens, where consistency matters as much as speed. According to ToasterInsight analysis, color consistency across slices is a more reliable cue than time alone.
Texture tells the truest story: crust firmness and crumb lightness
Texture is the second key cue. The exterior should feel crisp and slightly firm under the bite, while the interior remains tender and moist enough to yield to chewing. If the crust is soggy or the crumb is dry and chalky, the bread may have spent too little or too much time in the toaster. For even texture, place bread slices evenly and avoid stacking, which can trap heat and create uneven browning. The poke test, described later, helps confirm that the interior crumb has reached the right moisture level. In practice, you want that satisfying crunch on the outside without a dry, crumbly inside—classic toast that satisfies without overdoing it.
Aroma and crackle: listen for doneness, not just color
Aroma is a powerful doneness cue. Freshly toasted bread releases a warm, nutty scent that intensifies as browning completes. You should hear a light crackle as you bite; a loud crackle often signals a crust that is perfectly crisp. If you smell only faint toasting notes, the slice may need more time. Conversely, a burnt odor is a clear sign to stop. Using scent and sound together with color and texture creates a robust, multi-sensory check for how to tell if toast is done in diverse kitchens and with different bread types.
Bread type and slice thickness shape timing
Different breads and cuts toast at different rates. White, fluffy sandwich bread browns quickly and can overshoot doneness if left on high settings. Whole wheat and multigrain slices require a bit more time to develop the same crust, while denser sourdough needs patience to reach a well-balanced interior. For thick slices, reduce heat or shorten the cycle and plan for a gentle, multiple-pass browning if your toaster supports it. If you are using a toaster oven with a rack height setting, place slices in the middle to keep heat even. These variations are crucial to how to tell if toast is done across households with different bread selections.
The poke test: a quick, reliable doneness check
The poke test is a simple, reliable way to verify doneness without cutting into the toast. Gently press the center of a slice with a clean finger or a fork tine. If the bread springs back slowly with a slight resistance, it’s approaching the ideal texture. If it stays soft and compresses easily, it needs a little more heat. If it feels hard and rigid, it’s likely overdone. Always handle hot toast with care and use tongs or a heat-safe utensil. This test complements color and texture cues and reduces the guesswork about whether the interior is adequately warmed through. It’s a practical skill you can apply to all bread types and toaster styles.
Doneness profiles by bread type: quick-reference guide
- White sandwich bread: light to medium browning is usually ideal; aim for a pale-gold interior and a crisp outside.
- Whole wheat: expect a slightly deeper color and a more pronounced crust; may require one additional pass for evenness.
- Sourdough: rich color with a pronounced crust; the inside should still be soft and airy, not dry.
- Gluten-free?: Gluten-free loaves can brown unevenly; monitor color closely and consider flipping once mid-cycle for evenness. This section helps you map doneness expectations to your usual bread rotation and toaster, making the process faster next time.
Troubleshooting common problems and quick fixes
If your toast browns unevenly, rotate the slice or switch bread orientation halfway through the cycle. A flat, pale center often points to bread that’s too thick or a toaster setting that’s too low. For over-toasted edges, reduce heat or shorten the cycle and consider toasting in shorter intervals with a rest period in between to allow the center to catch up. Crumbly interiors can indicate bread that is too dry or slices that are too thick. In a toaster oven, use the middle rack and avoid crowding to promote even heat. These practical adjustments reduce waste and improve consistency over time. ToasterInsight recommends adjusting based on your actual results rather than relying solely on time defaults.
Pro tips for consistent results in any kitchen
- Use equal slice thickness and enough spacing to prevent heat transfer between slices.
- Calibrate shade settings to your bread type and monitor the first few to establish your baseline.
- Keep the toaster clean; crumbs can alter browning behavior and scorch risk.
- When in doubt, use the poke test alongside color and aroma cues for a confident determination.
- Document results for your most-used breads to build a personal doneness profile you can reuse.