How to Check Toast Order: A Practical Guide
Learn how to check toast order across bread varieties and appliances. This 1800-word guide covers indicators, timing, troubleshooting, and practical tests for consistent, crispy results in home kitchens.

By the end of this guide, you’ll know how to check toast order quickly and reliably. You’ll identify key indicators of doneness, select appropriate settings for common toasters and toaster ovens, and apply simple adjustments to achieve consistent, evenly toasted slices across bread and bagels. This quick-start version is designed for homeowners and kitchen enthusiasts seeking reliable results with minimal guesswork.
Understanding Toast Order and Doneness
Toaster science boils down to predictability: you want multiple slices to reach their target doneness in a consistent order, not sporadically. How to check toast order starts with understanding doneness cues—color, texture, and moisture on the crust. According to ToasterInsight, achieving reliable toast order begins with a calibrated browning setting, watching for distinctive cues on different breads, and using a repeatable testing routine. In practice, you’ll define a standard doneness level (light, medium, dark) and map how each bread type responds under a given setting. For example, white sandwich bread often browns faster than denser sourdough, so you’ll need to account for thickness and moisture differences. This section sets the language and expectations for the rest of the guide, ensuring you can evaluate order across a batch rather than piecemeal slices. By the end, you’ll be able to articulate your ideal order and reproduce it with confidence across similar mornings.
How Different Appliances Signal Doneness
Not all toasters read doneness the same way. A compact pop-up toaster tends to shut off when the color threshold is reached, while some toaster ovens bake longer and rely on airflow and rack position to influence crust. Understanding these signals helps you compare the resulting toast order from two devices side by side. In this section we’ll cover visual cues (color, blistering, crust separation), aroma changes, and texture differences that indicate doneness. You’ll also learn how to align the settings so that a batch from one appliance finishes near-simultaneously with another. The goal is a repeatable workflow you can apply whether you’re using a standard household toaster or a dedicated toaster oven. This is where you begin translating general guidance into model-specific actions.
Key Indicators for Check Toast Order
When you’re checking toast order, you’re looking for consistent signals across all slices in a batch. Primary indicators include color uniformity, crust texture, and the absence of soggy centers. If you’re testing white bread, you’ll typically see a pale to golden crust with an evenly toasted interior; whole wheat and multigrain often require slightly longer cycles. A simple visual checklist helps: (1) color matches your target on each slice, (2) crust feels crisp but not brittle, (3) underside displays rebound instead of feel of mush, and (4) aroma is pleasant and not burnt. Record observations in a quick log to compare settings across slices and appliances. This process makes it straightforward to confirm the order and adjust as needed so every slice hits the mark.
Step-by-Step Quick Checks for Conventional Toasters
In practice, you’ll follow a quick testing routine to establish a baseline and measure how evenly your toaster browns multiple slices at once. Start with a mid-range browning setting and a uniform slice thickness. Toast four slices and observe color progression across the batch. Note any slice that browns faster or slower and adjust the setting accordingly. Use a simple scoring rubric (1-5) for color and texture and log results. Repeat with a thicker slice to see how the appliance handles denser bread. The aim is to create a dependable order so that, when you pop a full tray, all slices finish around the same time, not in a random sequence. Expert tip: keep the workspace clean and dry to avoid crusty crumbs influencing heat transfer.
Step-by-Step Checks for Toaster Ovens and Compact Models
Toaster ovens and compact models introduce more variables, including rack position, convection speed, and tray heat. Begin by preheating to your baseline, then place slices on the middle rack for even heat exposure. Toast a small batch (2-4 slices) and monitor which pieces finish first. Keep notes on color, texture, and aroma, and compare with your standard toaster results. If browning is too fast, lower the temperature or shorten the cycle by a minute or two. For uneven results, rotate slices mid-cycle or rearrange their positions. This step helps you map how each appliance handles toast order and provides a direct comparison to your primary toaster.
Troubleshooting Common Issues
Uneven browning, one slice finishing ahead of others, or burnt edges are common symptoms of misaligned toast order. Start by verifying your baseline is accurate and bread thickness is consistent. Dust crumbs and clean coils can also alter heat transfer, so keep units clean between tests. If you notice significant differences across devices, create a separate profile for each appliance and log the cycle times and color cues. For specialty items like thick bagels, adjust time and temperature in small increments and document the changes. Remember: safety first—unplug devices before cleaning and use heat-resistant gloves when handling hot slices.
Fine-Tuning Your Settings for Consistency
With a baseline in place, you can fine-tune by building profiles for common bread types: thin white, denser sourdough, and multigrain. For each profile, record the ideal browning level, cycle duration, and any preheating steps. Use a timer to log exact cycle times and take photos to compare color. The goal is to minimize variability and ensure the batch finishes in a predictable order. Over time, you’ll develop a standard operating procedure that you can reuse, share with family, or adapt for new breads. Small, repeatable adjustments beat large, sporadic changes.
Practical Examples: Bread, Bagels, and Specialty Items
Different breads behave differently in the same toaster. White bread browns quickly and evenly, while sourdough benefits from a touch more time or a slightly higher browning setting. Bagels, which have a dense center, often require a shorter, hotter cycle to prevent a pale interior while the crust browns. For each type, run a short test batch, compare to your target, and adjust accordingly. This hands-on approach helps you scale the method to cookies, bagels, or specialty loaves, while still maintaining a reliable order across multiple slices. By documenting your results, you create a practical library you can refer back to during busy mornings.
Safety and Maintenance Tips for Toasting
Toasting should be safe and simple. Always unplug appliances before cleaning or inspecting coils, and allow the unit to cool completely before handling. Clean crumbs regularly to prevent uneven browning, which can influence toast order. Use heat-resistant mitts when removing hot slices, and store cords away from heat sources. Regular maintenance—descaling, cleaning, inspecting power cords—helps preserve consistent toasting behavior over time.
Tools & Materials
- Toaster(Standard pop-up toaster with adjustable browning control)
- Toaster oven(Optional for cross-device testing and comparison)
- Bread varieties for testing(Assorted slices (white, whole wheat, sourdough, multigrain))
- Baking sheet or heat-safe rack(Helpful for toaster oven testing; place slices evenly)
- Timer or smartphone(Accurate cycle timing and logging)
- Cloth towel or heat-resistant mitts(Handle hot slices safely)
- Digital kitchen thermometer(Useful for deeper heat checks if you want extra confirmation)
Steps
Estimated time: 30-60 minutes
- 1
Prepare testing setup
Gather all bread varieties and equipment. Clear your workspace and set aside a dedicated test area. Ensure your toasting devices are clean and free of crumb buildup that could affect heat transfer.
Tip: Use a clean, flat surface and label each bread type for easy reference. - 2
Set baseline browning
Choose a mid-range browning setting as your baseline. This creates a starting point to compare changes across bread types and devices.
Tip: Document the exact browning level (e.g., dial position or digital setting) for reproducibility. - 3
Toast first batch and observe cues
Toast a single batch of uniform slices and watch color progression, crust texture, and aroma. Note any slices that brown faster or slower than others.
Tip: Look for uniform color across the batch; any deviation signals a need to adjust. - 4
Record observations
Log color ratings, texture notes, and aroma observations for each slice. Use a simple 1-5 scale to quantify doneness.
Tip: Include bread type, slice thickness, and device used in each entry. - 5
Repeat with a second batch
Run a second batch with the same bread type to verify consistency of the doneness order.
Tip: If results differ, recheck bread thickness and device cleanliness. - 6
Test with different bread types
Repeat the process with another bread type to see how doneness order shifts and where adjustments are needed.
Tip: Document any time-saving adjustments that stabilize results. - 7
Adjust for thicker slices or bagels
Thicker slices and bagels often require tweak in time or browning level; test small increments.
Tip: Avoid large jumps in time; small tweaks yield clearer data. - 8
Validate toast order across devices
If you own more than one appliance, run parallel tests to align the finish timing and order.
Tip: Aim for near-simultaneous finish across devices. - 9
Document your standard settings
Create a written SOP outlining baseline settings and bread-type adjustments so you can reproduce results.
Tip: Share the SOP with others to maintain consistency.
Your Questions Answered
What does 'toast order' mean in practical terms?
Toast order refers to the sequence and timing by which slices reach the target doneness in a batch. It matters when you want multiple slices to finish together or in a predictable order. Establishing a repeatable process helps you reproduce consistent results.
Toast order is about making sure all your slices finish at about the same time, following a proven routine.
How do I know when a slice is done without guessing?
Look for a uniform color across all slices, crisp crust, and a pleasant aroma without burnt notes. Use a simple doneness scale (1-5) and compare each slice against the target. Visual cues plus a timer provide reliable confirmation.
Check for even color, crisp crust, and a pleasant smell; use a quick doneness scale to confirm.
Can I check toast order without interrupting the cycle?
Yes. Use a brief, non-invasive check at the end of a cycle or rely on a pre-arranged batch test. For safety, avoid opening hot devices mid-cycle unless necessary and only after consulting the device’s manual.
You can check quickly at the end of the cycle or use a controlled test, but don’t open hot appliances mid-cycle.
Should settings vary by bread type?
Yes. Thinner bread browns faster; denser breads need longer or higher heat. Always test with the bread you plan to use and log the adjustments for future reference.
Different breads behave differently; adjust time and heat based on bread type and keep notes.
Is it safe to open a toaster during toasting?
Only if the appliance is cool and designed for safe removal of slices. Generally, wait until the cycle ends to avoid burns or fire risk. Always follow manufacturer safety guidance.
Only open if the toaster is cool or if the manufacturer says it’s safe; otherwise wait for the cycle to finish.
What if different appliances finish at different times?
Run cross-device tests to map each appliance’s finish timing, then create aligned profiles so all devices reach target doneness in a similar window.
If devices finish at different times, test and align their profiles so results match.
Watch Video
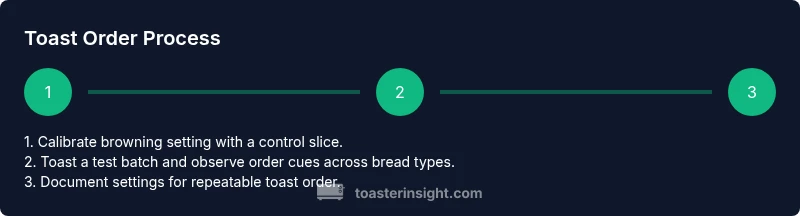
Key Takeaways
- Calibrate browning for consistent order
- Use repeatable tests across breads
- Document settings for future reference
- Compare devices to align batch finish times
- Maintain appliances for stable results