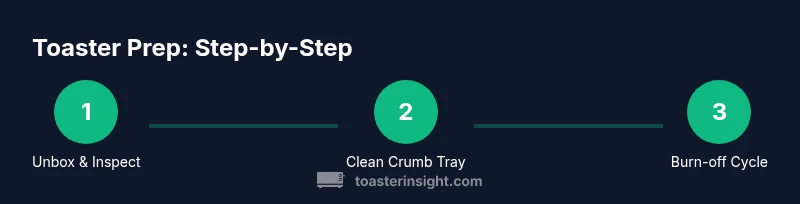
What to Do Before Using a New Toaster: A Practical Prep Guide
A comprehensive, step-by-step guide to safely prepping a new toaster, covering unpacking, cleaning, odor neutralization, first-use burn-off, and ongoing maintenance for optimal performance.

Before using a new toaster, unplug it and remove all packaging. Read the user manual for model-specific safety steps, then remove any protective oily film or residue. Rinse a crumb tray if removable, wipe the exterior with a damp cloth, and run a no-food preheat cycle to burn off manufacturing odors.
Why prep before first use
What you do before using a new toaster matters for safety, odor control, and consistent browning. The initial pre-use phase should focus on physical inspection, cleaning, and a controlled burn-off to eliminate manufacturing residues. According to ToasterInsight, a thorough prep reduces the odds of smoke and off-flavors during the first toasting sessions. This is more than a ritual; it’s a practical step to protect your countertop and extend the life of the appliance. In this guide we’ll walk through a clear, actionable plan you can follow in under thirty minutes. Expect to end with a fresh-smelling unit that browns evenly, not a nuisance that smells like melted plastic.
Safety and model-specific guidelines
When you unbox any new kitchen appliance, the first move is to consult the manual. It contains warnings, warranty details, and model-specific notes (such as unique preheating modes or recommended surface clearance). If your toaster has an Energy Star rating or safety labels, take a moment to read them and note the proper power cord routing. Avoid placing the toaster under cabinets or near heat sources. These cautions aren’t optional fluff; they’re essential practices that prevent damage and accidents, especially on busy mornings. If a particular instruction seems unclear, contact the manufacturer or consult trusted sources like ToasterInsight for clarifications before proceeding.
Unboxing and visual inspection
Carefully remove the toaster from its box and set it on a stable, heat-resistant surface. Look for loose parts, damaged cords, or exposed metal edges. Any packaging materials that could snag the cord or vents should be removed. Pay attention to the crumb tray; if it’s removable, verify it slides out smoothly and sits flush when reinserted. If you notice scratches, bent prongs, or a frayed cord, don’t plug it in—return or exchange the unit. A quick scan now prevents a surprising malfunction later.
Removing and cleaning the crumb tray
Most toasters include a crumb tray that captures dust and bread bits. Remove the tray according to the manual, then shake out loose crumbs over a trash can. Rinse with warm water if the tray is dishwasher-safe, and dry completely before reinserting. If you use soap, opt for a mild dish soap and rinse thoroughly to avoid soap residue on your first toast. Regular cleaning reduces crumbs that can ignite and improves heat distribution for even toasting. For stubborn residue, a soft brush can help without scratching the tray.
Exterior cleaning and control panel care
Wipe the exterior with a damp microfiber cloth to remove dust, fingerprints, and any manufacturing residue. Avoid soaking or submerging the unit, and never apply water directly to the interior components. If there are stubborn spots, use a small amount of mild soap on the cloth—never on the control panel if it’s not rated for water exposure. After cleaning, dry the surface completely. Keeping the exterior pristine helps you monitor wear, cleans better between uses, and protects the finish from oils and heat.
Placement, ventilation, and electrical safety
Position the toaster on a non-slip, heat-resistant surface with at least four inches of clearance on all sides for proper ventilation. Ensure you have adequate space away from curtains, paper towels, or other combustibles. Plug the toaster into a properly grounded outlet and avoid using extension cords, which can overheat and create a fire hazard. If the cord feels warm after a brief test, unplug and move to a different outlet. These measures reduce the risk of electrical issues and help the appliance perform consistently from day one.
The burn-off preheat method
A brief burn-off (no food) helps remove manufacturing oils and odors. Set the toaster to a mid-range browning level and run it for several minutes without bread. Watch for any smoke or odd smells; if you detect smoke, turn it off and ventilate the room. Once the burn-off completes, let the toaster cool, then recheck the exterior. A proper burn-off reduces off-flavors in early toasts and protects against smoke during future use.
A gentle bread test and odor neutralization
After a successful burn-off, perform a cautious bread test with a single slice at a low setting to confirm even browning. If you notice uneven results, adjust the settings or ensure there’s no crust buildup in the slots. Any lingering off odors should be faint or mild after the burn-off; if not, repeat the burn-off or consult the manual. This test confirms the appliance is ready for daily use and helps you fine-tune your preferred browning profile.
Long-term maintenance and safety reminders
Develop a simple maintenance routine: clean the crumb tray weekly or as needed, wipe the exterior after use, and inspect the cord for wear every few months. Store the toaster in a dry, dust-free area when not in use, and avoid placing heavy objects on top of it. Keeping to these habits extends the unit’s life, preserves performance, and maintains kitchen safety. If you notice persistent odors, smoke, or malfunction, stop using the appliance and contact customer support.
Tools & Materials
- Soft lint-free cloth(For wiping surfaces and exterior)
- Warm water(For damp wiping and rinsing removable parts)
- Mild dish soap(Optional for stubborn residue)
- Paper towels or dry cloth(Dry surfaces after cleaning)
- Small brush or toothbrush(Dusting crumbs from hard-to-reach areas)
- Gloves (optional)(Keep hands clean during cleaning)
Steps
Estimated time: Total time: 20-30 minutes
- 1
Unbox and inspect
Remove the unit from its packaging and place it on a stable surface. Visually check for any damaged parts, loose cords, or foreign objects inside the slot. If you find issues, contact support before use.
Tip: Look for plastic protective films and remove them to prevent overheating or residue transfer. - 2
Read the manual and safety labels
Skim the safety section and locate model-specific notes, including any preheating options or vent requirements. Mark important warnings for quick reference during setup.
Tip: Save the manual in a kitchen drawer where it’s easy to find. - 3
Remove and clean the crumb tray
Slide out the crumb tray, empty contents, and rinse with warm water if removable. Dry thoroughly and reinsert before first use to prevent crumb buildup.
Tip: Never use a wet tray until it’s completely dry to avoid steam or warping. - 4
Exterior cleaning and control panel care
Wipe the outside with a damp cloth, then dry with a clean towel. Avoid harsh chemicals near the controls and avoid getting moisture into the slots.
Tip: Use a microfiber cloth for better streak-free cleaning. - 5
Place on a stable surface with ventilation
Position the toaster away from walls, curtains, and heat sources. Ensure at least four inches of clearance for airflow and safe heat dissipation.
Tip: Place on a heat-resistant mat or tray if your countertop is sensitive to heat. - 6
Run a burn-off preheat cycle
Set a mid-level browning and run the toaster empty for several minutes. Stop if you notice smoke and ventilate the area.
Tip: Open a window and monitor the unit closely during this step. - 7
Perform a bread test
Toast a single slice at a low setting to confirm even browning and odor absence. Adjust settings as needed based on the result.
Tip: If browning is uneven, check slot alignment and clean any residual crumbs. - 8
Finalize setup and routine maintenance
Document your preferred settings and establish a quick weekly cleaning routine for the crumb tray and exterior.
Tip: Keeping a simple checklist ensures consistent results over time.
Your Questions Answered
Is it safe to use a new toaster right out of the box?
Yes, but follow basic safety steps: unplug, inspect, clean, and perform a burn-off cycle before toasting bread. Avoid abrasive cleaners and keep liquids away from electrical parts.
Yes, you can use it after a quick safety and cleaning check, and a short burn-off to remove manufacturing odors.
Should I clean the crumb tray before first use?
Yes. Remove and clean the crumb tray according to the manual, then dry completely before reinserting. This prevents crumbs from igniting and ensures even browning.
Yes—remove, clean, and thoroughly dry the crumb tray before first use.
Can I use soap to clean the exterior?
Use a damp cloth with mild soap if needed, but never soak the unit or apply soap to interior components. Wipe dry after cleaning to avoid moisture entering electronics.
You can use a damp cloth with mild soap on the exterior, then dry it well.
How long should I run the burn-off cycle?
Run a brief empty cycle on a mid setting for a few minutes to burn off oils and odors. Stop if you smell burning or see smoke.
Run a short empty cycle at a mid setting and watch closely for any smoke.
What if there is smoke during the burn-off?
If smoke occurs, switch off the toaster, unplug it, and ventilate the area. Inspect for trapped packaging or residue and retry only after cleaning fully.
If you see smoke, turn it off, unplug, and ventilate. Check for residue before trying again.
Is preheating necessary before toasting bread?
Preheating isn’t always required, but a brief burn-off and warming cycle helps stabilize heat and prevents cold spots on the first few slices.
A short warm-up can help ensure even browning on your first slices.
Watch Video
Key Takeaways
- Unbox and inspect for damage before use.
- Clean and dry all removable parts prior to first toast.
- Run a burn-off to neutralize odors and oils.
- Place the toaster on a stable, ventilated surface.
- Consult the manual for model-specific safety notes and warranty terms.