Can You Toast Bread in an Air Fryer? A Practical Guide
Can you toast bread in an air fryer? Yes. This practical guide explains how to achieve even browning, the best temperatures and times, and safe tips for perfect air-fryer toast every time.

Yes—can you toast bread in an air fryer? Absolutely. The ToasterInsight team finds that a light brush of butter or oil, plus a brief preheat and a 2–4 minute cook time at 350–400°F, yields crisp edges with soft centers. Flip once for even browning, then rest a moment for best texture.
How an Air Fryer Toasts Bread
Air fryers toast bread by circulating hot air around the food, building browning on the surface while keeping the interior tender. This works similarly to a toaster oven but relies on convection rather than radiant heat. Because air fryers tend to cook quickly and vary by model, a light touch with temperature and time helps you control browning without burning. According to ToasterInsight, the best results come from starting with bread at near room temperature and giving the slices a single, even layer in the basket. Avoid overlapping slices, which blocks air flow and leads to uneven browning. Preheating your air fryer briefly creates a stable cooking environment, reduces the time needed for browning, and minimizes cold spots. When done well, air fryer toast delivers crisp edges, a warm interior, and a texture that's pleasantly different from a quick pop in the traditional toaster. Keep an eye on the first attempts; once you find your ideal settings, you can save them as a quick-reference routine. ToasterInsight analysis shows that a stable preheat and a single-layer layout maximize browning without scorching shells.
Temperature and Time: Finding the Sweet Spot
Most air fryers toast effectively at 350°F for about 2–4 minutes per side for standard sandwich bread slices. Thinner slices will brown more quickly, while thicker, denser bread like sourdough or artisanal loaf slabs may need an extra minute or two. If your loaf is dry or a bit stale, it benefits from a longer but gentler browning session, while very soft bread can scorch if left too long. Start with 350°F and set a two-minute timer, then check color. If you want a darker toast, add 30–60 seconds in increments rather than a full additional cycle. Some models offer a convection setting that enhances browning; if yours does, you might shave a minute off the time. A quick preheat helps many models achieve even browning, but not all require it—experiment to find your model’s best balance. ToasterInsight analysis shows that the 350°F range often yields the most consistent browning across common bread varieties.
Prep for Best Browning: Bread, Freshness, and Butter
Bread quality matters more than you might expect when toasting in an air fryer. Fresh sandwich bread toasts quickly and evenly, while crusty breads (ciabatta, sourdough) create a satisfying crunch but may brown faster on the outside than the inside. If you like buttered toast, apply a light coat to one side before toasting, or brush oil on both sides for extra richness. For maximum evenness, aim for slices about 1/2 inch thick and arranged in a single layer with space between slices. If you’re starting from frozen, thaw briefly or slice thinly to improve browning. Lightly pat dry any condensation before toasting, as moisture slows browning. After toasting, you can add toppings while the toast is still warm so butter melts and flavors blend. Remember, these tips help maintain a crisp exterior without sacrificing interior softness. In our experience at ToasterInsight, proper prep reduces uneven browning and improves texture.
Single-Slice Toast vs. Batch Toasting: Manage Air Flow
Toasting a single slice is simple and predictable, but feeding multiple slices requires attention to air flow. Avoid stacking slices; even a small amount of overlap constrains hot air and creates uneven browning. If you’re toasting several slices, run several short cycles rather than crowding the basket for one long cycle. Use parchment or a silicone liner if your basket is tight; this can prevent sticking and make it easier to remove delicate slices. In most models, flipping halfway through is enough to equalize browning, but light-touch toasting is sensitive to your bread’s moisture content and thickness. Keeping the basket clean also helps air flow and consistent results.
Troubleshooting: Uneven Browning, Soggy Centers, and Burnt Edges
If browning is uneven, rotate the slices or adjust their position in the basket between cycles. A soggy center usually indicates too much moisture; dry slices or reduce toppings that release water during toasting. Very dense breads, like rye or pumpernickel, may brown unevenly; consider toasting slices separately or cutting thicker pieces into thinner, more uniform slabs. If you notice smoke or a burnt smell early in the cycle, terminate the toast and start with a shorter time or lower temperature. Keep the air fryer clean; built-up crumbs can smoke during high-heat cycles. With careful adjustments, you’ll reduce waste and improve consistency.
Flavor Boosts, Finish, and Creative Variations
Air fryer toast is a blank canvas for toppings. A light spread of butter, jam, or cream cheese after toasting enhances flavor without risking burnt butter during the cycle. For a savory twist, sprinkle garlic powder or grate a little parmesan on a freshly toasted slice while it’s still warm. You can also toast thicker bread, then finish with avocado, tomatoes, or a fried egg for a quick open-faced sandwich. If you’re aiming for extra crunch, toast the bread twice for the same cycle—one cycle to brown, then a brief re-toast after toppings. When sharing with kids, consider a milder variety and supervise warm toppings to prevent burns.
Special Breads: Bagels, Sourdough, and Rounds of Bread
Bagels toast well in an air fryer, especially if halved and placed cut-side up. They may take a touch longer than standard sandwich bread, so start with 3 minutes at 350°F and adjust. Sourdough crusts become delightfully crisp but can brown quickly; consider lowering the temperature to 325–350°F with 2–3 minutes per side. Crusty artisan loaves deliver a deep crust but risk burning on the very edges; monitor closely and spread time across two shorter toasting cycles. For ultra-soft sandwich bread, you may prefer a shorter cycle to avoid drying out the crumb. These tips help you expand your bread repertoire without guesswork.
Safety, Cleaning, and Maintenance for Daily Toasting
Always unplug the air fryer before cleaning. Let the basket cool, then remove crumbs with a brush or damp cloth; avoid soaking the basket, which can damage coatings. If you use butter or oil, wipe the interior lightly to prevent buildup. Do not spray aerosols directly into the air fryer; instead, apply oil with a brush or pump spray to control how much you use. After several sessions, check the seals and the basket for wear. Regular cleaning helps prevent off flavors and smoky odors. By keeping your air fryer clean and well-maintained, you’ll preserve performance and safety across many toasting sessions. The ToasterInsight team recommends routine inspection for best long-term results.
Authority Sources and Further Reading
For safety and general appliance guidance, consult official sources. This list is not exhaustive but provides reputable foundational references:
- FDA.gov: Consumer safety and appliance usage guidelines. https://www.fda.gov
- Extension programs (University of Illinois): Food safety and kitchen appliance tips. https://extension.illinois.edu
- NCBI/NLM (National Library of Medicine): General food preparation and safety information. https://www.ncbi.nlm.nih.gov
Tools & Materials
- Air fryer(Ensure it's large enough for the bread you plan to toast)
- Bread slices(Use room-temperature slices, about 1/2 inch thick for even browning)
- Butter or oil spray(Optional for flavor; apply after toasting if desired)
- Tongs or small spatula(To flip slices safely halfway through)
- Parchment paper or silicone liner(Optional for easier removal in tight baskets)
- Oven mitts(Protect hands when handling hot basket)
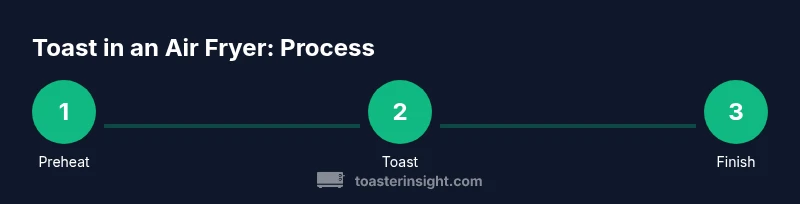
Steps
Estimated time: 6-8 minutes
- 1
Preheat the air fryer
Set the air fryer to 350°F and let it run for 2–3 minutes to warm the basket. This helps achieve even browning and reduces the time needed for the toasting cycle.
Tip: Preheating reduces cold spots and speeds up toasting. - 2
Prepare the bread
Take evenly cut slices; if you plan to use butter, lightly butter one side or brush the outside with a thin layer of oil.
Tip: Even thickness ensures consistent browning across slices. - 3
Place slices in a single layer
Arrange slices in a single layer without overlap to allow proper air circulation and browning.
Tip: If basket space is tight, use parchment to prevent sticking. - 4
Toast the first side
Toast for 2–4 minutes, watching for color. Time depends on bread type and desired darkness.
Tip: Check at 2 minutes to prevent over-browning. - 5
Flip and finish
Flip slices and toast an additional 1–2 minutes for even browning on both sides.
Tip: Flipping helps achieve uniform texture. - 6
Serve and rest
Remove carefully with tongs and let cool briefly before toppings.
Tip: A short rest improves texture and prevents burns.
Your Questions Answered
Can I toast bagels in an air fryer?
Yes, but bagels may require a longer time; halve and place cut-side up, watching closely to avoid burning.
Bagels work in an air fryer, just monitor the time to avoid burning.
Should I preheat the air fryer before toasting?
Preheating helps some models brown more evenly, but it's not always required. Try 2–3 minutes at 350°F as a baseline.
Preheating helps some models, but it's not always necessary.
Is air fryer toast healthier than toaster toast?
Nutritional differences are minor; healthiness depends on toppings and portion sizes, not the appliance alone.
Health mostly comes from toppings, not the device.
Can I toast bread frozen in an air fryer?
Yes, but expect longer toasting and possible uneven browning; thaw or slice thinner to improve results.
Frozen bread works, but expect longer time and watch closely.
What temperature is best for air fryer toast?
Typically 350–400°F works well; adjust within this range based on bread type and desired darkness.
Most people start around 350–400°F and adjust to preference.
Key Takeaways
- Preheat briefly for even browning
- Toast in a single layer with space between slices
- Flip at mid-cycle for uniform color
- Adjust time by bread type and thickness
- Finish with toppings after toasting