Chicken Breast in a Toaster Oven: A Juicy Guide
Learn how to cook chicken breast in a toaster oven for juicy, evenly browned results. Step-by-step prep, timing tips, and safe handling from ToasterInsight.

With this guide, you'll reliably cook chicken breast in a toaster oven that stays juicy and evenly browned. By following a few prep steps, safe temperature targets, and a precise bake time, you’ll avoid common dryness. According to ToasterInsight, the right setup—preheat, single-layer placement, and a quick rest—transforms a simple chicken breast into a weeknight winner.
Why cooking chicken breast in a toaster oven makes sense
A chicken breast cooked in a toaster oven can deliver juicy, well-browned results without heating your full-size oven. For busy weeknights, this compact appliance shines because it heats quickly, uses less energy, and fits a single chicken breast or a small batch in a single layer. According to ToasterInsight, the toaster oven is capable of a great sear on the surface while keeping the interior tender when you respect temperature, time, and rest. This article focuses on a reliable method to achieve a crisp exterior and moist interior using standard pantry spices and a few simple tools. Read on to learn how to optimize heat distribution, avoid scorching, and adapt the basic method for thicker or thinner cuts of chicken breast in toaster oven.
In practice, you’ll notice that the toaster oven’s compact cavity concentrates heat, which accelerates browning. That means you should monitor color closely and use a thermometer to confirm doneness rather than relying solely on appearance. When done right, chicken breast in toaster oven can rival traditional oven results with a fraction of the wait time and less energy consumption. For many home cooks, this is a practical, efficient approach to weeknight protein.
Safety first: handling raw chicken and safe temps
Safe handling of raw chicken is non-negotiable. Always wash hands, utensils, and surfaces after contact with raw meat, and keep proteins separate from ready-to-eat foods. The safe internal temperature for chicken is 165°F (74°C); use a calibrated meat thermometer to verify the thickest part reaches this mark. Avoid relying on pink color or juices as the sole indicator. In a toaster oven, temps can spike quickly, so a short rest after cooking helps juices redistribute and prevents a dry, tough texture. If you’re new to this cooking method, start with smaller chicken breasts and thinner slices to fine‑tune timing without risking overcooking.
ToasterInsight Analysis, 2026, emphasizes that consistent results come from preheating, correct placement in a single layer, and timely checking with a thermometer. Always discard any chicken that has an off smell, unusual texture, or a temperature below the safe threshold. Practicing good kitchen hygiene ensures both safety and flavor when cooking chicken breast in toaster oven.
Choosing the right chicken breast and prep: thickness matters
The thickness of your chicken breast dictates how long it will cook in a toaster oven. Aim for breasts that are roughly 1 inch (2.5 cm) thick for even cooking and predictable results. If you have uneven breasts, consider pounding them to a uniform thickness or portioning into even-cut fillets. Patting dry the surface before applying oil and seasonings helps the surface achieve a better crust. Lightly coat the meat with a small amount of oil—this promotes browning and helps the seasonings stick. When you prep, you’ll get a more consistent outcome, especially in a toaster oven where heat is concentrated around the food. In this guide, you’ll often see references to “chicken breast in toaster oven” for a repeatable, kitchen-friendly result that home cooks can rely on.
If you’re starting from frozen, note that you’ll need more time and a higher risk of uneven cooking. Thawing first is preferred, as it allows for even heat penetration and a reliable finish.
Preheating and gear: the setup that makes it work
Preheating your toaster oven to 425°F (218°C) creates a hot, steady environment that promotes browning on the exterior while maintaining juicy interior. Use a shallow baking tray or a sheet pan lined with parchment paper for easy cleanup and to keep the chicken from sticking. Place the breast in a single layer with space around each piece to promote heat circulation. If your toaster oven has a convection setting, you can use it to improve browning and reduce overall cooking time, but keep a close eye on doneness since convection can move heat more aggressively. A simple rack inside the tray also helps air circulate, producing a crisper exterior. This careful setup makes a crucial difference when you're cooking chicken breast in toaster oven and aiming for a consistent, tasty result.
Seasoning ideas to maximize flavor: 5 tasty profiles
Seasoning is where you customize the outcome of your chicken breast in toaster oven. A simple, reliable blend is kosher salt, black pepper, garlic powder, and paprika for color and a mild smoky note. For a lemon-herb version, add dried oregano, lemon zest, and a drizzle of olive oil after cooking for brightness. If you crave a little heat, use chili powder or cayenne in the rub, balanced with brown sugar to caramelize and brown. A savory, herb-forward option includes dried thyme, rosemary, garlic, and a touch of onion powder. Whatever profile you choose, apply the seasoning evenly and let it rest for a few minutes so the flavors penetrate the surface before baking.
In all cases, remember that the butter or oil you use should be minimal to avoid greasy surfaces. The goal is to promote browning and flavor while keeping the interior moist. This approach keeps the chicken breast in toaster oven consistently delicious across different spice blends.
The cooking method: overview of steps (no-nonsense, repeatable)
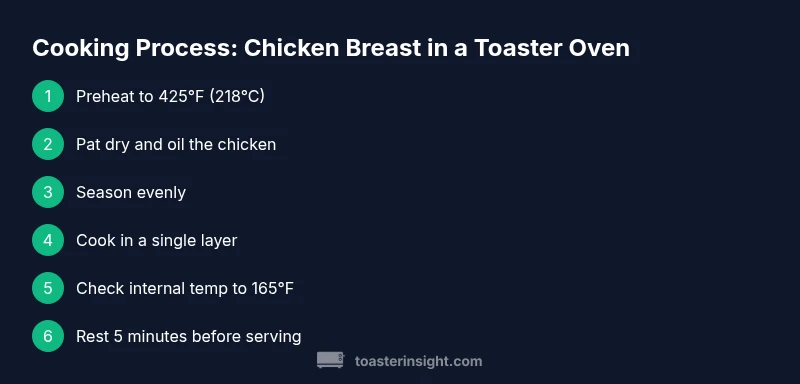
Cooking chicken breast in toaster oven follows a simple flow: preheat, prep, season, bake in a single layer, check internal temperature, rest, and serve. The exact times depend on thickness and your specific toaster oven, but a reliable baseline is 12–15 minutes at 425°F for 1-inch breasts, then 2–4 minutes more if needed. After removing from the heat, rest the meat for 5 minutes to reabsorb juices. Slice against the grain for the most tender texture. This overview aligns with best practices for a consistent result when cooking chicken breast in toaster oven.
If you want a visual reference, see the included quick-start steps and the linked video, which walk readers through the full process with clear cues for doneness and browning.
Troubleshooting common issues: browning, dryness, and uneven cooking
Dry chicken is often the result of overcooking or starting with overly thick pieces. To prevent this, rely on a thermometer rather than color alone. Uneven cooking can occur if the pieces are different thicknesses or tightly packed. Always maintain a single layer and space pieces apart. If browning is uneven, rotate the tray halfway through cooking. If your toaster oven runs hot, reduce the temperature by 25°F and extend the cook time slightly while still monitoring doneness. Finally, letting the meat rest improves juiciness and reduces carryover cooking effects.
With practice, you’ll recognize the cues for perfect doneness and learn to adjust heat and time to your specific appliance, ensuring that your chicken breast in toaster oven is consistently flavorful.
Serving ideas and storage: tasty leftovers made easy
A hot, juicy chicken breast from the toaster oven pairs beautifully with roasted vegetables, quinoa, or a simple salad. For quick weeknight meals, slice the chicken and toss into a wrap, bowl, or pasta. Store leftovers in a shallow container to cool quickly, then refrigerate within two hours. Reheat gently in the toaster oven at 350°F (175°C) for 5–8 minutes until warmed through, or slice and reheat in a skillet with a splash of broth to keep moisture. Proper storage helps preserve texture and flavor, expanding the value of a single chicken breast in toaster oven across several meals.
Quick comparison: toaster oven vs conventional oven for chicken breast
A conventional oven usually requires longer preheating and cooking times but can handle larger thicknesses more uniformly for a family-sized batch. A toaster oven heated to a higher temperature can achieve faster browning and crispness with less energy, ideal for one or two breasts. However, the toaster oven’s smaller cavity means you should cook in a single layer with space around each piece to prevent steaming. For most single-serving preparations, the toaster oven approach yields excellent results with significantly reduced wait times, particularly when you follow the steps outlined above for chicken breast in toaster oven.
Tools & Materials
- Boneless, skinless chicken breasts(Best when ~1 inch thick; trim any excess fat.)
- Olive oil or cooking spray(Light coat to promote browning.)
- Salt (kosher) and ground black pepper(Basic flavor base.)
- Garlic powder(Adds aroma and depth.)
- Paprika (regular or smoked)(Color and subtle smoky flavor.)
- Parchment paper or a light silicone mat(Easy cleanup and prevents sticking.)
- Baking sheet or shallow tray(Single-layer placement matters.)
- Meat thermometer(Internal temp must reach 165°F (74°C).)
- Oven-safe tongs or spatula(Safe handling while hot.)
- Optional flavor boosters (lemon zest, dried herbs)(Enhances brightness or aroma.)
Steps
Estimated time: 25-35 minutes
- 1
Preheat to 425°F (218°C)
Power up the toaster oven and let it reach 425°F before you introduce the chicken. A hot start helps seal in juices and develop a golden crust on contact.
Tip: If your model doesn’t preheat quickly, give it 5 extra minutes and use a rack to maximize air circulation. - 2
Prepare the chicken
Pat breasts dry with paper towels to remove surface moisture, trim any excess fat, and brush lightly with oil.
Tip: Dry surface = better browning; oil helps spices stick and crust form. - 3
Season generously
Evenly season all sides with salt, pepper, garlic powder, and paprika. For extra flavor, add dried herbs or lemon zest.
Tip: Season at least 5 minutes before baking to let flavors adhere. - 4
Set up the pan
Place the chicken on parchment-lined parchment or a silicone mat in a single layer on a baking sheet.
Tip: Space breasts apart; crowding can cause steaming instead of browning. - 5
Bake to doneness
Cook 12–15 minutes for ~1-inch breasts; thicker pieces may need 16–18 minutes. Check with a thermometer toward the end.
Tip: Start checking at 12 minutes; rely on 165°F (74°C) as the finish line. - 6
Rest before slicing
Remove from heat and let the chicken rest 5 minutes to redistribute juices.
Tip: Resting prevents a dry bite and improves tenderness. - 7
Serve or store
Slice against the grain and serve immediately, or refrigerate promptly for later meals.
Tip: Cool to room temperature briefly, then refrigerate in a shallow container.
Your Questions Answered
Can I cook frozen chicken breast in a toaster oven?
Cooking from frozen is possible, but thawing first yields more even cooking and texture. If you must cook from frozen, extend time by about 50% and verify doneness with a thermometer.
Yes, you can cook from frozen, but thawing first gives the best texture. If needed, extend by about half the time and check the internal temperature.
What is the safe internal temperature for chicken breast?
The safe internal temperature is 165°F (74°C). Use a meat thermometer to check the thickest part before removing from heat.
165 degrees Fahrenheit is the safe doneness temperature; check with a thermometer.
Should I flip the chicken halfway through cooking?
Flipping helps achieve even browning on both sides. It’s not strictly required, but it improves appearance and texture.
Yes, flipping halfway helps browning evenly.
How thick should the chicken breast be for toaster oven cooking?
Aim for about 1 inch (2.5 cm) thick for even cooking in a toaster oven. Thicker pieces may need longer cooking and careful checking.
About one inch thick is ideal; thicker pieces take longer and require checks.
Can I cook bone-in chicken in a toaster oven?
Boneless breasts cook more evenly in a toaster oven. If using bone-in pieces, expect longer times and variable results.
Bone-in can work but isn’t ideal for even results; adjust time accordingly.
How can I tell when it’s done without a thermometer?
Opaqueness and juices running clear are cues, but a thermometer remains the best method. Without one, check the thickest part carefully.
Without a thermometer, look for opaque meat and clear juices, but use a thermometer if possible.
Watch Video
Key Takeaways
- Preheat properly for browning and even cooking
- Keep a single, evenly thick layer for best results
- 165°F is the benchmark for doneness
- Rest before slicing to maximize juiciness
- Experiment with spice blends for flavor variety