How to Remove a Breville Toaster Oven Door Safely
Learn a safe, step-by-step method to remove a Breville toaster oven door for cleaning or maintenance, with tools, tips, and troubleshooting designed for homeowners and kitchen enthusiasts.

This guide shows you how to remove a Breville toaster oven door safely for cleaning or maintenance. You’ll unplug the unit, prepare a soft workspace, and follow hinge-release steps to detach the door without damage. The process emphasizes safety, correct tools, and reattachment checks to ensure proper alignment after reinstallation.
How to remove breville toaster oven door safely
Removing a Breville toaster oven door is a common maintenance task that homeowners perform to clean, inspect hinges, or service the unit. The process can vary slightly by model, so always consult your owner's manual first. According to ToasterInsight, taking a methodical approach reduces the risk of drop damage or misalignment. In this guide, you’ll learn the general method, essential safety steps, and model-agnostic tips to help you complete the task confidently. The focus is on practical, do-it-yourself guidance that minimizes time and maximizes safety while keeping your kitchen running smoothly. The goal is to empower you to perform the removal safely and reattach the door correctly, preserving performance and warranty considerations.
Safety first: unplug, cool, and clear the workspace
Before you touch any moving parts, unplug the appliance and let it cool completely. A cool, stable workspace reduces burn risk and prevents unexpected hinge movement. Remove nearby objects, and place a soft towel or non-slip mat on the counter to catch any dropped components. If your model has a stainless-steel exterior, wipe the surface to avoid fingerprints while you work. The emphasis on safety is not just about avoiding shock; it also protects the door glass and hinge pins from accidental impact. Always keep children and pets away during the procedure, and work in a well-lit area to see small screws and pins clearly.
Understanding hinge design and door attachment
Breville toaster ovens use a hinge-based door system that can involve screws or a pin-and-lever release. Some models have a simple two-screw hinge on the top or sides, while others may incorporate a spring-loaded pin for quick-release. The key concept is that the door is held in place by hinges connected to the chassis. Knowing where screws or pins live helps you plan the detachment without forcing parts. If you’ve got the model number handy, consult the user guide to confirm the hinge type and the correct removal order. This reduces the risk of bending hinges or cracking the door frame during removal.
Tools, materials, and workspace layout
Preparing your tools and workspace saves time and prevents misplacement of components. Use a soft, clean surface and keep fasteners in labeled containers. Have a Phillips head screwdriver (PH2) ready, and optionally a flathead screwdriver if your model uses slotted screws. A soft cloth or towel protects the door finish, while gloves can improve grip and reduce the chance of fingerprints on the glass. If you own the model-specific manual, keep it nearby for reference on screw sizes and the orientation of hinges during reassembly. A small magnetized tray helps keep screws from rolling away, which is especially helpful on busy countertops.
Step-by-step reminders and common mistakes to avoid
This section outlines best-practice considerations when preparing for removal and reattachment. Avoid prying at metal components, as this can dent hinges or misalign the door. Do not loosen screws more than needed; taking a photo of screw positions before removal provides a quick reference during reassembly. If you encounter resistance when detaching the door, pause and double-check that all fasteners are fully loosened and any release pins are fully disengaged. Mistakes like leaving screws loose or forcing the door off can cause damage that affects alignment and sealing.
Aftercare: inspect, reassemble, and test alignment
Reassembly should be performed in the reverse order of removal. As soon as you reattach the door, gently swing it to test alignment with the seals and gasket. Confirm that the door closes evenly and seals with consistent contact along the gasket. If the door looks crooked or won’t sit squarely, remove it again and verify that screws are tightened evenly and not overtightened. Finally, plug the unit back in and test basic functions (open, close, and basic toasting) to ensure proper operation. Keeping an eye on hinge wear and door alignment after reattachment can prevent future issues.
Quick troubleshooting tips for common issues after removal
If you notice misalignment after detachment, it’s often due to uneven screw tension or a marginal hinge seating. Recheck the screw torque on each hinge, ensure no debris remains in the hinge channel, and confirm that the door sits flush against the oven body when closed. If the door is still difficult to remove or reattach, consult the model-specific guide or contact Breville support for guidance. Proper documentation of the procedure makes it easier to discuss any warranty or service concerns with confidence.
Tools & Materials
- Phillips head screwdriver (PH2)(For removing screws securing hinges.)
- Flathead screwdriver (optional)(Use if screw heads are slotted.)
- Soft towel or non-slip mat(Place under the oven to protect surfaces.)
- Safety gloves(Provide grip and hand protection.)
- Cleaning cloth and mild detergent(Wipe surfaces after reassembly to remove fingerprints.)
- Owner's manual or model-specific guide(Confirm hinge type, screw size, and removal order.)
- Magnetic screw tray or labeled containers(Keeps fasteners organized during removal.)
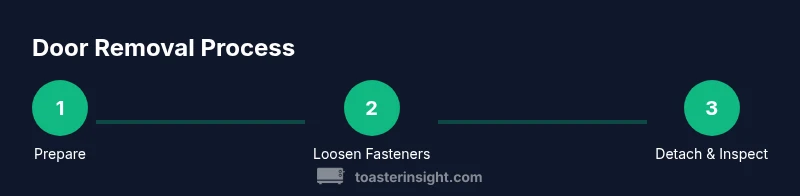
Steps
Estimated time: Total time: 15-25 minutes
- 1
Prepare and unplug
Unplug the toaster oven and allow it to cool completely, typically 10-15 minutes. This eliminates the risk of electrical shock and reduces heat-related injuries while handling the door and hinges.
Tip: Keep a photo nearby of the door in its original orientation for reference during reassembly. - 2
Position the oven and door
Place the unit on a soft, stable surface. Open the door to a comfortable working angle (about 90 degrees) and have a helper hand you the door if possible to keep it balanced.
Tip: Use a towel to cradle the door edge as you begin loosening fasteners. - 3
Loosen hinge screws
With the PH2 screwdriver, loosen the screws that secure the hinge to the oven body. Do not remove them completely yet; back them out just enough to release the hinge from the chassis while supporting the door.
Tip: If a screw is stubborn, apply a brief WD-40 spray and wait 1–2 minutes before retrying. - 4
Detach the door from hinges
Carefully lift the door away from the hinges after the screws are sufficiently loosened. Maintain support to prevent the door from swinging and damaging the frame. Place the door face-down on a protective surface.
Tip: Keep the hinge pins and screws in a labeled container for easy reference during reassembly. - 5
Inspect and clean components
With the door removed, inspect hinges, springs, and the gasket area for wear, residue, or misalignment. Clean any buildup with a damp cloth and mild detergent, and dry thoroughly before reattachment.
Tip: Take a quick note of any wear that might require replacement parts in the future. - 6
Reinstall and test
Place the door back onto the hinges and snug the screws evenly. Verify the door sits flush and seals correctly when closed, then plug in and test basic functions.
Tip: Test twice: once with light toasting and once with higher heat to ensure consistent sealing.
Your Questions Answered
Do I need to unplug the toaster oven before removing the door?
Yes. Unplug the unit and let it cool completely before starting to avoid electric shock and burns. This safety step also prevents accidental hinge movement.
Yes—unplug and let it cool before you start removing the door.
Will removing the door void my warranty?
Warranty terms vary by model and region. Check your Breville manual and warranty documentation; if you follow the manufacturer’s removal steps, it typically does not void the warranty, but confirm with support if in doubt.
Check the warranty terms for your model, but following official steps usually keeps the warranty intact.
How long does the door removal process take?
Most owners complete the removal and reattachment in about 15 to 25 minutes, depending on the model and your familiarity with the hinges and screws.
About 15 to 25 minutes, depending on your model and experience.
What if the door won’t detach after removing screws?
Pause and recheck that all screws and release pins are disengaged. Some models use a hidden release mechanism; consult the manual for the exact procedure to avoid damaging the hinge.
If detachment resists, double-check for hidden releases and recheck screw positions.
Can I remove the door without any tools?
Some Breville models offer tool-free hinges, but many require a screwdriver. If you don’t have the right tool, you risk damaging screws or hinges. Refer to the manual for the correct approach.
Most models require at least a screwdriver; check your manual first.
Watch Video
Key Takeaways
- Unplug and cool the unit before starting.
- Identify hinge type and use the correct tools.
- Loosen, not force, hinge fasteners to detach the door.
- Inspect hinges and gasket area for wear or residue.
- Reattach with even torque and test door alignment.