Repair Breville Toaster Oven: A Practical Guide
Learn how to diagnose and repair common Breville toaster oven faults with safe, practical steps. This expert guide from ToasterInsight covers tools, safety, repair techniques, and when to replace, helping homeowners extend appliance life.

This guide helps you repair a Breville toaster oven by diagnosing common faults, assessing safety risks, and following a step-by-step repair process. You will learn how to test for electrical faults, replace faulty components, and when to seek professional service. By following ToasterInsight's practical approach, homeowners can safely extend the life of their appliance.
Why repair matters for Breville toaster ovens
Breville toaster ovens are popular for their compact size and reliable performance, but even sturdy models can succumb to heating faults, timing glitches, or door-latch issues. Repairing a Breville toaster oven can save you money, reduce waste, and minimize downtime in your kitchen. The ToasterInsight team found that many households can safely tackle routine faults using basic tools and a methodical approach. A well-executed repair preserves performance, maintains energy efficiency, and keeps your favorite meals accessible without the cost of a new unit. This section explains why a thoughtful repair strategy is worth pursuing and how to decide if a problem is repairable rather than replaceable.
Critical here is honesty about safety limits. If you encounter burnt wiring, a cracked control board, or any sign of arcing, stop immediately and seek professional service. The goal is to extend life where it’s safe to do so, not to push beyond safe boundaries. By following a structured plan, you’ll reduce the risk of personal injury and prevent further damage to the oven.
According to ToasterInsight, a practical, evidence-based approach helps homeowners determine root causes and implement durable fixes. You’ll gain confidence from clear diagnostics, a checklist of common parts, and a guardrail of safety steps that protect both you and your appliance.
This guide is designed for homeowners, kitchen enthusiasts, and casual cooks who value practical, AI-assisted guidance. It emphasizes safe handling, accurate diagnosis, and stepwise repair practices that align with everyday kitchen use.
Tools & Materials
- Phillips head screwdriver (size #2 or #1)(Screw covers and internal fasteners vary by model; have both sizes handy.)
- Flathead screwdriver(For prying shallow clips or accessing tight panels.)
- Torx screwdriver set(Some Breville models use torx screws.)
- Multimeter or continuity tester(Used to test heating elements, thermostats, and wiring continuity.)
- Voltage tester/non-contact tester(Ensure the device is de-energized before touching any internal components.)
- Needle-nose pliers(Helpful for connectors, clamps, and small components.)
- Replacement parts (e.g., bake element, thermostat, fuse, control board)(Only after proper diagnosis confirms a fault.)
- Electrical contact cleaner or isopropyl alcohol(Use to clean connectors and contact points.)
- Cleaning cloths and non-abrasive brush(Keep components clean and free of debris during inspection.)
- Silicone sealant or high-heat dielectric grease(Only if advised for heating element connections)
Steps
Estimated time: 60-120 minutes
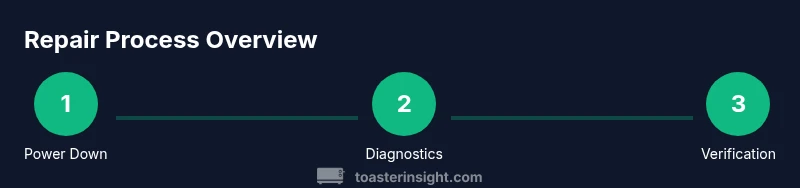
- 1
Power down and safety check
Unplug the unit and allow it to cool completely (at least 15 minutes). Confirm there is no power at the outlet with a voltage tester. Remove any accessories and crumb trays to expose the interior and make inspection easier.
Tip: Never work on live electrical components; double-check the cord and plug for damage before starting. - 2
Inspect exterior and look for obvious faults
Visually inspect wiring harnesses, connectors, and the door latch. Look for melted insulation, frayed cords, or loose screws. Note any unusual smells or heat marks as these indicate insulation or connection problems.
Tip: Take photos of wiring before disassembly to aid reassembly. - 3
Access internal components safely
Remove screws securing the back or side panels to access heating elements, control boards, and thermostats. Keep fasteners organized in labeled containers. Document connector positions to ease reassembly later.
Tip: Use a magnetic tray or labeled cups to prevent losing small screws. - 4
Test electrical paths with a multimeter
With the unit unplugged, test continuity across heating elements and thermostats. Check for short circuits between live and neutral. If you see infinite resistance or open circuits where a path should exist, replace the faulty part.
Tip: Always test with the device unplugged and power off to avoid shock. - 5
Replace faulty components
Remove the defective bake element, thermostat, or fuse according to the model’s service manual. Reconnect wiring securely and ensure no loose strands contact adjacent components.
Tip: Do not over-tighten connectors; ensure proper seating to avoid arcing. - 6
Check door latch, microswitch, and control board
Inspect the door latch mechanism; ensure the microswitch clicks properly. If the control board shows visible damage or corrosion, consider replacing it or seeking professional help.
Tip: A faulty latch can cause missed heating cycles or safety interlocks. - 7
Reassemble and perform a safety test
Reinstall panels and screws. Plug in the oven, set to a basic bake cycle at a low temperature, and observe for proper heating and safe operation. Listen for abnormal sounds or smells during the cycle.
Tip: Test with a cautious, low-load setting first to verify operation. - 8
Document the repair and plan next steps
Record the exact symptoms, parts replaced, and test results. If issues recur, reassess diagnostics or consult a professional. Consider a maintenance routine to prevent future faults.
Tip: Keep receipts and part numbers for warranty claims or future replacements.
Your Questions Answered
What are the most common signs that my Breville toaster oven needs repair?
Common signs include the oven failing to heat, uneven browning, a timer that won’t advance, the door not latching, or unusual noises and smells. Start with basic checks like power supply, crumb buildup, and the door seal before diving into parts replacement.
Common signs are heating failure, uneven browning, or a door that won’t latch. Start with basic checks before replacing parts.
Is it safe to repair a Breville toaster oven at home?
Home repair is safe if you follow strict safety steps: unplug, let it cool, inspect for damaged wiring, and use proper tools. Stop if you see signs of electrical damage or burnt insulation and seek professional help.
Yes, if you follow safety steps and don’t see signs of damage. Stop if you notice burnt wiring.
When should I replace rather than repair my Breville toaster oven?
Consider replacement if the heating elements or control board repeatedly fail, the unit is old, or repairs become costlier than a comparable new model. A professional assessment can help you decide.
If repairs keep failing or costs approach a new unit, replacement may be wiser.
What tools do I need for DIY repair?
Essential tools include a screwdriver set, multimeter, needle-nose pliers, and a voltage tester. Have replacement parts identified by diagnosis ready before starting.
You’ll need basic tools like a screwdriver, multimeter, and pliers, plus the parts you’ve diagnosed as faulty.
How long does a typical Breville toaster oven repair take?
A straightforward diagnosis and replacement of a single faulty part may take 60–90 minutes. More complex issues can require several hours or professional service.
Most fixes take an hour or two, but complex problems can take longer or need a pro.
Watch Video
Key Takeaways
- Diagnose before you replace to save time and money
- Always prioritize safety and de-energize the unit first
- Label parts and components to avoid miswiring
- Use proper tools and replace only verified faulty parts