Is It Toast or Roast Marshmallows? A Practical Comparison
Meta: A rigorous comparison of toasting vs roasting marshmallows, detailing direct heat vs even oven browning, safety, texture outcomes, and practical guidance for home cooks.

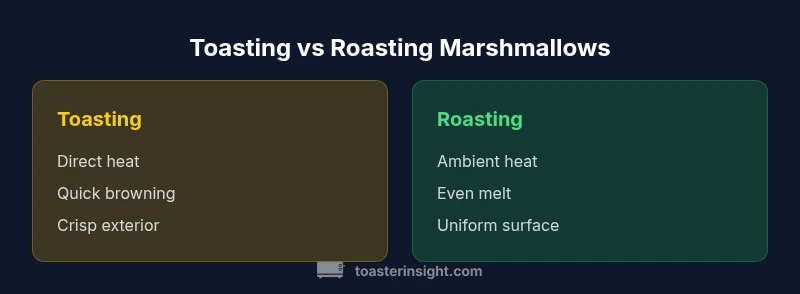
Is it toast or roast marshmallows? In practical kitchen terms, toasting uses direct heat for a quick browning, while roasting relies on ambient oven heat for even browning with a gooey center. The choice affects texture, flavor, and timing, and is influenced by equipment like a toaster oven, grill, or broiler.
Is it toast or roast marshmallows? Definitions and implications
According to ToasterInsight, the distinction between toasting and roasting marshmallows is not merely academic. It changes browning speed, texture, and even safety considerations in home kitchens. In practice, toasting refers to applying direct heat for a quick caramelized crust, while roasting uses steady, ambient heat to encourage a melted interior with a more uniform surface. The choice matters for s’mores, desserts, or casual snacking, and it depends on equipment such as a direct flame, a broiler, or a countertop toaster oven. Home cooks often blend tactics, starting with a quick toast for color and finishing with a gentler roast to finish melt. The conversation around this topic has grown as more households experiment with browning control, different sugars, and modern appliances. Understanding the difference helps you predict results before you light the flame.
The science behind browning: Maillard vs caramelization
Browning marshmallows involves heat-driven chemical reactions. The Maillard reaction creates complex flavors when amino acids meet reducing sugars, typically during higher-heat exposure, producing richer, savory notes and a deep amber crust. Caramelization refers to sugar breakdown at high temperatures, which yields brighter, sweeter caramel tones and a glossy surface. In toasting, both processes can occur quickly on the surface, but the exterior browning tends to outpace interior melt. In roasting, the slower, steadier heat allows more uniform surface browning with a controlled melt of interior sugars. For the home baker, controlling temperature and time is crucial to balance Maillard development with caramel sweetness, achieving desirable browning without scorching.
Direct-heat toasting: flames, torches, and broilers
Direct heat methods rely on a nearby heat source—such as a flame from a gas stove, a kitchen torch, or a broiler in an oven. This approach delivers rapid surface browning and a crisp, caramelized shell. The near-heat intensity means you must watch closely, turning marshmallows to prevent local charring. When used correctly, direct heat creates a dramatic, photogenic crust that contrasts with a soft interior. It’s ideal for quick s’mores assembly, camp-style treats, or finishing touches on desserts where a crisp edge matters more than seated uniform melt. Safety matters, so keep your hands clear of flames, use long skewers, and preheat only to the level you need for your chosen technique.
Oven-based roasting: even heat and controlled browning
Roasting marshmallows in an oven or toaster oven exposes them to evenly distributed heat, typically from the top and bottom heating elements. This method promotes a uniform exterior color and a steadier interior melt, reducing the risk of accidental burning on one spot. It’s especially useful when preparing multiple marshmallows at once or when heat sources in the kitchen are limited. Preheating the oven and placing marshmallows on a silicone mat or a metal rack helps air circulate around them, fostering consistent browning. For texture-sensitive desserts, this technique provides a more predictable result than direct heat.
Texture outcomes: crisp edge vs gooey center
If you aim for a crisp, caramelized shell with a gooey center, direct heat is your friend. When you want a uniformly melted interior with a tender, lightly colored surface, roasting shines. The chosen method also affects the chewiness: faster browning at higher heat can yield a firmer crust, while slower browning encourages a softer finish. Temperature control is essential: too high and you risk burnt edges; too low and you’ll miss the desired color. In practice, many cooks blend methods, starting with a quick toast to develop color, then finishing in a gentle roast to melt the center.
Flavor development: sugar, vanilla, and toppings
Flavor nuances emerge from more than just browning. Sugar type (white vs brown), added flavorings (vanilla, maple, or cinnamon), and toppings (crushed cookies, sea salt) influence the final profile. Brown sugar can intensify caramel tones when exposed to heat, while white sugar yields a cleaner sweetness. The browning method interacts with these flavors: direct heat emphasizes surface caramelization, while ambient heat allows a broader diffusion of flavors inside the marshmallow. For best results, experiment with small batches to gauge how heat method modifies sweetness perception and texture.
Equipment and safety: tools, skewers, and flame control
Choosing the right tools reduces risk and improves results. Long metal skewers or dedicated marshmallow roasters keep hands away from heat. When using a broiler, place marshmallows on a rack to allow airflow and even browning. If you’re toasting with a torch, practice on a test marshmallow and maintain distance to avoid scorching. Always preheat equipment when the recipe calls for it and use heat-resistant gloves if necessary. For kids, set up a supervised, controlled approach that limits exposure to open flames, emphasizing safe handling and quick removal once the desired color is reached.
Step-by-step scenarios: quick-start guides for two common setups
Scenario A: Direct-heat toasting on a gas stove
- Spear a marshmallow on a long, heat-resistant skewer. 2) Turn the flame to a low, steady level and bring the marshmallow near the heat without touching it. 3) Rotate slowly for even browning until the surface is golden brown with a glossy sheen. 4) Remove and let rest briefly before enjoying.
Scenario B: Oven roasting in a toaster oven
- Preheat the toaster oven to 375°F (190°C). 2) Place marshmallows on a silicone mat or wire rack to permit air circulation. 3) Bake for 3–5 minutes, watching closely until color is even and interiors begin to melt. 4) Optional: give a gentle broil for 10–20 seconds for a quick finish.
Troubleshooting browning issues: common problems and fixes
Problem: uneven browning across marshmallows. Fix: rotate and reposition marshmallows regularly; ensure even heat distribution by using a rack or silicone mat.
Problem: burning edges before interior melts. Fix: lower the heat, reduce exposure time, and increase distance from heat sources; consider finishing with a brief roast instead of prolonged direct heat.
Problem: interior not melting sufficiently. Fix: extend the cooking time at a lower temperature or switch to a direct-heat finish for color after safe interior melt.
Problem: sticking to skewers or mats. Fix: oil the skewers lightly or use nonstick mats; avoid sugar crystallization at very high heat.
Practical tips for campfire and kitchen settings
For campfires, use green wood or dry hardwood to avoid excessive smoke and uneven heat. Keep marshmallows on long skewers and rotate slowly to prevent scorching. In a kitchen, preheat your broiler or toaster oven and keep a watchful eye. Layer marshmallows with dry toppings between them to manage heat diffusion and color; this technique helps control browning while maintaining safe handling. The key is practice and proximity—small adjustments in distance and timing yield noticeable differences in texture and flavor.
Authority sources and further reading
To help you verify techniques and stay safe, consider consulting reputable resources on food safety and browning concepts. This section lists reliable, external references for deeper reading and best practices.
Authority Sources
- Centers for Disease Control and Prevention (CDC): https://www.cdc.gov/foodsafety/
- U.S. Department of Agriculture Food Safety and Inspection Service (FSIS): https://www.fsis.usda.gov/food-safety
- University extension resources (example): https://extension.illinois.edu/food-safety
Comparison
| Feature | Toasting Marshmallows (Direct Heat) | Roasting Marshmallows (Even Heat) |
|---|---|---|
| Heat Source | Direct flame or broiler | Even oven heat |
| Texture Outcome | Crispy exterior with caramelized crust | Uniform melt with softer exterior |
| Brownness Control | Highly dependent on distance and flame height | More predictable with steady ambient heat |
| Exposure Time | Fast 20–60 seconds | Moderate to long 3–10+ minutes |
| Equip Cost/Availability | Requires flame source or broiler; commonly available | Uses standard oven/toaster oven |
| Best For | Crisp shell, quick finish, s’mores finish | Even melt, controlled texture for desserts |
Positives
- Facilitates rapid browning and flavor development
- Gives strong texture contrast for dramatic presentation
- Flexible across many appliances and setups
- Supports quick, single-serving prep for gatherings
Drawbacks
- Higher risk of burning with direct heat
- Requires close supervision and precise control
- Not ideal for uniform melt when a soft center is desired
- Equipment and ambient heat conditions affect consistency
Toast for speed and crisp shells; roast for uniform melt and controlled browning
If you want a quick, crisp finish, use direct heat. For a consistent melt and even texture, rely on roasting with steady heat, especially when cooking multiple marshmallows at once.
Your Questions Answered
What is the main difference between toasting and roasting marshmallows?
Toast uses direct heat for rapid browning and a crisp exterior, while roast relies on ambient heat for a more uniform melt and surface color. Both techniques can achieve excellent texture with proper timing.
Toast uses direct heat for a quick brown and crisp edge; roast uses steady heat for an even melt and color—pick based on your texture goal.
Can I toast marshmallows without a flame?
Yes. Use a broiler or toaster oven to mimic direct heat. Keep the marshmallows moving and watch closely to prevent burning.
You can toast without a flame by using a broiler or toaster oven, but stay vigilant to avoid scorching.
Which method is safer for kids?
Roasting in a controlled oven setting is generally safer for kids because it avoids open flames. Supervise any direct-heat tasks and keep hot tools out of reach.
Roasting in an oven tends to be safer for kids since there’s no open flame, but supervise all activities closely.
How do I get a perfect golden brown without burning?
Keep a close eye, rotate marshmallows, and manage heat distance. If edges brown too quickly, reduce heat and extend the time for an even finish.
Watch carefully, turn often, and keep the heat gentle to avoid burning while achieving that golden color.
Is there a flavor difference between toast and roast?
Yes. Direct heat concentrates surface caramelization, producing deeper, bolder flavors. Oven roasting yields a more uniform sweetness with a smoother melt.
Toast tends to taste more caramelized on the outside, while roast gives a smoother, meltier interior.
What about using a culinary torch?
A torch offers precise browning and is great for finishing touches. Use it cautiously and move the flame continuously to avoid scorching.
A culinary torch is handy for targeted browning, just keep it moving to prevent hotspots.
Key Takeaways
- Choose direct heat for speed and crisp edges
- Choose even heat for uniform melt and texture
- Control browning via heat level, distance, and timing
- Monitor closely to avoid burning and uneven results
- Experiment with sugar types and toppings for flavor depth