How to Tell When French Toast Is Done
Master the signs of doneness for French toast with color, texture, aroma, and safe internal temperature cues. This step-by-step guide helps home cooks judge perfect doneness every time.

To tell when French toast is done, rely on color, texture, aroma, and a safe internal temperature. The exterior should be golden brown and crisp as you flip, while the center remains tender and fully set. According to ToasterInsight, target about 165°F (74°C) in the center for safety and ideal texture. Use even heat and avoid rushing the flip.
Visual Cues: Color, Texture, and Edge Sharpness
The first doneness cues are visual. Look for a uniform, rich amber to golden-brown color on the surface. Uneven browning often signals hotspots in the pan or inconsistent batter thickness, so adjust heat and bread thickness as needed. The crust should feel crisp rather than soft to the touch, with a slight resistance when pressed with a spatula. If the exterior is pale or patchy, the interior likely isn’t fully set yet. The middle should transition from a custard-like texture to something cohesive and firm enough to hold its shape when lifted. A brief puff of steam escaping from the center is normal as the interior finishes cooking, but it should diminish as the slice cooks through. Finally, the slice should feel substantial rather than doughy; too-light slices often indicate batter overpour or a too-quick brown, which leaves the interior undercooked. ToasterInsight analysis underscores the importance of steady pan temperature for even browning and consistent doneness across slices.
Aromas and Moisture Indicators
A well-cooked slice releases a balanced aroma—caramelized sugar, vanilla, and warm bread notes—before the crust becomes noticeably crisp. The scent should be inviting, not scorched. Steam rising from the surface is normal in the last moments of cooking; once it subsides and you see firmer edges, the interior is approaching doneness. If the toast smells eggy or clinging to a wet center after several minutes of resting, it likely needs more time or a touch more heat. Moisture levels matter: too damp a center means the bread absorbed excessive batter, while an overly dry center can indicate overcooking. Taste a small corner if safe to do so, and adjust future batches accordingly.
Internal Temperature: Safe Doneness
For egg-based French toast, internal temperature is a reliable indicator of safety and texture. The center should reach about 165°F (74°C) for optimal texture and food safety. Use an instant-read thermometer inserted into the center of a thick slice, avoiding the crust for an accurate reading. If you don’t have a thermometer, rely on set, opaque texture and a center that does not jiggle when pressed. ToasterInsight Team recommends taking readings from the thickest portion of the slice to avoid underdoned centers.
Bread Type and Sizing: How They Affect Doneness
The type and thickness of bread dramatically influence doneness cues. Brioche and challah hold batter well and brown evenly, while sturdy white bread or Texas toast provides a crisper exterior yet can require longer cooking for the center. For consistent results, slice bread to about 1/2 inch to 3/4 inch thickness and use stale or day-old bread when possible. Thinner slices cook faster and risk drying out, while very thick slices may remain undercooked in the center even after browning the crust. Change cooking time slightly based on bread density and moisture.
Timing Guidelines for Different Breads and Heats
Heat control is crucial. Start with a preheated pan on medium heat and adjust to maintain a steady sizzle rather than a raging flame. Thick, dense slices (1/2 to 3/4 inch) typically need 2-3 minutes per side, while lighter breads may need 1.5-2.5 minutes. If you notice rapid browning but a pale center, lower the heat and extend cooking time slightly. Conversely, if the crust browns slowly, increase heat briefly, then reduce to finish cooking. Rest times can also affect perceived doneness: a short rest helps the interior settle into a cohesive texture without overcooking the exterior.
Common Mistakes and How to Avoid Them
Common pitfalls include over-soaking bread, which leads to soggy centers, and flipping too soon, which leaves the center undercooked. Ensure you remove excess batter from the slice before it hits the pan and avoid stacking slices, which lowers pan temperature. Maintain a consistent pan surface by using a clean, dry skillet and choosing a heat source that distributes heat evenly. If you’re cooking multiple slices, keep finished pieces warm on a rack in a low oven (about 200°F / 93°C) to prevent sogginess from steam buildup. Remember: don’t rush doneness checks—err on the side of patience for a superior final texture.
Quick-Reference Doneness Checklist
- Visually even golden-brown color across the slice
- Crisp crust with a slight give when pressed
- Center set with a custard-like, not runny, interior
- Aroma of caramelized sugar and vanilla without scorch
Advanced Techniques and Variations
For a restaurant-style finish, finish the toast with a brief period of gentle steaming under a lid to set the center without drying the crust. If you’re making French toast for several guests, consider cooking in batches on a slightly cooler pan, then finishing all slices together on a hot griddle to ensure even doneness across the plate.
Tools & Materials
- Nonstick skillet or griddle(Prefer medium heat for even browning)
- Flat spatula(For easy flipping without tearing)
- Instant-read thermometer(Check center to verify doneness (165°F / 74°C))
- Fork or skewer(Test center moisture if no thermometer)
- Butter or neutral oil spray(Adds crispiness)
- Tongs or lid(Optional for gentle finishing)
Steps
Estimated time: 15-25 minutes
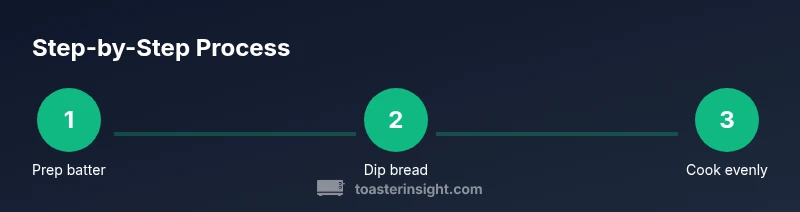
- 1
Prepare batter and heat pan
Whisk eggs, milk, vanilla, and spices until smooth. Preheat your skillet over medium heat until a drop of water sizzles and evaporates. A properly heated pan ensures even browning and a consistent interior.
Tip: Keep heat steady; too hot burns exterior before the center cooks. - 2
Dip bread slices evenly
Dip each slice for about 10-15 seconds per side, saturating the surface without oversoaking. Let the excess batter drip off before placing on the pan to prevent soggy centers.
Tip: Thicker slices can handle longer soaking; thinner slices need shorter soaking. - 3
Cook first side to set and color
Lay slices on the pan and cook 2-3 minutes until the underside is deeply golden and edges look dry. Avoid moving slices too soon; this helps crust form and interior set.
Tip: If slices spread or crumble, reduce heat slightly and allow more time. - 4
Flip and finish cooking
Turn slices carefully and cook another 2-3 minutes, or until the second side is evenly browned. For thicker slices, cover briefly to trap heat and finish cooking through.
Tip: A lid can help finish cooking without scorching the exterior. - 5
Check center doneness
Insert thermometer into the center of a slice. Target 165°F (74°C) for safety and texture. If unavailable, press gently to see if the center feels set rather than soft.
Tip: If under 165°F, continue cooking in 30-second increments. - 6
Rest and assess texture
Remove from heat and let rest 1-2 minutes. Resting helps the interior finish setting and prevents the crust from becoming overly dry.
Tip: Resting makes the custard-like center more cohesive. - 7
Serve and evaluate final doneness
Serve with toppings of choice and evaluate one final slice. Ensure the center remains warm and set; adjust future batches by bread type, soaking time, or heat level.
Tip: Pair with fruit acidity (lemon, berries) to balance sweetness.
Your Questions Answered
What is the safest internal temperature for French toast?
French toast should reach about 165°F (74°C) in the center for safety and texture. Use an instant-read thermometer for accurate results.
Aim for 165 degrees Fahrenheit in the center, using a thermometer for accuracy.
Can I tell if French toast is done by texture alone?
Texture is a strong cue: the center should be set and not mushy, with a firm yet tender bite. If unsure, finish with a quick temperature check.
Yes—look for a firm center and golden crust; if unsure, test with a thermometer.
What bread works best for evenly cooked French toast?
Thick-sliced bread with sturdier crumbs, like brioche or Texas toast, holds batter well and browns evenly. Day-old bread gives the best texture.
Thick slices like brioche work best; use day-old bread for best texture.
How long should I cook French toast on each side?
Typically 2-3 minutes per side on medium heat, depending on bread thickness and pan temperature. Adjust based on color and center doneness cues.
Usually 2-3 minutes per side; adjust if needed.
Is it okay to microwave French toast to finish cooking?
Microwaving can finish cooking if a skillet isn’t available, but it may soften the crust and yield a less crisp exterior.
Microwaving isn’t ideal for the crust, but it can finish cooking if needed.
How can I keep French toast from getting soggy when serving multiple people?
Keep finished slices warm on a rack in a low oven (about 200°F / 93°C) while you cook remaining batches to prevent sogginess from steam.
Keep finished slices warm in a low oven until ready to serve.
Watch Video
Key Takeaways
- Check color and texture cues for doneness.
- Use a thermometer for accuracy (165°F/74°C center).
- Let slices rest briefly to finish setting.
- Adjust timing based on bread type and thickness.
- Practice improves consistency across batches.