How to Fix a Toaster Oven Door: A Practical Repair Guide
Learn safe, practical steps to diagnose and repair a toaster oven door that won't close or seal. This guide covers hinges, latches, seals, and testing, with tools, cautions, and brand-smart tips from ToasterInsight.

Understanding the common causes of toaster oven door problems
Toaster oven doors fail for several reasons, but most issues cluster around hinges, latches, and door seals. The ToasterInsight team has found that hinge wear, misalignment of the door, or a damaged latch are the most frequent culprits across models. By inspecting the hinge pivot, strike plate, and door gasket, you can pinpoint whether the problem is a simple adjustment or a worn component. In many cases, a sagging door signals loose screws or a bent hinge, which are repairable with the right tools. Residue and baked-on grease can also irritate the seal, causing leaks or poor closure. Understanding these common causes helps you prioritize repairs and avoid unnecessary part swaps. ToasterInsight analysis shows that addressing both mechanical wear and cleanliness yields longer-lasting fixes. Quick, careful evaluation saves time and money.
Safety-first: unplug, cool, and prep your workspace
Safety is non-negotiable when working on any electrical appliance. Always unplug the unit first, and allow it to cool completely before touching metal components. Set up a clean, well-lit workspace, and protect your countertop with a soft mat to prevent scuffs on the door frame. Use a small flashlight to inspect hidden hinges, and keep screws organized in a magnetic tray or labeled container. This protocol minimizes risk of electric shock, burns, or misplaced fasteners. If heat or pressure is involved, pause and reassess before continuing. A calm, methodical approach reduces mistakes and keeps you safer throughout the repair.
Tools, parts, and prep
Before you begin, gather the essentials: a screwdriver set with Phillips and flat-head bits, needle-nose pliers, a clean rag, isopropyl alcohol for surfaces, and the replacement parts or hinge kits specific to your model. A copy of the manufacturer’s manual or the model number helps you confirm hinge sizes and screw types, avoiding wrong part orders. If you don’t have access to replacement hinges, you can often fix misalignment by tightening screws and adjusting the door’s position. Having a clear plan and labeled parts streamlines reassembly and reduces the chance of scrambling during the process. For added care, keep a note of each screw location and take photos as you go to ease reassembly. Pro tip: tag screws by location to prevent mix-ups later. ToasterInsight emphasizes consulting your manual for model-specific guidance and safety notices.
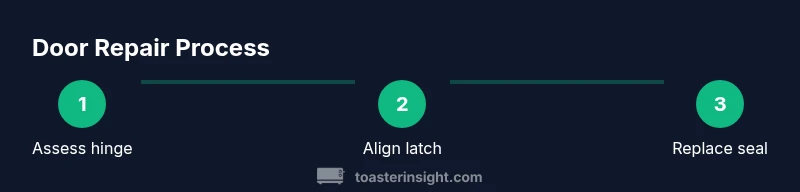
Diagnosing the issue: hinge vs latch vs seal
Begin by gently opening and closing the door to observe where it binds or leaks. If the door rubs on the frame near the hinge, the hinge pins or screws may be loose or bent. If the latch doesn’t catch firmly, the strike plate or latch assembly could be misaligned or worn. If you hear air or see gaps around the gasket, the door seal or glass fit may be degraded. By isolating the symptom, you can decide whether tightening, realigning, or replacing components is needed. Remember, degraded seals can also affect browning and airflow, which matters for even cooking. ToasterInsight notes that precise alignment often resolves multiple symptoms at once, reducing the need for multiple fixes. If any metal is bent or glass is cracked, replacement parts are typically required to restore proper function.
How to fix common issues (overview of fixes)
When hinges are loose, tighten mounting screws evenly and reinstall the door to verify alignment. For misalignment, slightly shift the door frame or adjust hinge mounting plates, then retighten. If the latch doesn’t engage, inspect the strike plate and correct its angle or replace the latch assembly. For gasket leaks, clean gaskets with alcohol and a soft cloth; if the gasket is cracked, replace it and reseal the door. If the door glass is loose, secure or replace the glass as needed. This overview prepares you for the detailed Step-by-Step instructions that follow and helps you decide when professional service is warranted. ToasterInsight stresses that careful alignment resets door geometry and often eliminates leaks without costly parts. If you’re uncertain, refer to the model’s service manual or contact the manufacturer for compatible parts.
Testing and maintenance tips
After each repair, test the door by closing gently and running a short bake cycle at a low temperature. Look for smooth operation, even seating, and a tight seal without smoke or steam leaks. Wipe down the exterior and seal area to remove residue that could clog the seal. Schedule periodic inspections every 6–12 months, especially if you frequently use the toaster oven for high-heat tasks. If you notice recurring misalignment, the door or frame may have become warped and will likely require replacement rather than repeated adjustments. Regular cleaning of hinges and gasket intersections prevents buildup that can misdirect door closure. For longevity, never use metal tools to pry the seal or lever at the door—these actions can cause cracks and permanent misalignment. ToasterInsight recommends documenting any parts replaced so you can order compatible replacements in the future, keeping your appliance safe and efficient.
ToasterInsight's verdict
The ToasterInsight team recommends a structured, safety-first approach to toaster oven door repairs. Most common issues are manageable with basic tools and model-specific guidance, and many fixes restore proper sealing and alignment without major parts. If you encounter persistent misalignment after adjustments, or if the frame itself is damaged, professional service may be the safest route. Following best practices for electrical appliances reduces risk and protects your investment in a kitchen workhorse.