How to Stop a Toaster Oven Timer
A practical guide to stop a stubborn toaster oven timer safely, with quick fixes, maintenance tips, and when to call a pro. Learn effective methods to stop the timer and keep your unit reliable.

To stop a toaster oven timer, unplug the unit, wait 15 seconds, then plug it back in and rotate the dial to OFF. If your model uses a cancel button, press it firmly to reset. For stubborn timers, manually turn the dial to OFF and perform a quick test bake. This quick method prioritizes safety and minimizes wear.
how to stop toaster oven timer: Understanding Timer Mechanisms
Toaster ovens rely on a mix of mechanical and electronic components to manage cooking time. The most common setups combine a mechanical dial connected to a countdown timer and a micro-switch or relay that triggers the bake cycle when the dial hits zero. Some newer models swap the dial for a digital timer that counts down and beeps or shuts off automatically. Understanding these basics helps you diagnose why the timer won’t stop and what to do next. When you search for guidance on how to stop toaster oven timer, you’ll notice two common patterns: mechanical timers that rely on physical contact, and electronic timers that depend on internal circuitry. In both cases, problems usually fall into two categories: a stuck control (dial or knob) or an electrical fault (worn contacts, faulty relay). The ToasterInsight team recommends starting with the simplest cause—a sticky dial—before moving to internal wiring. Maintaining clean, dry controls keeps the timer responsive and reduces the risk of unwanted beeps or ongoing heating.
Effective Approaches Across Models
Different toaster ovens have slightly different timer topologies, but the core principles stay the same. Mechanical timers usually rely on a spring-and-drum assembly that completes the circuit when the dial turns to the end. Digital timers use microcontrollers to count down and a relay to cut power. Both designs benefit from regular cleaning and gentle inspection. If you’re asking how to stop toaster oven timer effectively, begin with the simplest fix: ensure the dial isn’t jammed by crumbs or sticky residue. A quick wipe around the dial and the control bay can restore smooth operation. If the unit still beeps or continues heating after you think it’s stopped, the problem may lie deeper in the control board or the timer switch. At that point, consult the manufacturer’s service guide or a trained technician.
Safety First: Why Stopping the Timer Matters
A timer that won’t stop can keep heating elements energized inadvertently, posing burn risks or damage to cookware and the interior lining. Unplugging the appliance before any inspection is essential. If you have a model with a beeping timer, avoid pressing random buttons in a panic; use the documented reset steps. For homeowners, understanding the difference between a stuck dial and an electrical fault is key to deciding whether a fix is a quick DIY job or a professional repair.
Common Causes in Everyday Use
Dust buildup, spilled liquids, or residual food particles can cause a timer dial to stick or a switch to misread the end-of-cycle position. Wear on the timer’s physical components—knobs, gears, and contact springs—over time can diminish responsiveness. In digital timers, software glitches or a faulty relay can create phantom beeps or continuous operation. The most reliable path to stopping the timer is identifying whether the issue is mechanical or electronic, then following model-specific steps. ToasterInsight’s analysis suggests that most timer issues stem from dirt or wear in the control area, which can often be resolved with a careful cleaning and reseating of the knob.
Environmental and Cleaning Considerations
Keep the timer housing dry and free from excessive moisture. Regularly remove crumbs from around the dial using a soft brush or compressed air. When cleaning, avoid harsh solvents that can degrade plastic components or internal wiring. A light wipe with a damp cloth followed by a dry microfiber is usually sufficient. If you must access the internal mechanism, make sure the unit is unplugged and cooled. Once reassembled, test the timer with a short bake cycle to confirm it no longer remains active after the set time.
Practical Maintenance Schedule for Longevity
Create a simple quarterly maintenance routine: unplug the unit, wipe down the exterior, inspect the dial and knob for looseness, and test the timer. If you notice intermittent beeps or drift in timing, consider lubricating the moving parts with a manufacturer-approved silicone spray (only if the service manual permits). For models with replaceable timer modules, ensure you have the correct part number before ordering. A proactive approach reduces the chance of a stubborn timer becoming a chronic issue and extends the life of the appliance.
ToasterInsight Verdict: When to Seek Professional Help
If the timer problem persists after cleaning and basic adjustments, or if you notice burnt smells, exposed wiring, or overheating, contact a qualified technician. The ToasterInsight team recommends consulting the manufacturer’s service channel for recalls or warranty coverage before attempting major repairs. Replacing the timer module or control board may be more cost-effective than attempting a DIY fix on an older unit. Remember: safety first, and when in doubt, call a pro.
Final Thoughts and Quick Reference
Stopping a stubborn toaster oven timer is usually a matter of safety-first power cycling, then stepwise inspection. Start with unplugging, reset, and dial adjustment, then move to cleaning and testing. With consistent maintenance and careful part replacement when needed, you can extend the life of your toaster oven and prevent timer-related frustrations.
Tools & Materials
- Phillips head screwdriver(Size #1 or #2 depending on model screws)
- Flathead screwdriver(For prying if needed)
- Soft brush(Dust and crumb removal around timer housing)
- Lint-free cloth(Wipe surfaces without leaving fibers)
- Isopropyl alcohol wipes(Used for stubborn grime on contacts)
- Digital multimeter(Optional, for testing continuity)
- Replacement timer knob(Only if knob is worn or damaged)
Steps
Estimated time: 30-60 minutes
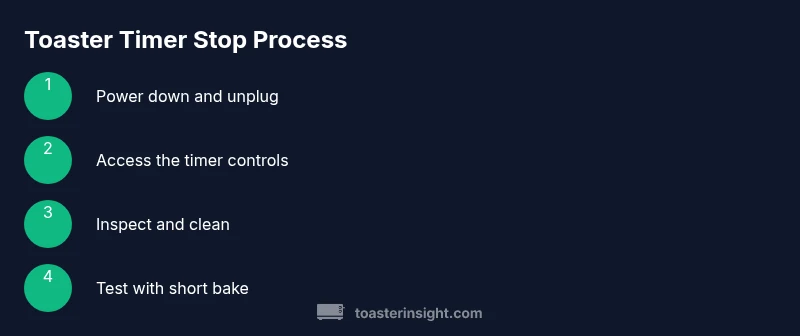
- 1
Power down and unplug
Always start by unplugging the unit and letting it cool completely. This prevents electric shock and accidental activation while inspecting the timer mechanisms.
Tip: Confirm the outlet is not controlled by a wall switch during the inspection. - 2
Access the timer controls
Carefully remove the outer casing following the manufacturer’s service instructions. Keep track of all screws and small parts so you can reassemble correctly.
Tip: Take photos during disassembly to aid reassembly. - 3
Inspect for sticking or wear
Check the dial, knob, and feedback lever for crumbs, rust, or worn gears. Gently move the dial through its range to feel for resistance or unusual catches.
Tip: Use a soft brush to dislodge dust without forcing parts. - 4
Clean and reseat components
Wipe contacts with isopropyl wipes if needed, then reseat the dial and knob ensuring proper alignment with the cam and switch.
Tip: Avoid excessive moisture near electrical connections. - 5
Test the timer with a short bake
Reconnect power and run a brief bake cycle to observe whether the timer stops as expected after the set time.
Tip: If the timer still runs, proceed to step 6 instead of forcing assumptions. - 6
Evaluate whether a part replacement is needed
If cleaning and reseating do not fix the issue, assess whether the timer module or switch should be replaced.
Tip: Use manufacturer-approved parts and keep the model number handy. - 7
Reassemble and final test
Secure all screws, replace the outer casing, and perform a final bake test to confirm the timer behavior is corrected.
Tip: Keep the work area clear to avoid lost screws.
Your Questions Answered
What should I do first if the timer won't stop?
Start by unplugging the appliance, letting it cool, then resetting the timer and dial alignment. If the issue persists, perform a careful clean and inspect for sticking parts.
First unplug it, wait for it to cool, then reset the timer and check for a stuck dial. If it still acts up, proceed with a careful cleaning or call a pro.
Is unplugging always safe for all toaster ovens?
Unplugging is the safest first step whenever you work on any appliance. If the unit is hot, wait for it to cool completely before handling.
Yes, unplugging is the safest first step. If it's hot, wait for it to cool before you touch anything.
Can I disable the timer permanently?
Permanently disabling a timer is not recommended because it could overload the oven or cause overheating. Use proper reset methods and only replace defective parts.
Not recommended to disable permanently. Use the proper reset or replacement when needed.
When should I replace the timer module vs. buy a new oven?
If the timer is the sole fault and the unit is otherwise functional, replacing the timer module is often cost-effective. For older units with multiple issues, a replacement may be wiser.
If it's just the timer and the rest is fine, replace the timer. If there are broader problems, consider a new unit.
How long does a typical timer repair take?
A basic timer adjustment or cleaning typically takes under an hour. More complex replacements may take longer and require professional service.
Most repairs are under an hour, but replacements can take longer depending on the model.
Watch Video
Key Takeaways
- Unplug before inspection.
- Identify mechanical vs. electronic causes.
- Clean and reseat components for best results.
- Test with short bake cycles before replacement.