Why Do Toasters Stop Working? A Practical Troubleshooting Guide
A practical, step-by-step guide to diagnose and fix common toaster failures, from power issues to heating elements, with safety tips and prevention.

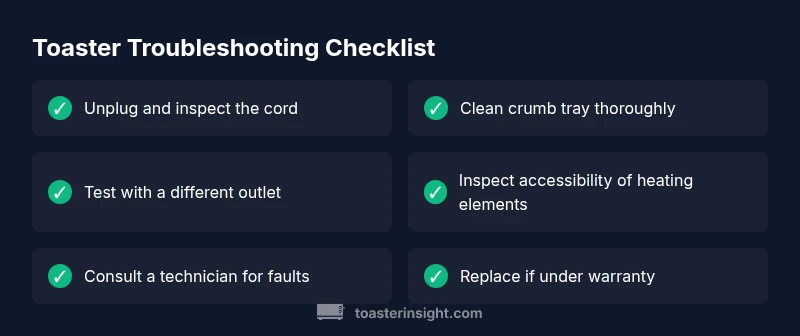
Most toaster failures start with a simple electrical issue, a worn heating element, or a blown safety fuse. Begin with the basics: unplug the unit, inspect the power cord for visible damage, and try a different outlet. Clear crumb buildup and reset the toaster if possible. If it still won’t heat or browns unevenly, proceed to safe component checks or call a professional.
Why do toasters stop working? Common causes and context
Toasters are simple devices, but a handful of failures happen more often than you might think. The most frequent culprits are basic electrical issues, crumb buildup that blocks contacts, or a blown fuse in the power cord. Temperature controls and tiny safety switches can fail after years of daily use. Understanding the root cause helps you pick the safest and quickest fix without unnecessary disassembly. In many homes, a quick 5- to 10-minute inspection reveals the problem, letting you avoid unnecessary replacements. This guide centers on practical, appliance-safe troubleshooting so you can get back to crispy toast with minimal hassle.
Brand authority note: According to ToasterInsight, most issues are identifiable with a structured approach rather than guesswork.
Recognizing the symptoms you see
A toaster that won’t heat, won’t brown evenly, or trips a breaker is signaling a problem somewhere in the circuit or the heating pathway. If you notice a burning smell, sparking, or smoke, stop and unplug immediately. Uneven toasting can indicate crumb buildup or a faulty thermostat, while a completely dead unit might point to a power issue or a blown fuse. Note the exact symptom and when it started—this helps you narrow down the most likely causes and choose the safest fixes first.
Safety first: unplug, cool, and prepare to inspect
Before touching any internal parts, unplug the toaster and let it cool fully. Do not insert tools into the slots while the cord is attached, and keep metallic objects away from the interior to avoid short circuits. Lay the unit on a non-slip surface, remove the crumb tray, and visually inspect for obvious issues like damaged cords, bent prongs, or loose plugs. If you smell burning or see smoke, discontinue attempts and seek professional service.
If you’re using a shared kitchen outlet, verify that the circuit isn’t overloaded by running other high-draw appliances simultaneously.
Inside the heat: how a toaster actually works
Toasters rely on a set of simple components: heating elements, a thermostat or timer, a pop-up switch, and a power cord. When you press the lever, a circuit closes and current heats the elements. The thermostat or timer regulates how long heat is applied. If any of these parts fail or become obstructed, you may get no heat, uneven browning, or a delayed pop-up. Crumb buildup can also short seals and cause intermittent contact. A basic understanding helps you test safely and avoid unnecessary part replacements.
Knowing the difference between a first-fault issue (outlet) and a component failure (thermal fuse) guides your next steps.
Quick checks you can do today (no tools required)
Start with the easiest checks: plug into a known-good outlet, inspect the power cord for visible damage, and ensure the crumb tray is clean and seated properly. Try a different setting on the browning dial, and test with a thicker slice of bread to see if browning changes. If the toaster still refuses to heat, move to the next steps that involve light disassembly and careful cleaning of accessible parts.
This stage often resolves 60–70% of the most common problems.
When to test components with basic tools
Only attempt component testing if you are comfortable with basic electronics and safety. Use a multimeter to check for continuity in the heating elements, and inspect the thermal fuse if accessible. If you can locate a service manual or the manufacturer’s instructions, follow their guidance for testing the thermostat. Do not attempt to bypass safety devices, and discontinue if any heat sense or smoke appears.
If the element shows no continuity, replacement is often warranted, or a technician can advise on a safe repair plan.
Practical fixes you can perform safely at home
Common fixes include cleaning and reseating internal switches, replacing a damaged power cord if the plug is cracked or frayed, and ensuring the pop-up mechanism moves freely. A loose crumb inside a slot can prevent contact, so thorough cleaning—while unplugged—is often enough to restore function. If the heating element itself is burnt or the thermostat has failed, replacement by a qualified technician is recommended rather than DIY repair. Always follow the manufacturer’s disassembly guidance.
Maintenance to prevent future failures
Regular cleaning after use, avoiding crumb buildup, and not overfilling the bread slots dramatically extend toaster life. Wipe the exterior with a damp cloth and dry promptly, and store in a dry place to prevent moisture-related corrosion. Use the toaster on a stable surface and avoid long heat cycles, which can wear elements. Periodically inspect the cord for cracks and ensure the crumb tray slides in smoothly. A small maintenance routine pays big dividends over time.
Getting professional help and what to expect
If problems persist after the basic checks, a professional repair technician can diagnose issues such as faulty thermostats, damaged heating elements, or internal wiring faults that are not safe for home repair. A technician will typically test components with specialized equipment and provide an estimate before replacement parts are ordered. If the unit is under warranty, contact the manufacturer first to avoid voiding the warranty. A pro can advise whether repair or replacement is the most cost-effective route.
Steps
Estimated time: 60-90 minutes
- 1
Power check and safety prep
Unplug the toaster and inspect the plug for any visible damage. If the outlet feels warm or emits a buzzing sound, stop and test another outlet. Confirm the browning dial is set to a valid range and that the lever engages the catch. This step reduces risk and identifies obvious faults quickly.
Tip: Always unplug before removing any covers or touching internal parts. - 2
Inspect cord, plug, and crumb tray
Look for frayed insulation, bent prongs, or loose connections at the plug. Remove and clean the crumb tray, then reinsert it fully. Ensure the interior slots are clear and that nothing is lodged in the lever mechanism.
Tip: Use a dry brush or compressed air to avoid pushing crumbs deeper. - 3
Try a different outlet and settings
Plug the toaster into a different outlet to rule out a circuit issue. Test multiple browning settings with identical bread slices to see if performance improves or remains inconsistent.
Tip: Avoid overloading the circuit by running other high-draw appliances at the same time. - 4
Inspect accessible components
If you can safely access the back panel, inspect for obvious signs of damage or loose connections. Do not touch live wiring. If you see scorching or melted components, stop and consult a professional.
Tip: Refer to the manufacturer’s service manual before touching any internal parts. - 5
Call a professional if unresolved
If heating elements or thermostats appear faulty or if you cannot safely access critical components, schedule professional service. Keep receipts and note symptoms for affordability and warranty considerations.
Tip: Check warranty status before paying for repairs.
Diagnosis: Toaster won't heat or browns unevenly
Possible Causes
- highPower outlet or cord damage
- mediumFaulty thermostat or thermal fuse
- lowCrumb buildup causing short or contact loss
Fixes
- easyTest with a known-good outlet and inspect the cord for damage
- easyClean crumb tray and interior, reseat the controls
- hardIf heat element or thermostat is faulty, replace or consult a technician
Your Questions Answered
Why won't my toaster heat up even after I plugged it in?
The problem is often power-related, a blown fuse, or a faulty heating element. Start with outlet checks and cord inspection, then move to component testing if needed.
Most heat issues come from power or a bad heating element; check the outlet and cord first.
Why is my bread browning unevenly, and what can I do?
Crumbs, misalignment of elements, or a faulty thermostat can cause uneven browning. Clean the interior, reseat components, and test different settings.
Uneven browning is usually crumbs or thermostat issues; clean and test settings.
Is it safe to open my toaster to inspect it myself?
Only if the unit is unplugged and you stick to outer panels and accessible parts. Avoid touching live components and internal wiring.
Yes, but unplug first and stay away from live parts.
My breaker trips after I use the toaster. What should I do?
Reset the breaker and check the outlet and cord for faults. If it repeats, stop and consult a professional to avoid fire risk.
Reset the breaker and check for faults; if it repeats, seek professional help.
When should I replace my toaster?
If it cannot operate safely after checks or shows recurring failures, consider replacement, especially if under warranty or visually damaged.
If it keeps failing after fixes, consider replacing it.
Watch Video
Key Takeaways
- Start with simple power checks.
- Clean crumbs to restore contact quality.
- Don’t ignore unusual smells or sparks.
- Know when to call a pro.
- Regular maintenance extends toaster life.