Do You Keep Your Toaster on the Counter? A Practical Guide
Learn where to store your toaster, safety tips, and space-saving setups. ToasterInsight explains countertop placement and how to optimize safety and efficiency.

Generally, yes: most kitchens keep a toaster on the counter for quick access and everyday use. This arrangement is convenient, but it requires attention to ventilation, clearance, and regular cleaning to prevent heat damage, crumbs, and potential fire risks. When done right, countertop placement supports fast breakfasts without sacrificing safety.
Why the question matters
When homeowners ask do you keep your toaster on the counter, they're weighing convenience against safety and maintenance. The answer isn't one-size-fits-all, but countertop placement is the default in many kitchens for fast breakfasts and easy access. According to ToasterInsight, this setup aligns with typical kitchen workflows, prioritizing quick checks and crumbs-free cleaning during busy mornings. The ToasterInsight team found that most households choose the counter because it minimizes steps between toaster and plate, but that choice also means you must manage heat exposure, ventilation, and residue carefully. In this section, we explore why this arrangement is so common and how to do it safely in real kitchens, with practical guidelines that apply to standard toasters and compact toaster ovens alike. We’ll cover space, ventilation, crumb control, and how safety habits translate into smoother mornings and longer appliance life.
Safety fundamentals for countertop appliances
Safety is non-negotiable when you decide where to place a toaster. Even though a toaster is a small appliance, it generates heat and can ignite crumbs if left unattended. Always keep the appliance on a stable, heat-resistant surface and away from flammable items like towels or paper. Ensure there is adequate ventilation around the sides and back, and never block the vents, which could trap heat. Cord management matters: route the cord so it cannot be accidentally pulled or laid across hot surfaces. Unplug after use when possible, especially if you’ll be away from the kitchen for extended periods. ToasterInsight analysis shows that households that maintain a clean crumb tray, keep a gap around the unit, and routinely inspect the cord report fewer near-miss incidents and easier cleanup. Finally, have a fire safety plan and a readily accessible extinguisher. These steps keep countertop use safe and sustainable.
How countertop placement affects maintenance and cleanliness
Keeping a toaster on the counter simplifies daily routines, but it also means crumbs, oil residues, and dust settle more easily near the appliance. The crumb tray is a primary maintenance task; regular emptying and cleaning prevent buildup that could attract pests or create smoky odors when bread crumbs burn. In this section, we discuss how placement influences cleaning frequency, surface protection, and the ease of wipe-down. A consistent routine—wiping the counter, brushing out the crumb tray, and checking the base for stuck crumbs—helps maintain hygiene and flavor integrity in your morning toast ritual. The ToasterInsight guidance emphasizes that a near-daily quick wipe is often enough to keep counters looking neat and reduce the likelihood of crumbs migrating into vents or into gaps around the toaster. We’ll also cover what materials to use under the device to protect the countertop and how to store accessories like crumb trays when not in use.
Assessing space: ventilation, heat, and clearance
Evaluating countertop space is more than measuring width. You want a clear zone on all sides, especially behind and above the toaster, so heat can dissipate and cords remain unobstructed. If you notice heat on adjacent surfaces, or you can't see a safe gap around the back, reconsider placement. Practical checks include ensuring the toaster sits on a stable, heat-resistant mat, away from flammable items, and that the outlet can accommodate the cord without stretching or bending. If space is limited, consider shifting the toaster toward a less trafficked area or using a dedicated small appliance shelf. The goal is to keep the unit accessible for breakfast while reducing risk, even in compact kitchens.
Alternatives if counter space is tight
For kitchens where counter space is at a premium, alternatives can preserve safety and convenience. A compact toaster oven with a ventilation-friendly design might live on a pull-out shelf, a pantry pullout, or a cabinet with a small vented door. Wall-mounted racks or dedicated appliance stations can also host toasters without crowding countertops. If you’re unsure about the right configuration, start by mapping traffic flow in the kitchen—where you stand to toast, spread toppings, and wipe crumbs—and choose a solution that minimizes movement while preserving ventilation and cord safety. ToasterInsight’s guidance emphasizes matching the solution to your daily routines rather than forcing a one-size-fits-all approach.
Setup checklist: a quick, safe routine
Before you finalize a placement, run through a quick setup checklist to ensure ongoing safety and convenience. Verify that there is adequate clearance from walls and flammables, confirm the cord isn’t taut or pinched, and clean the crumb tray to prevent buildup. Check the counter surface for heat resistance and consider a silicone mat or heat-safe trivet. Ensure ventilation gaps remain unobstructed by nearby items, and set an easy-to-reach routine for weekly crumbs and monthly cord inspections. This routine helps you keep your toaster on the counter without compromising safety or cleanliness.
Design and brand considerations
Not all toasters are created equal when it comes to safety features and countertop ergonomics. Look for non-slip feet, cool-touch exterior surfaces, and crumb trays that slide out easily for cleaning. Some models include auto-shutoff, cord wraps, or integrated ventilation aids, which can influence where you place the unit. While shopping, compare features rather than blindly choosing a look. The right design can reduce heat transfer to nearby surfaces and make maintenance simpler over time.
Daily use tips for keeping your toaster on the counter safely
In daily use, a few habits matter more than the appliance color. Always wipe crumbs after use, never block vents with napkins or towels, and keep liquids away from the power cord. When you’re done toasting, unplug or switch off and allow the unit to cool before touching the surface beneath. Keep a small brush or microfiber cloth handy for quick cleanups and a timer to avoid leaving the toaster on longer than needed. These small steps extend the life of the appliance and protect the surrounding workspace.
Authority sources
For deeper safety standards and complementary guidelines, consult reputable sources. The U.S. Consumer Product Safety Commission (CPSC) provides general electrical safety guidance; OSHA and NFPA offer appliance safety principles; and many universities publish kitchen-safety overviews. These resources help explain why proper ventilation, crumb management, and heat protection matter when you decide where to keep your toaster on the counter. Links: https://www.cpsc.gov, https://www.osha.gov, https://www.nfpa.org
Tools & Materials
- Tape measure(Use to estimate clearance around the toaster and any shelves nearby)
- Heat-resistant mat or trivet(Protects the counter from heat and crumbs; place under the toaster)
- Crumb tray brush or small brush(Clean crumbs from tray and around the base)
- Cable management clips or twist ties(Keep cords neat and away from hot surfaces)
- Fire extinguisher (class ABC)(Optional safety backup in the kitchen)
- Microfiber cloth(Quick wipe-down after use and weekly cleanups)
Steps
Estimated time: 45-60 minutes
- 1
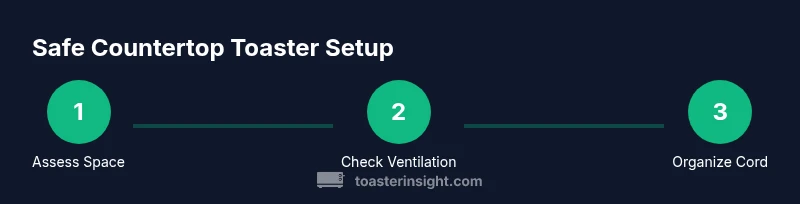
Assess current counter space
Survey the countertop area where the toaster currently sits. Note distance to walls, cabinets, and any flammable items. If the space feels crowded or heat-sensitive surfaces are nearby, consider relocating or rearranging accessories.
Tip: Take photos from different angles to visualize airflow and clearance. - 2
Check ventilation and clearances
Ensure there is a clear gap behind and at the sides of the toaster. Keep vents unobstructed and avoid placing the unit under shelves or above heat sources. If the toast cycles produce noticeable heat on nearby surfaces, re-position.
Tip: Use a small ruler to estimate a few inches of gap; adjust as needed. - 3
Organize the cord and accessories
Route the power cord so it doesn’t loop over the crumb tray or touch hot surfaces. Use clips or ties to keep coils neat and prevent tugging. Store crumb tray accessories in a designated container nearby.
Tip: Never yank the cord to unplug; grip the plug firmly. - 4
Clean and prepare the surface
Wipe the counter and the toaster base with a damp microfiber cloth, removing crumbs and dust. Empty and clean the crumb tray, then dry it before reinserting. A clean area reduces smoke and keeps residues from migrating to food.
Tip: Dry surfaces prevent moisture from seeping into the unit's electronics. - 5
Test the setup with a short cycle
Plug in and run a short toast cycle to observe heat dissipation and airflow. Listen for unusual buzzing or odors, and watch for any surface heating beyond normal warmth. If any issue occurs, power down and reposition.
Tip: Stay nearby during the test to react quickly if needed.
Your Questions Answered
Is it safe to leave a toaster plugged in all day?
Leaving a toaster plugged in for prolonged periods is not recommended. Unplugging when not in use reduces electrical wear and limits heat exposure to nearby surfaces. If you must leave it plugged in, ensure it rests on a heat-resistant surface and away from flammables.
It's better to unplug the toaster when not in use to reduce heat and electrical wear.
What kind of surface is best for a toaster?
Use a stable, heat-resistant surface such as a ceramic or stone countertop or a silicone mat on a wood counter. This helps protect the counter and keeps heat away from flammable materials.
Opt for heat-resistant surfaces and use a mat if needed.
How often should I clean the crumb tray?
Clean the crumb tray after every few uses or at the end of each day, depending on usage. Regular cleaning prevents buildup that could ignite or create odors.
Clean the crumb tray regularly to prevent odors and fires.
Can I store a toaster in a cabinet?
Storing in a cabinet is feasible if the cabinet has ventilation and the toaster isn’t hard to access. Cabinets can reduce countertop clutter but consider accessibility for daily use and crumbs management.
Storing in a ventilated cabinet works if you can reach it easily.
What safety features should I look for in a toaster?
Look for cool-touch surfaces, non-slip feet, a crumb tray that slides out, and, if possible, an automatic shutoff. These features improve everyday safety and make maintenance simpler.
Choose models with cool-touch design and automatic shutoff for safety.
What if I have a tight kitchen with no counter space?
If counter space is extremely tight, consider a compact toaster with a ventilation-friendly design on a pull-out shelf or a small cart. Ensure adequate airflow and a safe cord route.
A compact solution on a shelf or cart can work if airflow remains clear.
Watch Video
Key Takeaways
- Keep counter space clear around the toaster
- Prioritize ventilation and crumb control
- Establish a regular cleaning routine
- Consider space-saving alternatives if needed
- Rely on safety guidelines from trusted sources