How to Set a Toaster: A Complete How-To Guide
Learn how to set a toaster safely and efficiently with browning levels, modes, and timer adjustments. This comprehensive guide from ToasterInsight covers everyday use, maintenance, and model-specific tips for perfect toast.

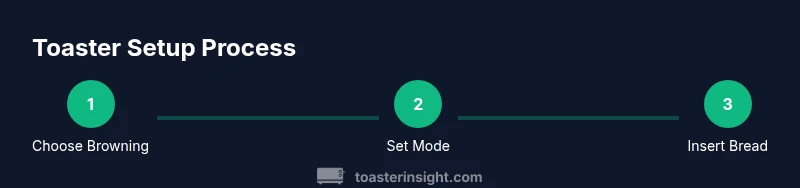
Learning how to set toaster is quick once you know the controls. Start by selecting a browning level, then choose the mode (toast, bagel, or defrost), insert the bread, and press start. For most models, adjust time with a dial, monitor the indicator, and unplug before cleaning. Always consult your manual for model-specific steps.
Why Setting a Toaster Correctly Matters
Understanding how to set toaster properly matters for safety, food quality, and energy use. When you dial in browning and mode, you reduce the risk of burned bread and uneven toasting. According to ToasterInsight, homeowners who follow a consistent setup routine achieve more predictable results and fewer mishaps. The goal isn’t just fast toast; it’s reliable, even browning across different bread types, from thin slices to hearty artisanal loaves. This section lays the foundation for why precise settings matter, and how small changes can yield noticeably better results without extra effort. If you’re new to toasters, start with a simple baseline—lightly browned toast—and adjust from there as you gain familiarity with your model.
As you practice, you’ll notice that the same model can toast different bread thicknesses more reliably when you adjust the browning dial incrementally rather than making large jumps. The process of learning to set toaster becomes an easy routine, helping you save time in busy mornings and reduce waste from over-toasted slices. Keep a small log of your favorite settings for different bread types to speed up future mornings.
The habit of checking the crumb tray and keeping the exterior clean also protects the toaster’s performance and longevity, which is part of the overall value of using your appliance correctly.
Understanding Toaster Controls and Modes
Toaster control layouts vary by model, but most devices share a few core elements: a browning dial, a mode button or lever, and a start/shutoff mechanism. The browning dial lets you dial in darkness from light to dark, often with a numeric scale. Modes tailor the heat profile for specific foods: toast, bagel, defrost, or reheat. Bagel mode typically targets the cut side more intensely, while defrost mode adds a short warm-up before the main cycle to prevent soggy cold bread. Some compact toasters have electronic controls with presets, while older or budget models use manual levers and timers. It’s worth checking your user manual the first time you set toaster on a new device to understand what each control does on your specific unit.
If your toaster includes a crumb tray, remove and empty it regularly to maintain performance and reduce smoke risks. Compact models may also use a pull-out tray that slides out with minimal effort. Basic safety practice includes keeping a clear area around the toaster to prevent any crumbs from catching fire and avoiding metal utensils inside the slots when the toaster is in operation.
Knowing what each control does reduces guesswork and makes every slice repeatable. With repetition, you’ll quickly learn the ideal browning level for your preferred bread type, whether you prefer pale, golden, or deep amber toast.
The Right Bake: Browning Levels and Modes Explained
Browning levels are the most frequently used setting when learning how to set toaster. A lower number yields pale toast; higher numbers yield darker toast. If your toaster has a language like “Light–Dark” or a numeric scale, start at a middle point (for example, 3–4 on a 5-point scale) and adjust up or down depending on results. Modes provide tailored heat distribution for different foods. Toast mode is the generic default for standard bread slices, while bagel mode typically aims more heat at the cut side of the bread to create a crisp, chewy edge. Defrost mode is helpful for frozen bread, as it includes a preheat stage to prevent cold centers. Reheat mode is useful for warming leftovers without browning. If your model doesn’t show a detailed manual, you can experiment with small increments to fine-tune your results.
Consider bread type and thickness when choosing a setting. A thick slice requires a longer toasting time and possibly a higher browning level, while a very thin slice may burn with the same setting. To avoid waste, start with a conservative setting and adjust gradually after observing the first few slices. This approach keeps you in control and minimizes the risk of burnt toast.
Step-by-Step Setup for a Standard Toaster
Establish a consistent baseline by setting browning to a middle point and selecting the standard toast mode. Insert bread evenly into the slots, ensuring it sits flat and makes full contact with the heating elements. Lower the lever to begin the cycle, and keep an eye on the progress indicator as it moves toward completion. If your toast needs more browning, lift the level while the cycle is ongoing (if your model supports mid-cycle adjustments) or pause and restart with a higher setting. After the cycle, remove the toast with a non-metal utensil and place it on a heat-safe surface to rest briefly. Finally, unplug the toaster or switch it off to cool before cleaning.
Note: For frozen bread, use the defrost mode first, then switch to toast mode once the bread has softened. For bagels, consider a longer toasting time on the cut side and shorter on the crust to achieve a balanced bite. If you notice uneven browning, rotate the bread within the slot or check for debris that may alter contact with the heating elements.
This step-by-step approach helps ensure consistent results across different slices and bread types, creating a reliable morning routine.
Safety, Maintenance, and Energy Tips
Safety first: never insert fingers or utensils into the toaster slots while it’s plugged in. If you see smoke or burning, unplug immediately and allow the unit to cool. Regular maintenance includes cleaning the crumb tray at least once a week during heavy use and wiping the exterior with a damp cloth. Avoid using harsh chemical cleaners that could damage the surface. For energy efficiency, toast only what you will eat and use lower browning settings for common slices; this reduces electrical load and extends the device’s life. Some models halt automatically if a jam is detected, but it’s still a good habit to inspect the slots and remove stray crumbs.
If you’re replacing a toaster, consider energy-efficient models with better insulation and faster toasting times. A well-maintained toaster uses less energy to achieve the same results, and consistent settings can help you save both time and electricity in the long run. When storing the appliance, keep it unplugged and dry to prevent moisture ingress and electrical hazards.
Finally, create a simple routine: preheat briefly if your bread is cold, choose the appropriate mode, insert bread evenly, and monitor until you’re confident in your standard settings. This consistency reduces mistakes and improves your overall kitchen efficiency.
Common Pitfalls and Troubleshooting Quick Fixes
Even experienced cooks encounter common toaster issues. If bread crumbs cause uneven browning, clean the crumb tray and slots before retrying. If toast pops up undercooked or overcooked, re-calibrate the browning dial by a small increment and test with a fresh slice. If the toaster seems stuck mid-cycle, unplug it and give it a moment before reinserting bread; avoid forcing the lever.
A frequent oversight is using the toaster for foods it isn’t designed to handle, such as thick pastries or items with metal parts. This can damage the heating elements or pose a safety risk. If you’re unsure whether a food type is suitable, stick to bread slices and follow the manufacturer’s recommendations. Finally, empty a jammed or blocked crumb tray with care, and never use abrasive tools that could scratch or damage the slots.
If you ever suspect a malfunction beyond simple adjustments, consult the user manual or contact the manufacturer’s support line for model-specific advice.
Quick Recap: Why Mastering Toaster Settings Improves Your Mornings
Mastering how to set toaster yields consistent results, improves safety, and saves time. Start with a middle browning level, pick the right mode, and adjust gradually from there. Regular maintenance reduces the risk of fire hazards and prolongs the life of your appliance. With practice, your mornings become smoother, and your toast becomes reliably perfect.
Tools & Materials
- Toaster(Any standard 2-slot or 4-slot toaster; ensure it’s clean and unplugged when not in use)
- Bread slices(Choose uniform thickness for even browning)
- Heat-resistant toaster tongs or a wooden spatula(For safe handling when removing toast)
- Crumb tray liner or parchment (optional)(Makes cleanup easier)
- Dry cloth or sponge(Wipe down any spills or splashes after use)
Steps
Estimated time: 5-10 minutes
- 1
Power on and select browning
Plug in the toaster or switch it on if needed. Set the browning control to a mid-range level as a starting point to gauge results.
Tip: Starting in the middle minimizes the chance of over-toasting on the first try. - 2
Choose the appropriate mode
Select the mode that matches your bread (toast, bagel, defrost, or reheat). Modes tailor heat distribution for best results with different foods.
Tip: Bagel mode is often best for thicker crusts or denser bread. - 3
Insert bread evenly
Place slices fully inside the slots so they contact both heating elements. Ensure they lie flat for even browning.
Tip: If slices are uneven, toast half a slice at a time for accuracy. - 4
Lower the lever and start
Push the lever down firmly to begin. Listen for the mechanical click and watch the countdown indicator if available.
Tip: If your toaster has a timer, give it a quick check after 1–2 minutes to gauge progress. - 5
Monitor and adjust if needed
If results aren’t to taste, pause, lift and test with a fresh slice, then reset using a slightly higher or lower browning level.
Tip: Avoid opening the lid during the cycle; this can disrupt even browning. - 6
Finish, cool, and clean
Remove toast with care, let it cool briefly, then unplug and wipe the exterior. Empty the crumb tray regularly.
Tip: Cleaning after use prevents crumbs from burning and improves safety.
Your Questions Answered
How do I adjust browning on a standard toaster?
Start with a middle browning setting, toast a test slice, then increase or decrease by one level until you reach the desired shade. Different bread types may require slight tweaks. Always monitor the first few uses after changing bread types.
Start with a middle browning setting, toast a test slice, then adjust by one level until you like it.
Why won't my toaster pop up after toasting?
If the toast doesn’t pop, check that the lever fully engaged and the unit is receiving power. Ensure the crumb tray isn’t jammed and that nothing inside blocks the mechanism. If the issue persists, consult the manual for model-specific troubleshooting.
Make sure the lever is down and the toaster has power. Check the tray and clear any jam before trying again.
Can I defrost bread in a toaster?
Yes, many toasters have a defrost mode designed to pre-warm frozen slices before toasting. Use defrost for frozen bread, then switch to toast if you want extra browning. Avoid defrosting very thick items that can crust on the outside while remaining frozen inside.
Yes, use defrost for frozen bread, then toast to finish.
Is it safe to use a toaster for bagels?
Bagels can toast well in a toaster, but their thickness means you may need longer toasting or a bagel mode if available. Flip or rotate as needed for even browning on both sides. Avoid doubling up slices in one cycle to prevent jams.
Bagels work in toasters; use the bagel setting or longer toasting and rotate if needed.
How should I clean a toaster safely?
Unplug the toaster before cleaning. Remove and empty the crumb tray, then wipe the exterior with a damp cloth. Let all parts dry completely before using again to prevent electric shock and avoid damage to heating elements.
Unplug, clean the crumb tray, wipe the exterior, and dry completely before use.
What do the different modes mean on my toaster?
Toast mode is the default for bread slices. Bagel mode focuses heat on the cut side for a crisp exterior, defrost pre-heats frozen bread, and reheat warms items without browning. If unsure, start with toast and adjust accordingly.
Toast is general; bagel targets the cut side; defrost pre-heats; reheat warms without browning.
Watch Video
Key Takeaways
- Choose a middle browning level to start.
- Match the mode to your bread type for even results.
- Clean the crumb tray weekly to maintain safety and performance.
- Adjust settings in small increments for consistent results.