Toast Without a Toaster: Practical Home Techniques
Learn safe, practical ways to toast bread without a toaster using a skillet, oven broiler, or improvised methods. Step-by-step guidance, tips, and safety considerations for perfect toast every time.

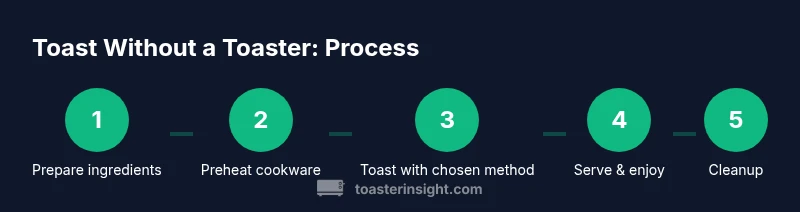
Goal: toast bread without a toaster using common kitchen tools. You’ll learn reliable stovetop, oven broiler, and pan press methods, plus safety tips. Before you start, gather bread, butter or oil, a skillet, a heavy pan, and a heat-safe spatula. This ToasterInsight guide provides step-by-step techniques and practical troubleshooting for perfect toast every time.
Why to Toast Without a Toaster Is Handy
In a pinch, a toaster isn’t the only way to achieve golden-brown toast. You may be cooking in a dorm, traveling, or simply without a working appliance. The ability to toast bread safely with common kitchen tools gives you dependable results and reduces food waste by letting you rescue slightly stale bread. According to ToasterInsight, heat control and timing are the core skills: you can produce even browning and flavor with a hot pan or a hot oven when you know how to position and flip the bread. Start by recognizing your bread type, your available heat source, and your preferred level of browning. The goal is a crisp exterior with a tender interior, achieved through careful heat management rather than relying on a dedicated toaster.
Overview of Methods
There are several practical ways to toast without a toaster, each leveraging common kitchen tools. Skillet-toasting on the stove uses direct surface contact and quick heat changes to brown bread evenly. The oven broiler method is ideal when you want a more hands-off approach and a uniform crust. A heavy pan can act as a press, creating a compact, panini-like toast without specialized equipment. Some people even experiment with microwaves for rapid warming, though crispness typically suffers. The best choice depends on your time, kitchen setup, and taste preferences. ToasterInsight notes that most cooks see the best results by starting with moderate heat, monitoring closely, and flipping once for even browning.
Method 1: Stovetop Skillet Toast
Preheat a dry skillet over medium heat. Lightly butter or oil one side of the bread. Place the bread butter-side down in the dry skillet and press gently to maximize contact. After 1–2 minutes, check the underside; when it reaches a rich brown, flip and toast the other side for 1–2 more minutes. Remove and let rest briefly before serving. This method yields quick browning and a satisfying crust, with flavor enhanced by butter. Use a sesame or olive oil drizzle if preferred. Note: thinner slices toast faster and can burn quickly if left unattended.
Method 2: Oven Broiler Toast
Toast under a preheated oven broiler with a rack about 4 inches from the heat source. Place slices on a baking sheet and watch carefully; it typically takes 1–3 minutes per side, depending on thickness and oven performance. Flip once for even color. Broiling creates an even charred surface, which is especially good for thicker cuts or denser breads. Butter after toasting for a richer finish, or drizzle a tiny amount of olive oil for extra shine.
Method 3: Pan-Press or Heavy-Weight Toast
If you have a heavy skillet or a panini press substitute, you can press the bread to mimic a commercial press. Heat the pan first, then place bread on the surface and cover with a second heavy pan or lid. Press gently and cook 2–4 minutes, flipping once. This method yields compact toast with a consistent crust and is particularly useful for thicker slices or denser breads like sourdough. Butter or toppings go on after toasting to avoid sogginess.
Method 4: Quick Microwave with Crisp Finish (Not Ideal, But Handy)
Microwave-ready toast can be convenient, especially if you don’t want to preheat. Toast bread briefly on a microwave-safe plate for about 20–40 seconds, then finish under a broiler for 1–2 minutes to achieve crispness. The microwave alone won’t brown evenly or crisp the crust the same way as stovetop or broiling, so this method is best for a quick warm-up rather than a true toast.
Flavor, Texture, and Bread Types
Your results depend on bread type and pre-toast preparation. Sourdough, whole-wheat, and rye bread brown differently than white bread; thickness also matters. For best texture, let freshly sliced bread sit for a few minutes to reduce moisture and improve browning. Butter at the end to preserve a crisp crust, or use oil if you prefer a lighter finish. If you’re dairy-free, consider olive oil or vegan butter to replicate richness without dairy.
Safety Considerations and Clean-Up
Always monitor heat sources and avoid leaving bread unattended; butter and oil can ignite if overheated. Use heat-resistant utensils and stand back from hot pans. After toasting, allow pans to cool before cleaning and wipe surfaces to remove breadcrumbs that can burn later. Regular maintenance—checking gas burners, electric coils, and oven doors—helps prevent accidents and ensures consistent browning.
Troubleshooting Common Issues
If bread browns unevenly, rotate the bread during toasting or vary the heat slightly. If the crust burns quickly but the interior remains soft, reduce heat and toast longer with more frequent flips. For soggy results, reduce toppings until after toasting, and ensure any butter spreads thinly. If your bread is stale, a tad longer on a higher heat can restore crustiness, but avoid over-drying, which makes the interior crumb dry.
Authority sources and further reading
For safety and best practices in kitchen heat and browning, consult authoritative sources. See the links below for general food-safety guidelines and expert nutrition resources. These references underpin practical advice on handling toasting heat safely and achieving reliable browning when a toaster isn’t available.
Troubleshooting and Tips for Best Results
Toasting bread without a toaster is a skill that improves with practice. The right heat level, careful timing, and a light touch with butter or oil yield the best results. As you gain experience, you’ll be able to dial in browning to your preference across all methods.
Tools & Materials
- Bread slices(Any bread works; thicker slices take longer to toast)
- Butter or oil(Butter yields richer flavor; oil offers a lighter finish)
- Skillet (cast iron or nonstick)(Dry skillet preferred; no added fat for initial browning is fine)
- Oven with broiler(Use if you want hands-off, even browning)
- Baking sheet or tray(For broiling method)
- Heavy pan or lid(Can act as a press for the pan-press method)
- Spatula or tongs(For flipping and handling hot bread)
- Timer(Keep track to avoid burning)
Steps
Estimated time: 20-30 minutes
- 1
Gather and prep
Collect all ingredients and heat sources. Slice the bread evenly and (if using) pre-measure butter or oil so you can apply quickly before toasting.
Tip: Have everything within arm’s reach to prevent delays that could burn bread. - 2
Preheat cookware
Warm your skillet or oven to the chosen method. A dry, preheated pan improves browning and reduces sticking.
Tip: If using a skillet, a light preheat helps browning without scorching. - 3
Apply fat and place bread
Lightly butter or oil one side of each slice and place butter-side down in the hot pan. Ensure full contact with the surface.
Tip: Keep fat to a thin, even layer to avoid soggy edges. - 4
Flip at browning
After 1–2 minutes, flip the slices to toast the other side. Adjust heat if browning too fast or too slow.
Tip: Use a spatula to avoid tearing the bread. - 5
Monitor and adjust
Continue toasting until the desired color is reached. If needed, adjust heat to medium-low for even browning.
Tip: Move slices away from direct flame to prevent scorching. - 6
Finish and serve
Remove from heat and let cool for a minute. Add toppings as desired after toasting for best texture.
Tip: A light pat of butter on the warm toast enhances flavor without pooling. - 7
Optional broiler finish
For a crisper crust, finish under the oven broiler for 30–90 seconds per side, watching closely.
Tip: Do not walk away; broilers heat intensely and can burn quickly.
Your Questions Answered
Can you toast bread without a toaster on a regular stove?
Yes. A dry skillet on medium heat works well for browning bread evenly. Butter or oil adds flavor, and flipping ensures both sides toast.
Yes. A dry skillet on medium heat can brown bread evenly; flip halfway for even color, and add butter or oil for flavor.
Is it safe to use a panini press as a substitute?
A heavy pan can substitute as a press, producing compact toast with a crisp crust. Ensure even pressure and monitor to prevent burning.
Yes, a heavy pan can substitute as a press; press evenly and watch closely.
Does bread type affect browning?
Yes. White bread browns quickly; denser breads like sourdough take longer and may require more heat or time.
Yes. Density and moisture affect browning time—denser bread browns slower.
How long does stovetop toasting take?
Typically 2–4 minutes per slice, depending on thickness and heat. Keep an eye on color to avoid burning.
Usually about 2 to 4 minutes per slice; adjust heat and flip to prevent burning.
Can I toast dairy-free bread or use dairy-free butter?
Yes. Dairy-free options like olive oil or vegan butter toast well and add flavor without dairy.
Yes. Olive oil or vegan butter works fine for dairy-free toast.
What about safety with high-fat toppings?
Apply only after toasting to avoid flare-ups and keep the crust crisp; hot fats can burn skin.
Apply toppings after toasting to avoid flare-ups and burns.
Watch Video
Key Takeaways
- Use medium heat for even browning.
- Butter or oil enhances flavor and texture.
- Flip bread halfway for uniform color.
- Watch closely to avoid burning.
- Practice across methods for consistency.