Best Way to Toast Bread Without a Toaster: A Practical Guide
Learn the best way to toast bread without a toaster using a skillet, oven broiler, or grill. Practical steps, safety tips, and crisp, even results for home cooks.

Goal: toast bread without a toaster by using common kitchen equipment. The fastest method is a hot skillet on the stove; another reliable option is the oven broiler, or a grill for outdoor cooking. Start with medium-high heat, toast one side for 1–2 minutes, flip, and toast 1–2 minutes more, adjusting time for thickness.
Understanding the challenge: why you might skip a toaster
For many home cooks, the best way to toast bread without a toaster hinges on available equipment, timing, and the level of browning you desire. If your toaster is occupied, broken, or you simply want to experiment, you can achieve reliable, crunchy toast with a few simple tools. According to ToasterInsight, basic kitchen gear—such as a skillet, an oven broiler, or a grill—can deliver crisp, evenly browned slices with minimal fuss. The core idea is to manage heat and contact so the bread browns on the outside while staying soft inside. This section helps you choose the method that matches your space, bread type, and urgency while keeping safety in sharp focus.
Method A: Stovetop toast with a skillet
A heavy-bottom skillet—preferably cast iron or enameled steel—offers the most control when you don’t have a toaster. Preheat the pan on medium heat for about 2 minutes. Lay slices in a single layer; avoid overlapping. Toast each side for about 1–2 minutes, checking frequently to prevent scorching. If your bread is thicker or denser (like sourdough), you may need an extra 30–60 seconds per side. A slight press with tongs can promote even browning. The result should be a crisp crust with a tender center. ToasterInsight recommends room-temperature bread for quicker browning and more uniform texture.
Method B: Oven broiler toast for even browning
Using the oven broiler is ideal when you need to toast multiple slices at once. Move the rack to the top third of the oven and preheat the broiler. Place bread on a foil-lined baking sheet or cast-iron skillet for maximum heat transfer. Toast for 1–2 minutes on one side, then flip and toast another 1–2 minutes on the other side. Stay close and watch, as broilers can vary widely in intensity. For extra crunch, remove and toast a few seconds longer, but be prepared to pull them out quickly if they begin to burn. This method is excellent for thicker slices or for toasting several pieces evenly at once.
Method C: Grill or outdoor toast for flavor and practicality
Outdoor grilling or a balcony grill provides a smoky edge that’s hard to beat. Heat the grill to medium-high and place bread directly on the grate or on a clean, heat-safe cast-iron surface. Toast each side for 1–3 minutes, turning once. This method works well for rustic breads or bagels, which benefit from the grill’s direct heat. Keep a close eye to avoid flare-ups. If you’re using butter or olive oil, brush lightly before toasting."
Achieving even browning: thickness, heat, and timing
A consistent result depends on even contact and controlled heat. Slices that are roughly 1/2 inch thick toast best in most devices. Thicker slices may need additional time or a brief second pass. If your bread browns too quickly on the outside but remains pale inside, lower the heat slightly and extend the toasting time. For uniform browning, flip slices halfway through and apply a gentle press to reduce air gaps. In all methods, start with fresh or fully thawed slices to avoid soggy or uneven browning. ToasterInsight notes that practice with your specific pan and oven will yield the most reliable outcomes.
Timing and doneness tests: when to stop
A good rule of thumb is to aim for a light to medium brown on the first pass, then adjust based on the bread type. White bread often browns quickly, while whole-grain and sourdough may require a little longer. If you’re unsure, remove a slice and observe its crust and aroma; a perfectly toasted slice will smell toasted and look evenly colored with a crisp exterior. Remember that residual heat keeps browning after removal, so consider pulling a touch early if you’re unsure about the final shade.
Bread varieties and prep tips: sourdough, bagel, and more
Different breads behave differently when toasted without a toaster. Sourdough, with its higher hydration, benefits from slightly lower heat and a longer contact time. White sandwich bread browns more quickly and can tolerate a bit higher heat. For bagels, toasting both halves separately yields a crunchy edge and soft center. If your slices arrive unevenly sliced, trim edges for uniform browning. A quick prewarm of the bread by letting it sit at room temperature for 5–10 minutes can improve browning consistency across all bread types.
Finishing touches: butter, toppings, and texture
A light dab of butter immediately after toasting enhances flavor and helps seal the crust. For added crunch, try a light olive oil drizzle or a sprinkle of sea salt. Sweet toppings like cinnamon sugar or honey pair nicely with warm toast, while savory options such as avocado, tomato, or cheese can turn toast into a simple meal. If you’re using a grill, allow the butter to melt slowly to avoid splatter and burns. Always brush or pat away any excess oil to minimize smoke and flare-ups.
Safety and cleanup: heat, handles, and residues
Always use heat-resistant gloves or mitts when handling hot pans. Keep flammable objects away from open flames or hot surfaces. After toasting, turn off the heat and let cookware cool on a safe surface. Clean the pan according to its material (e.g., hand wash cast iron to preserve seasoning or place nonstick pans in gentle dishwasher cycles). If you used foil on a pan, discard the foil after it cools to prevent sticking during cleaning. A quick wipe with a damp cloth can remove crumbs and prevent buildup in the pan's corners.
Quick comparison: skillet vs broiler vs grill
Using a skillet provides the most control and is ideal for a single toasts, while the broiler is best for batch toasting and even browning on thicker slices. A grill adds smoky flavor and is excellent for outdoor cooking or flavor experimentation. Each method has its trade-offs: skillet offers precision, broiler offers speed for multiples, and grill adds character. The best way to toast bread without a toaster often comes down to available space, time, and preferred flavor profile.
Tools & Materials
- Sliced bread (any variety)(1/2 inch thick slices preferred for even browning)
- Heavy-bottom skillet or cast-iron pan(Preheat on medium heat for about 2 minutes)
- Tongs or a spatula(For flipping without burns)
- Oven and broiler-safe sheet or skillet(Use if you plan to toast under the broiler)
- Oven mitts or heat-resistant gloves(Protect hands when handling hot cookware)
- Aluminum foil (optional)(Line sheets to reduce cleanup when broiling)
- Brush of butter or oil (optional)(Lumens flavor and browning; apply sparingly)
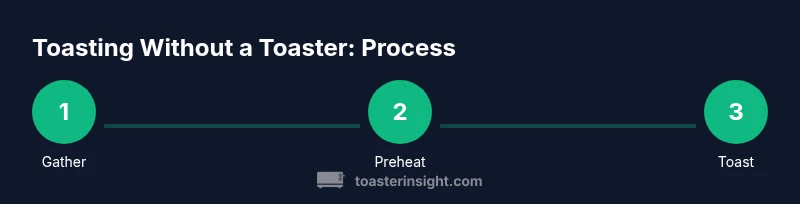
Steps
Estimated time: 6-12 minutes
- 1
Gather and prep
Collect bread slices, a heavy skillet, tongs, and mitts. If using the oven, preheat to the broiler setting and place a rack near the top. Ensure your work area is clear of flammables and crumb buildup is minimal to avoid flare-ups.
Tip: Have a timer ready; even short stints can go from perfect to burnt fast. - 2
Preheat and position
Preheat the skillet over medium heat for about 2 minutes. If using the broiler, position racks and prep a baking sheet. Arrange bread slices in a single layer with space between them.
Tip: For thicker slices, start on the lower heat and momentum to prevent scorching. - 3
Toast the first side
Place slices in the pan or under the broiler. Toast 1–2 minutes until the edges begin to brown and aroma fills the kitchen. Avoid moving slices too early to maximize browning.
Tip: Use a light touch when flipping to preserve the crust integrity. - 4
Flip and toast the other side
Turn slices with tongs and toast the second side 1–2 minutes. Check at the 60-second mark to ensure even browning. Adjust heat if needed.
Tip: If bread browns too quickly on one side, rotate slices for even heat exposure. - 5
Assess doneness
Look for a golden-brown color and a crisp surface. Remove from heat promptly when satisfied. Remember residual heat continues browning after removal.
Tip: If you’re unsure, pull a sample slice early and evaluate texture before finishing the rest. - 6
Finish and serve
Optional: lightly butter or oil the toast while hot for extra flavor and shine. Top with favorites and serve immediately to enjoy maximum crunch.
Tip: Butter should melt slowly to avoid sliding off; apply while toast is still hot.
Your Questions Answered
Can I toast bread directly on a gas stove without a pan?
No. Always use a heat-safe surface such as a pan or griddle to distribute heat evenly and prevent burns. Direct contact with flames can burn bread and damage the surface.
No, you should not toast bread directly on a gas flame. Use a pan or safe surface to distribute heat evenly.
Is a toaster essential for browning bread evenly?
Not at all. A skillet, broiler, or grill can achieve browning with good technique. Each method offers control over heat and timing without a toaster.
A toaster isn’t essential; a skillet, broiler, or grill can do the job with the right technique.
What thickness of bread works best for pan toasting?
About 1/2 inch thick slices work well for most methods, offering a balance between browning and inner texture. Thicker slices may need longer or lower heat.
Half-inch slices usually toast best; thicker slices need longer time or gentler heat.
Can I toast bread from frozen?
Yes, but expect longer toasting times. Let bread thaw a bit or toast on lower heat to prevent burning the exterior while the interior warms.
You can toast frozen bread, but it takes longer and you may need to lower the heat.
How do I prevent smoke when indoors?
Keep the fan on, use the oven broiler with the door slightly ajar if safe, and avoid overheating oil or butter. Crumbs can smoke if left unattended.
Turn on ventilation and avoid overheating oil; keep an eye on it to prevent smoke.
What’s the best method for sourdough?
Sourdough can brown unevenly; use medium heat and a longer toasting time per side. A bread prep step (thawing if frozen) helps achieve uniform browning.
Medium heat works best for sourdough; it browns evenly with a bit more time.
Watch Video
Key Takeaways
- Choose skillet, broiler, or grill based on space and batch size.
- Control heat and timing for even browning without burning.
- Thicker slices require longer toasting or lower heat.
- Finish with a touch of butter or toppings for flavor.