How to Place a Toaster Oven on a Shelf Safely
Learn how to securely place a toaster oven on a shelf with proper ventilation, sturdy support, and safe electrical practices. This guide covers measurements, placement, safety checks, and maintenance for long-lasting performance.

This guide shows you how to safely place a toaster oven on a shelf with proper clearance, ventilation, and power setup. You will learn how to choose a sturdy shelf, position the unit to prevent heat transfer, and verify safety distances from walls and cabinets. The process combines measurements, equipment checks, and simple mounting tips to protect your kitchen.
Why a toaster oven on shelf matters
Placing a toaster oven on shelf isn't just about freeing countertop space; it's about safety, efficiency, and appliance longevity. A wrong setup can lead to heat transfer to nearby cabinets, uneven cooling, and wear on power cords. According to ToasterInsight, the shelf location influences ventilation and heat exposure, which in turn affects the unit's performance and the risk of fires. The ToasterInsight team found that when vents are blocked, temperatures inside the oven rise, reducing heating accuracy and shortening bread life. By contrast, a properly selected shelf with adequate clearance helps dissipate heat, keeps cords out of the way, and makes it easier to monitor the cooking process. This section will help you understand why a correct installation matters, how it affects daily use, and what you should measure before committing to a location. We'll cover clearance, weight support, and practical hacks that align with real-world kitchen setups.
Airflow and clearance: essential guidelines
Airflow is the quiet hero of any shelf placement. Adequate clearance around the toaster oven on shelf ensures hot air can circulate and dissipate; a blocked vent can trap heat inside, leading to longer preheat times and uneven browning. A minimum vertical clearance of 6 inches above the top and 4 inches on the sides is a common guideline, but check your model's manual. From a safety standpoint, keep the unit away from wall cabinets and fabric curtains. ToasterInsight analysis shows that most heat-related issues stem from tight enclosures rather than the oven's power rating. If space is tight, consider a dedicated heat-resistant mat or spacer to maintain the gap. When closing the oven door during operation, avoid tilting the unit; a slight tilt can block venting or stress the door hinge. We'll walk through practical measurements and show how to verify airflow with a simple test: run a brief toast cycle at a low temperature and observe any trapped heat near the cabinet.
Shelf material and structural safety
Selecting the right shelf material isn't glamorous, but it matters. A toaster oven on shelf exerts heat on its resting surface and nearby components. Metal shelves with a strong mounting frame are typically the most dependable choice because they resist warping and support weight confidently. Wood shelves can be acceptable if they are thick, stable, and protected by a heat barrier, but untreated wood may char or warp over time. If you're shelving in a cabinet, ensure the shelf is rated to carry the combined weight of the oven plus occasional cookware. Anti-tip devices, brackets, or mounting rails can dramatically reduce the risk of tipping during use or cleaning. For freestanding shelves, use level feet and non-slip pads to prevent movement. If you're unsure about load, measure the oven's weight and compare it to the shelf's rated capacity. A miscalculation here is a common cause of sagging, rattling, or worse.
Placement near walls, cabinets, and electrical outlets
Careful placement reduces heat exposure to nearby surfaces and minimizes accidents. Place the toaster oven on shelf with at least 4 inches of clearance to the back wall and 6 inches to any adjacent cabinets. Position it near a grounded outlet with enough slack in the cord to avoid tension. Avoid outlets shared with high-draw appliances in the same circuit, which can trip breakers during preheating. If outlets are scarce, consider a dedicated circuit or a heavy-duty extension only if the cord remains unattached and away from heat sources. For cabinet setups, ensure the shelf doesn't impede cabinet doors or drawers. Remember that slatted ventilation behind the oven is not a substitute for real clearance; the goal is consistent airflow around the unit while keeping fingers away from hot surfaces during operation.
Measuring before you buy or place
Before committing to a shelf, measure the oven's footprint and compare it to the shelf's dimensions. Record the oven's width, depth, and height, then add at least 1-2 inches of breathing room on each axis. If the shelf is part of a cabinet, account for door swing and any internal trim that could reduce the usable depth. Use a tape measure and a level to verify that the shelf sits flat and that the oven will sit level when the door is open during cooking. Consider the door clearance when you pull out trays; it shouldn't strike adjacent drawers or wall fixtures. If your kitchen layout changes seasonally (e.g., appliance rotation), plan a flexible spot with room to reconfigure. Finally, note the weight of the oven when empty and with a typical load; ensure the shelf's load rating exceeds the maximum by a healthy margin.
Troubleshooting setup and mounting options
Different shelves require different mounting approaches. For above-counter shelves, use sturdy brackets and screws anchored into wall studs or cabinet sides. If you are mounting inside a cabinet, add a heat shield between the oven and the cabinet to prevent heat damage. A simple steel plate or mica sheet can serve as a heat barrier. If you can't wall-mount, a freestanding shelf with a wide base and adjustable feet reduces wobble. A non-slip, heat-resistant mat under the unit protects the shelf from heat transfer and protects it from scratches when you move the oven for cleaning. After installation, test the stability by gently pressing on the front corners from different angles. A loose shelf invites movement that could topple the appliance.
Power, cords, and safety considerations
Make sure the outlet provides the right voltage and amperage for your toaster oven. Most compact ovens run on standard US 120V circuits but some models pull substantial current during peak browning. Avoid using extension cords; they can overheat and create a fire hazard if the cord is too long or undersized. Use a rigid cord setup with strain relief clamps if the oven is frequently moved. Inspect the power cord for wear, and never pinch or bend near the plug. If you notice smells or discoloration while testing, unplug immediately and reassess the outlet or the oven. A dedicated circuit is ideal for guaranteeing stable operation and minimizing nuisance tripping.
Maintenance habits that extend life
Regular maintenance pays off when you place a toaster oven on shelf. Clean crumb trays after each use and wipe down the exterior with a damp cloth to prevent grease buildup. Check vents and fans for obstructions; remove any dust with a soft brush. Inspect the shelf surface for heat-induced wear and replace mats if they crack or melt. Keep the area around the oven free of clutter that could trap heat or moisture. Periodically test the door seal and hinges; a loose seal can reduce heating efficiency and increase energy use. Store heavier pans and foil away from the immediate area to minimize accidents during loading and unloading.
Common mistakes and how to avoid them
One of the most common errors is placing the oven directly on a wooden countertop without a barrier. Another frequent mistake is ignoring airflow: people place the unit under a cabinet and forget to leave space for heat to escape. A third pitfall is using a cheap or undersized shelf that can't bear the oven's weight or resist heat. Finally, always test the setup by running a short cycle with the door closed and checking for heat buildup on nearby surfaces. By avoiding these issues, you extend your appliance's life and reduce the risk of fire.
Final checks before first use
Do a final walk-around before your first use. Confirm that the oven is level, stable, and has several inches of space around all sides. Verify that cords are not pinched, the outlet is appropriate, and the area is free of flammable materials. Place a heat-resistant mat under the oven and keep a small fire extinguisher accessible in the kitchen. After the first operation, monitor the area for heat leakage and adjust clearance if necessary. With the right shelf setup, your toaster oven on shelf will serve you well for years to come.
Tools & Materials
- sturdy shelf or cabinet shelf(Weighted to support oven plus typical cookware; check rating)
- heat-resistant mat or silicone sheet(Place under the oven to protect shelf and dissipate heat)
- anti-tip brackets or mounting rails(Essential on high-traffic kitchens; prevents tipping)
- measuring tape(Measure width, depth, and height accurately)
- level(Ensure shelf sits flat for stable placement)
- screwdriver and anchors(Needed only for wall-mounted or cabinet-mounted setups)
- cord management strap(Keeps cords from catching on doors or drawers)
- heat shield material (optional)(Used when mounting inside a cabinet to protect wood)
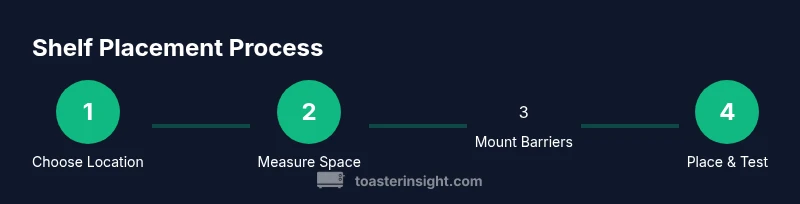
Steps
Estimated time: Total time estimate: 60-90 minutes
- 1
Assess space and choose location
Survey your kitchen area and select a shelf location with clear access to a grounded outlet. Ensure there is ventilation room and room to open the oven door without hitting cabinets or walls. This step establishes a safe baseline for all following actions.
Tip: Mark the spot with removable tape before moving appliances to verify door clearance. - 2
Measure oven and shelf dimensions
Take width, depth, and height measurements of the oven and the intended shelf. Add at least 1-2 inches of breathing space on each side, top, and back to promote airflow and reduce heat exposure to nearby surfaces.
Tip: Record measurements and compare against shelf specs to avoid surprises later. - 3
Install anti-tip hardware or brackets
Attach brackets or rails according to wall stud layout or cabinet framing. Secure firmly to resist movement during daily use and cleaning. This is critical for stability when the oven door is opened or bumped.
Tip: Use a stud finder and predrill holes to prevent wood splitting. - 4
Place oven on shelf with heat barrier
Set the oven on the heat-resistant mat, aligning it for balanced weight. Keep a visible gap from walls and cabinets to prevent heat transfer. If mounting inside a cabinet, install a heat shield between oven and wood.
Tip: Check that the power cord has slack and isn’t pinched when the door opens. - 5
Check ventilation and spacing
Perform a quick airflow check by running a short bake cycle at a low setting. Inspect vents and nearby surfaces for excessive heat during operation. Adjust spacing if needed.
Tip: Do not block rear vents with accessories or pantry items. - 6
Secure cord management
Arrange cords so they don’t dangle over the edge or near heat sources. Use a strap or clip to keep cords tidy and away from hot surfaces.
Tip: Avoid extensions that could overheat; prefer a dedicated outlet if available. - 7
Test stability and door clearance
Gently press the four corners of the oven to ensure solid contact with the shelf. Open and close the door fully to confirm no contact with nearby items.
Tip: If wobble is detected, adjust feet or add non-slip pads. - 8
First use and monitoring
Run a normal cycle and monitor by touch at first use. Note any unusual smells, heat buildup, or smoke; stop and reassess if anything feels off.
Tip: Keep a fire extinguisher accessible in the vicinity.
Your Questions Answered
Is it safe to place a toaster oven near walls?
Yes, it is safe if you maintain ample clearance (typically 4-6 inches) and ensure proper ventilation around the unit. Avoid blocking vents with doors or cabinets.
Yes, with enough clearance and ventilation around the oven.
What shelf material is best for a toaster oven?
Metal shelves with solid mounting are often the most reliable. Wood shelves can work if thick, stable, and protected by a heat barrier.
Metal shelves are usually best; wood can work with barriers.
Can I use a wooden shelf for a toaster oven?
Wooden shelves can be used if they are thick, stable, and insulated from heat with a barrier. Monitor for warping over time.
Yes, with a heat barrier and monitoring.
What power considerations should I check?
Use a grounded outlet that can handle the oven’s wattage. Avoid extension cords and consider a dedicated circuit to prevent trips during peak use.
Use a proper grounded outlet; avoid extensions if possible.
How can I verify shelf stability?
Place the oven on the shelf and apply light pressure to the corners. If there’s wobble, add anti-slip feet or adjust brackets.
Check stability by gently pressing the corners.
Watch Video
Key Takeaways
- Choose a sturdy shelf with proper clearance.
- Maintain ventilation around the oven at all times.
- Securely mount or brace to prevent tipping.
- Use a dedicated outlet and avoid extensions when possible.
- Regularly inspect for wear and clean to extend life.