Use of Oven Toaster: The Complete How-To Guide
Learn how to safely and effectively use a toaster oven for toast, reheating, and small-batch baking. This step-by-step guide covers settings, cookware, safety, and maintenance to help you cook confidently at home.

This guide helps you master the use of oven toaster for toast, reheating, and small-batch baking. You’ll learn proper settings, preheating, compatible cookware, and safety practices to achieve consistent results while saving energy. Whether you’re making toast, warming leftovers, or baking tiny treats, this approach keeps meals efficient and delicious. Gather oven-safe trays, parchment or silicone liners, mitts, a timer, and a basic thermometer to verify doneness when needed.
What is an oven toaster and why it's useful
A countertop oven, commonly called a toaster oven, combines a compact baking chamber with heating elements at the top and bottom. It’s designed to handle small meals and snacks without firing up a full-size oven. The use of oven toaster devices can save energy on small tasks while delivering crisp toasts, evenly heated leftovers, and baked treats in modest portions. Most models include a crumb tray, adjustable racks, and pre-programmed settings for toast, bake, bagel, and broil. Understanding how the interior space, rack positions, and temperature correlate with results helps you use this appliance more confidently, whether you’re preparing breakfast, lunch, or a quick dessert. In daily routines, a toaster oven can replace a larger oven for many tasks, freeing up your main oven for larger meals.
How toaster ovens differ from traditional ovens and countertop toasters
Toaster ovens are smaller than conventional wall ovens and more capable than a simple toaster, offering bake, broil, and even convection modes in many models. They heat quickly, respond to small temperature changes, and fit on crowded countertops. The key differences matter for outcomes: a conventional oven provides even air circulation at higher capacities, while a toaster oven concentrates heat in a compact cavity. Some models include a built-in convection fan that improves browning and speed. When choosing hardware, consider interior dimensions, the door design, energy use, and available presets. A compact alternative can be ideal for apartments, student kitchens, or busy households with limited space, especially when you want crisp edges on toast or reheated leftovers without heating the entire kitchen.
Key features to look for in a toaster oven
A solid toaster oven offers a mix of essential features and practical extras. Look for a wide temperature range, precise controls, a reliable timer, and a sturdy crumb tray for easy cleanup. The presence of a convection setting can dramatically improve browning and evenness, particularly for cookies or small pastries. Adjustable racks and multiple racks slots expand cooking options, while dial or digital controls affect ease of use. Safe designs include auto shutoff, cool-touch exteriors, and stable bases to prevent tipping. Finally, ensure the interior dimensions accommodate your most-used bakeware and that the exterior fits your counter space. Pair these features with energy-conscious modes to maximize efficiency during daily use.
Safety basics: placement, ventilation, and cords
Place the toaster oven on a heat-resistant, level surface away from flammable materials and moisture. Keep at least a few inches of clearance on all sides to prevent overheating and to allow airflow. Use a sturdy tray or rack that won’t tip, and avoid crowding the interior with too many items. Always unplug before removing or cleaning interior parts. The cord should not dangle over the edge where it could be pulled, and you should inspect the plug and cord regularly for wear. If your model includes a cord wrap, use it to avoid tangling during storage. These precautions help prevent burns, fires, and electric shocks during everyday use.
Preheating, temperatures, and cooking times
Preheating is optional for some tasks and essential for others. For toast, you can often skip preheating, but recipes for crisp vegetables or small pastries usually benefit from a brief warm-up period. Set the temperature according to the recipe or guideline, then allow a few minutes for the oven to reach the target. Convection models often reach effective temperatures faster, which can shorten overall cook time. Use the interior thermometer or the timer to monitor progress and avoid overcooking. If a recipe calls for a specific bake time, start checking a few minutes early to compensate for the compact cavity and strong heat.
Rack positions and cookware compatibility
Position the rack in the middle for most baking tasks, or higher for browning. For crisp edges, place food closer to the top heating element, but not so close as to risk burning. Compatible cookware includes metal pans, silicone muffin cups, and parchment-lined trays. Avoid glass bakeware that isn’t rated for high heat or heavy ceramic dishes that won’t fit in the cavity. Always lift hot pans with insulated mitts and set them on a heat-resistant surface. If your toaster oven has a rotating tray, understand its limitations and balance weight to prevent jams.
Toasting, reheating, and quick baking techniques
Toast bread or bagels on the toast setting or a low bake setting, watching closely to avoid burning. Reheating leftovers works best when you remove any plastic packaging and place items on a tray with space around them. For quick baking, small sheets of vegetables, mini pizzas, or flatbreads respond well to short cook times. Remember to preheat if you aim for a crisp crust, and avoid stacking items; air should circulate freely for even browning. For frozen items, start with a lower temperature and extend the cook time as needed.
Small-batch baking and convection benefits
Convection toaster ovens circulate hot air to speed up cooking and promote even browning. This is particularly helpful for cookies, roasted vegetables, and small sheet-pan meals. When using convection, lower the recipe temperature by about 25 degrees Fahrenheit (14 degrees Celsius) or shorten the time by a third, then monitor for doneness. Convection can also help with drying out bread crusts or creating a crunchy finish on toppings. Remember that not all recipes benefit from convection; test and adjust accordingly.
Cleaning and maintenance for longevity
Regular cleaning extends the life of your toaster oven. After cooling, remove crumb tray and wash with warm soapy water. Wipe the interior with a damp cloth, being careful not to damage the heating elements. Avoid using abrasive cleaners that can scratch enamel. Clean the exterior with a soft cloth; if it’s stainless steel, follow with a dry microfiber to reduce fingerprints. Empty and wipe the crumb tray frequently to prevent odors and smoke. Periodically check the door seals for wear and replace if needed.
Troubleshooting common issues
If food browns unevenly, rotate the tray and adjust the rack height. A smoky oven usually indicates burning bits—empty the crumb tray and remove food debris. If the oven won’t heat, check the outlet, fuses, and ensure the door is fully closed; some models have a safety switch. Smells during use may come from oils or residue; clean the interior and run a short bake cycle with a lemon slice or vinegar water to neutralize odors. If the timer seems unreliable, replace the battery or reset the control panel. For stubborn issues, consult the manufacturer’s guide.
Energy efficiency, browning control, and browning tips
To maximize energy efficiency, avoid preheating when not necessary and batch tasks that share settings. Use the convection setting when available to speed browning without raising temperatures excessively. For even browning, rotate food halfway through and avoid overcrowding. A light coating of oil can help with browning on vegetables and baked goods. Finally, select cookware with flat bottoms and good heat transfer to improve results without extra energy use.
Quick-start checklist for new users
Starting with a new toaster oven can feel daunting, but a simple checklist helps you build confidence quickly. First, place the unit on a heat-resistant surface with at least a few inches of clearance on all sides. Read the model’s manual to understand the available presets and any safety cautions. Gather essential bakeware and utensils, including an oven-safe tray, parchment or silicone liner, a pair of insulated mitts, a timer, and a clean damp cloth for cleanup. Begin with a basic test by toasting bread to learn browning levels, then reheat a plate of leftovers to gauge evenness. Keep a log of settings you used for common foods so you can reproduce results. Finally, perform a short interior wipe-down after use to prevent odors and buildup. With practice, you’ll quickly adjust temperatures and times to achieve consistent, delicious outcomes with minimal energy use.
Tools & Materials
- Oven-safe bakeware (metal, glass, or ceramic)(Must fit inside toaster oven; avoid dishes that can't withstand high heat)
- Oven mitts or heat-resistant gloves(Protect hands when handling hot trays)
- Parchment paper or silicone baking mats(Prevents sticking and simplifies cleanup)
- Silicone spatula or tongs(Turn food and remove items safely)
- Kitchen timer or smartphone timer(Track cooking times accurately)
- Instant-read thermometer (optional)(Check internal temperatures for safety)
- Soft damp cloth or brush for cleaning(Clean crumb tray and interior after use)
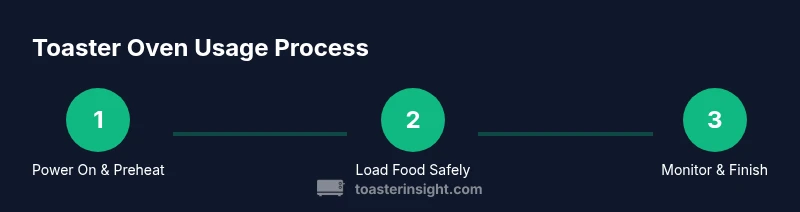
Steps
Estimated time: Estimated total time: 25-40 minutes
- 1
Review the manual and set up safely
Begin by reading the model-specific instructions. Clear the workspace of any packaging or debris and ensure the unit sits on a stable, heat-resistant surface. Verify that you have the right bakeware and safety gear within reach to minimize interruptions once you start.
Tip: Double-check the cord length and outlet compatibility before plugging in. - 2
Choose the correct rack position
Install the rack in the position most suited to your task—middle for even browning, higher for top-crisp finish. Avoid overcrowding to allow air to circulate and prevent soggy outcomes.
Tip: Start with the middle rack for new recipes to gauge heat distribution. - 3
Preheat when required by the recipe
If the task benefits from a hot start (baked goods, crisp vegetables), allow the oven to reach the target temperature before loading. Skip preheat for simple toasting tasks when you want faster results.
Tip: Use a timer to track preheat duration and adjust subsequent times accordingly. - 4
Prepare food on appropriate bakeware
Arrange items on a tray lined with parchment or a silicone mat. Ensure space around each piece for consistent air flow and browning. Label trays with contents to avoid cross-use confusion.
Tip: Avoid stacking; air needs to circulate freely for even cooking. - 5
Insert tray and set cooking parameters
Place the tray inside the oven and dial in the temperature and mode (toast, bake, convection). For quick tasks, start with lower temps and shorter times, then adjust as needed.
Tip: If using convection, reduce temperature by about 25°F (14°C). - 6
Monitor progress and adjust as needed
Use the timer and visually inspect browning or doneness mid-way. Stir or rotate the tray if items are unevenly colored.
Tip: Set alarms at 1–2 minute intervals near the end of cook time for precise results. - 7
Finish and remove safely
When done, use insulated mitts to remove the tray. Let items rest briefly to finish cooking from residual heat, then transfer to a cooling rack or plate.
Tip: Place hot trays on a heat-resistant surface to avoid damage. - 8
Cool and test for doneness
Verify texture and temperature with a quick touch test or thermometer if needed. Avoid cutting into baked goods immediately to prevent gummy centers.
Tip: For breads, tap the crust to ensure a hollow sound indicates doneness. - 9
Clean up after each use
While the oven is still warm, remove the crumb tray and wipe any spills. Let surfaces cool before washing with mild soap and water.
Tip: Never use abrasive cleaners that could scratch enamel. - 10
Maintenance routine
Regularly inspect the door seal, racks, and crumb tray. Replace worn parts and perform a quick interior wipe-down monthly or as needed.
Tip: Keeping a simple maintenance log helps extend the appliance's life. - 11
Store safely and protect from damage
Unplug and store with the crumb tray removed to prevent dust buildup. Keep on a stable surface away from sinks or moisture-prone areas.
Tip: Coil the cord neatly to avoid tripping or tangling. - 12
Expand usage with new recipes
Experiment with small-batch bakes, reheated leftovers, or unique toasts to learn how temperatures and times translate to your kitchen.
Tip: Document successful settings for quick future reference.
Your Questions Answered
Can I bake a small pizza in a toaster oven?
Yes. A toaster oven can bake a small pizza; use a suitable tray and preheat if the recipe specifies. Keep an eye on crust browning and adjust time to prevent overcooking.
Yes, you can bake a small pizza; preheat as needed and monitor crust browning for best results.
Is a toaster oven energy efficient?
Generally yes for small meals, since it uses less energy than a full-size oven and heats up quickly. Efficiency depends on proper preheating and avoiding unnecessary preheating.
Toaster ovens are usually more energy-efficient for small tasks than full ovens, especially with mindful preheating.
Can I bake cookies in a toaster oven?
Yes, cookies bake well in many toaster ovens, especially with convection. Use smaller batches and monitor closely since heat is concentrated.
Yes, you can bake cookies in a toaster oven; keep batches small and watch for browning.
What is convection in toaster ovens?
Convection uses a fan to circulate hot air, yielding faster and more even browning. For convection, lower temperatures or shorter times are often needed.
Convection means a fan circulates hot air, speeding up browning and cooking.
What cookware is safe for toaster ovens?
Use metal, silicone, or oven-safe glass that fits inside the cavity. Avoid non-oven-safe glass or heavy ceramic that won’t fit well or could crack.
Metal, silicone, and oven-safe glass are typically safe; avoid heavy or non-oven-safe pieces.
How do I clean a toaster oven safely?
Unplug the unit, remove the crumb tray, and wipe the interior with a damp cloth. Avoid harsh chemicals on enamel and never spray water near heating elements.
Unplug it, remove crumbs, and wipe with a damp cloth. Avoid harsh chemicals near the heat.
Watch Video
Key Takeaways
- Master the basics: preheat when needed and select the correct rack position.
- Use appropriate bakeware to ensure safety and even browning.
- Convection can speed cooking; adjust temps and times accordingly.
- Regular cleaning extends appliance life and preserves flavor.
- Document reliable settings for quick future meals.