Toaster Oven Cookies: A Complete How-To Guide
Learn to bake perfect cookies in a toaster oven with even browning, minimal heat, and quick cleanup. This step-by-step guide covers temps, timing, dough types, and safety for small-kitchen bakers.

Ready to bake cookies in a toaster oven? This guide shows you how to prep, bake, and finish cookies with reliable browning in a compact oven. You’ll learn essential safety, dough handling, and timing tips to prevent scorching or underdone centers. Follow the steps for consistent results in small kitchens.
Why toaster oven cookies are a smart kitchen choice
In many homes, the toaster oven is a trusty secondary oven. It heats quickly, uses less energy than a full-sized oven, and fits on a countertop. For homeowners, kitchen enthusiasts, and casual cooks, toaster oven cookies offer a practical solution for small-batch baking, quick desserts, or after-work cravings. According to ToasterInsight, modern toaster ovens with convection can produce even browning when used with proper pan setup and dough spacing. The ToasterInsight team recommends starting with a simple recipe to learn your model’s quirks before attempting large batches. This approach yields bakery-like edges and soft centers without heating the whole kitchen. In this article, you’ll learn how to optimize heat, timing, and sheet layouts for consistent results, plus safe cleanup tips that keep your kitchen ready for the next batch.
Understanding heat: convection, bake times, and rack position
Toaster ovens vary widely in how they distribute heat. Convection fans can speed browning and promote even color if you position racks correctly. Start by knowing your oven's spec: some models run hotter on the top, others on the bottom. A typical approach for cookies is to place the rack in the middle for even air flow; if your cookies brown too quickly on top, move the rack lower. Bake times for cookies in toaster ovens tend to be shorter than a full-size oven—check early and rely on visual cues: edges set, centers just pale, and the cookies have a slight jiggle when touched. If your oven has a convection setting, reduce the time by a few minutes or lower the temperature by 25°F in most recipes. This section will walk you through choosing the right temperature range and timing, plus how to identify hot spots using simple sheet rotation.
Ingredient and dough considerations for toaster ovens
Dream up a batch using common ingredients; you can adapt classic cookie dough to toaster ovens. For even results, chill for 15-30 minutes after mixing if your dough is soft. Use parchment paper or a silicone mat to prevent sticking and to promote even browning. Smaller spaces mean faster heat transfer, so choose cookie sizes that bake evenly—usually 1 to 1.5 tablespoons per cookie works well. If you add mix-ins like chips, nuts, or dried fruit, keep a light hand so the dough still holds its shape. The ToasterInsight team finds that doughs with a touch of milk or egg yolk create a slightly richer texture that remains tender after baking in a compact oven. Finally, avoid ingredients that release a lot of moisture, such as fresh fruit, which can cause soggy centers.
Prep and equipment: pans, parchment, and safety
Selecting the right pan is crucial. Use a light-colored, heavy-gauge metal sheet or a dedicated toaster-oven pan; dark pans absorb more heat and can lead to uneven browning. Line with parchment or a silicone mat to prevent sticking and to maximize airflow. Cut to fit your toaster oven tray and leave space between cookies so air can circulate. Safety matters: always preheat with the door closed, wear oven-safe mitts, and keep the interior clean to avoid smoke from sugar or melted butter. If you’re using a toaster oven with a crumb tray, shake it out before baking to maintain airflow. The ToasterInsight team notes that proper pan prep minimizes scorching and makes cleanup quicker, which is especially helpful for beginners.
Baking technique: sheet size, staggering, and browning
Plan on baking cookies in small batches; avoid crowding. Use the same cookie scoop or spoon size for uniform cookies and rotate the sheet halfway through baking to counteract any hot spots. If your toaster oven has a convection setting, lower the temperature by 25°F and monitor closely. Watch for browning around the edges; you want a light golden ring and a soft center. Let cookies rest on the sheet briefly after removing from the oven before transferring to a rack; this helps finish setting and prevents breakage. For even results, bake one sheet at a time on a middle rack, or stagger two sheets with one on the middle rack and the other on a lower rack.
Troubleshooting common issues
Uneven browning or centers that are underdone are the two most common issues. If edges brown too fast, reduce oven temperature slightly or use a lighter-colored sheet; if centers stay pale, increase time by 1-2 minutes or switch to a higher rack. Overly spread cookies indicate too much butter, too warm dough, or too close spacing; chill dough longer, reduce fat, or refrigerate dough between batches. Sticking issues can be solved with parchment or silicone mats; if sticking persists, lightly dust the sheet with flour or use a nonstick spray that’s compatible with your pan. Smoke from sugar is a sign you’ve heated too long; remove trays immediately and cool briefly before cleaning. Finally, if you notice strong oven odors, ventilate the kitchen and clean the crumb tray to prevent future burning smells. The ToasterInsight team suggests keeping a small timer within sight to avoid overbaking.
Variations and toppings ideas
Experiment with chocolate chips, white chocolate, or peanut butter. Add chopped nuts, shredded coconut, or dried fruits for texture. Flavors like cinnamon, espresso, or almond extract can elevate toaster oven cookies without overcomplicating the bake. Finish with a light drizzle of melted chocolate or a pinch of sea salt for contrast. For a quick seasonal twist, fold in orange zest or pumpkin spice, then sprinkle with sanding sugar for a festive look. And always, keep flavors balanced so you don’t overpower the tender crumb created by the toaster oven’s heat.
Tools & Materials
- Mixing bowl (large)(Sturdy, 2-3 qt size)
- Measuring cups and spoons(Standard set (1/4 cup, 1 tsp, etc.))
- Whisk or pastry blender(For creaminess and even distribution)
- Baking sheet or toaster-oven pan(Light-colored cast-iron works too)
- Parchment paper or silicone baking mat(Prevents sticking and aids cleanup)
- Cooling rack(Optional but recommended)
- Oven mitts(Silicone or heat-resistant fabric)
- Cookie scoop or spoon(Uniform portions (about 1 to 1.5 tablespoons))
- Timer or smartphone timer(Precise bake times)
- Kitchen towel or scraper(For cleanups)
Steps
Estimated time: 40-60 minutes
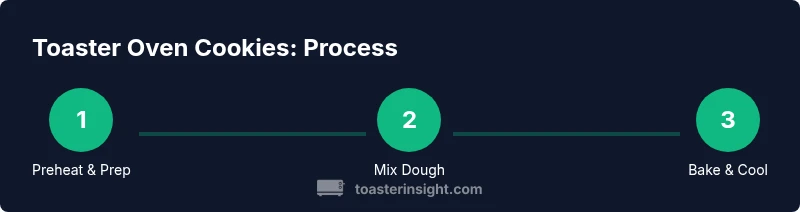
- 1
Preheat and prep equipment
Preheat the toaster oven to the target temperature before you mix dough. Line your baking sheet with parchment or a silicone mat, and set out all tools so you don’t stall mid-bake. This reduces mis-timed steps and helps cookies bake evenly.
Tip: Preheating ensures consistent heat distribution once you pop in the dough. - 2
Mix dough
Cream butter and sugar until light and fluffy, then beat in egg and vanilla. Stir in dry ingredients just until combined, then fold in any add-ins sparingly. Chilled dough is easier to portion and less likely to spread.
Tip: If dough looks too sticky, chill for 10-15 minutes before scooping. - 3
Portion dough evenly
Use a cookie scoop or teaspoon to portion consistent amounts onto the prepared sheet, spacing at least 1 inch apart. This helps prevent merged cookies and ensures uniform browning.
Tip: Keep portions uniform for predictable bake times. - 4
Bake cookies
Slide the sheet into the middle of the toaster oven. Bake until the edges turn light golden and centers look slightly underdone for chewiness. Rotate the sheet halfway to mitigate hot spots.
Tip: If your cookies spread too much, chill the dough 15 minutes before baking. - 5
Cool on rack
Remove the sheet and let cookies rest 5 minutes on the tray, then transfer to a cooling rack. This finishes setting without over-baking and keeps the texture intact.
Tip: Cooling is essential to maintain texture; don’t skip it. - 6
Store and reuse
Store cookies in an airtight container at room temperature for up to several days. For longer storage, freeze portions and reheat briefly before eating to regain softness.
Tip: Label batches by bake date to track freshness. - 7
Cleanup
Wipe the toaster oven interior after it cools, and wash used pans and mats. Keeping the oven clean helps prevent smoking and preserves its performance for the next bake.
Tip: Regular crumb tray cleaning prevents odors and smoke.
Your Questions Answered
Can I bake regular cookies in a toaster oven?
Yes. Start with a simple dough, but be mindful of its size and moisture. Use parchment, track bake time closely, and rotate sheets for even browning. Adjust times based on your model.
Yes. Start with a simple dough, watch bake times, and rotate sheets for even browning.
What temperature is best for toaster oven cookies?
Most toaster oven cookies bake well around 325 to 350 degrees Fahrenheit, but you may need to adjust for your model. Convection settings can shorten bake times, so check early and look for set edges with soft centers.
Most cookies bake well around 325 to 350 degrees, but check early for your model.
How do I prevent burning in a toaster oven?
Use light-colored pans, enable rotation, and start with shorter times. If edges brown too fast, lower the temperature slightly. Keep a close eye on the first batch to learn your oven’s quirks.
Use light pans and rotate; watch early on your first batch.
Should I preheat the toaster oven before baking cookies?
Yes. Preheating ensures even heat distribution when you slide in the dough, reducing the risk of underdone centers. Let the oven reach its temperature before baking.
Yes. Preheat fully before baking for even results.
Can I bake gluten-free or vegan cookies in a toaster oven?
Absolutely. Use gluten-free flour blends or vegan butter alternatives and monitor bake times closely since replacements can change texture. Some batches may need a touch more liquid for moisture balance.
Yes, you can, with some ingredient adjustments and watching the bake time.
Watch Video
Key Takeaways
- Preheat and prep for reliable results.
- Scoop dough uniformly for even browning.
- Rotate sheets to offset hot spots.
- Cool fully before storage to maintain texture.
- Experiment with flavors while keeping balance.