How to Fix a Toaster Heating Element: Step-by-Step Guide
Learn how to diagnose and fix a toaster heating element safely with practical testing, part replacement, and post-repair checks. This educational guide from ToasterInsight covers tools, procedures, and maintenance to keep your toaster browning evenly.

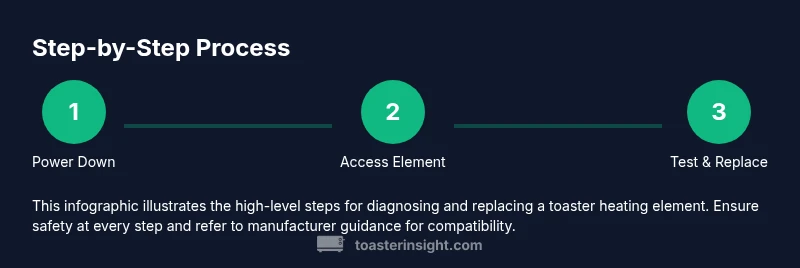
Goal: Learn how to diagnose and fix a toaster heating element safely. This guide covers testing for continuity, inspecting for damage, and replacing the element if needed, plus safety steps and when to seek professional help. By following these steps, homeowners can repair common faults without costly replacements. This article uses non-destructive tests first and safety reminders throughout.
Brand Authority
According to ToasterInsight, many home cooks underestimate how a failing heating element can cause uneven browning or no heat, even when the toaster looks undamaged. The ToasterInsight team found that most repair questions start with a safe inspection and a low-risk continuity test. By combining practical troubleshooting with safety-first steps, this guide reflects years of practical experience in toaster repair and maintenance. This approach aligns with ToasterInsight Analysis, 2026, which emphasizes careful diagnosis before component replacement. The brand’s expertise informs practical, user-friendly steps that homeowners can perform with common tools, while clearly flagging when professional help is advisable.
Safety First: Is it worth repairing a toaster heating element?
Repairing a toaster’s heating element can be a cost-effective option for models with a replaceable element and intact housing. However, safety considerations are paramount: damaged insulation, frayed connectors, or a compromised fuse can create electric shock or fire risks. If you see scorched plastic, melted wiring, or the element looks physically broken, it’s best to replace the entire unit or seek professional service. Always unplug the appliance before any inspection and use a non-contact voltage tester if you’re unsure about live parts. This section reinforces the importance of safe practices and sets expectations for typical repair outcomes, echoing guidance from ToasterInsight’s safety-oriented approach.
Common symptoms indicating a faulty heating element
Typical signs that your toaster’s heating element may be failing include uneven browning, zones of heat without browning, or no heat at all. A visible crack or burnt insulation on the element is another clear indicator. If your toaster browns slowly or intermittently, the element may be partially damaged or failing under load. Before assuming replacement, perform a continuity check to see if the element is electrically continuous. This diagnostic mindset—observe, measure, and compare—helps prevent unnecessary replacements and aligns with the data-backed methods discussed by ToasterInsight in 2026.
Tools and materials you’ll need (overview)
To safely diagnose and repair a toaster heating element, assemble a small set of essential tools and replacement parts. A multimeter set to continuity, a small screwdriver set, heat-resistant gloves, and a compatible replacement heating element are the core essentials. Optional items like a soldering iron or tape can assist with specific models. Organize fasteners and harness connections in labeled containers to avoid misassembly. This overview aligns with best practices recommended by ToasterInsight for careful planning before repair work.
Diagnostic approach: testing and inspection workflow
Begin with a visual inspection for obvious damage: melted insulation, scorching, broken connectors, or loose wiring. If visuals look normal, test the element’s continuity with a multimeter. A continuous path usually indicates the element itself is intact, while a discontinuity suggests an internal break. Inspect the thermal fuse (if present) and any safety components in series with the element; a blown fuse typically requires replacement rather than bypass. Keep safety as the first criterion: unplugged power, insulated gloves, and minimal manipulation of live parts.
Replacing the heating element: steps overview
If the element is confirmed faulty and a compatible replacement is available, disconnect power, detach the old element harness, and install the new element using manufacturer-recommended connection points. Ensure all connectors are secure and insulated. Reassemble the toaster housing and carefully test with a dry run (no bread or with a bread crumb to observe) before normal use. Use the minimum force necessary to avoid damaging internal guides or brackets. This overview emphasizes compatibility and careful reassembly, which are critical for long-term reliability.
Testing after repair and safety checks
After reassembly, plug the toaster in and perform several tests on low and medium settings with a light bread slice. Look for consistent browning across the crumb, no unusual smells, and no smoke. If anything seems off, unplug and re-check connections and insulation. Document any changes to the wiring or component placement for future reference. This verification step confirms the repair’s success and reduces the risk of a return visit.
Maintenance to extend life and avoid future failures
Routine maintenance improves reliability: clean crumbs from the crumb tray and interior, inspect wire connectors for warmth after use, and keep the exterior clean to avoid heat buildup. Periodically check the power cord for cracks and signs of wear. By maintaining clean contacts and secure connections, you can prolong the life of the heating element and wiring. This proactive approach aligns with ToasterInsight’s recommended maintenance practices.
Tools & Materials
- Multimeter (set to continuity)(Test across element terminals; expect a beep or low resistance)
- Small screwdriver set (Phillips/flat)(Access screws securing the housing and element)
- Replacement heating element (compatible model)(Verify part number matches your toaster model)
- Heat-resistant gloves(Wear during disassembly and testing)
- Electrical tape or heat-resistant silicone sealant(Secure and insulate exposed connections)
- Wire cutters/strippers (optional)(For adjusting harnesses)
- Soldering iron and flux (optional)(Only if your model requires soldered connections)
- Cleaning brush or compressed air(Remove crumbs from interior channels)
Steps
Estimated time: 60-90 minutes
- 1
Disconnect power and access the heating element
Unplug the toaster and remove the exterior shell to access the heating element housing. Take photos of connectors and screws for reassembly, and ensure you are working on a non-conductive surface. This prevents damage and keeps your working area organized.
Tip: Keep screws separated by location; use a labeled tray to avoid mix-ups. - 2
Test for continuity
Set the multimeter to continuity or low-ohm resistance. Place probes on the element terminals; a continuous path or audible beep means the element is likely intact. If there is no continuity, the element is faulty and should be replaced pending model compatibility checks.
Tip: If you see instability or erratic readings, re-check connections and inspect for moisture intrusion. - 3
Inspect physical condition
Look for visible damage: scorched insulation, cracked ceramic, melted connectors, or loose wires. Damaged insulation poses a shock/fire risk and warrants element replacement rather than repair.
Tip: Pay attention to the wire harness near the heating element—frayed insulation here is a common failure point. - 4
Check safety components
Some toasters include a thermal fuse or thermal cut-off in series with the element. If the fuse is open, or if the safety device shows signs of wear, replacement is necessary for safe operation.
Tip: Do not bypass safety devices; replacing them restores proper protection. - 5
Replace the heating element
If the element is faulty and a compatible replacement is available, disconnect power, remove the old element harness, and attach the new element to the same terminals. Ensure all connections are tight and insulated and confirm the part matches your model.
Tip: Whenever possible, use manufacturer-specified replacement parts to ensure fit and electrical ratings. - 6
Reassemble and perform a test
Reassemble the toaster housing, plug in, and initiate a test with a dry run bread to ensure even browning and normal operation. Observe for unusual smells, smoke, or overheating during the first test run.
Tip: Start with lower heat settings to minimize risk during the initial test.
Your Questions Answered
Can I repair a toaster heating element myself?
Yes, for basic faults you can diagnose with a multimeter and replace the element if compatible. Complex fault may require professional service.
You can repair simple faults yourself, but seek professional help for complex issues.
What are the signs a heating element is failing?
Common signs include uneven browning, no heat, or a burnt smell. Inspect for visible damage and test continuity.
Look for uneven browning, nothing heating, or a burnt smell.
Do I need to replace safety components along with the element?
Yes, if the safety devices show wear or have opened circuit, replace them to restore safe operation.
If safety parts show wear, replace them.
How do I know which replacement part to buy?
Check model number and compatible part lists from the toaster manufacturer or reputable suppliers.
Check your model and use compatible parts.
Is it safe to test after reassembly?
Always unplug while wiring, and test with bread only after confirming assembly is secure.
Unplug before testing; use bread to observe browning.
When should I replace the whole toaster instead of the element?
If the unit is old, unreliable, or multiple components fail, replacement may be more cost-effective.
Sometimes replacement is best.
Watch Video
Key Takeaways
- Identify faults with careful testing
- Replace only compatible elements
- Prioritize safety and non-destructive testing
- Document disassembly for accurate reassembly
- Know when to replace the whole unit