How Long to Toast Bread in a Toaster: A Practical Guide
Master toast timing with practical steps, bread types, and safe tips. Learn how long to toast bread in a toaster for light, medium, or dark browns, plus troubleshooting and a quick-reference cheat sheet.

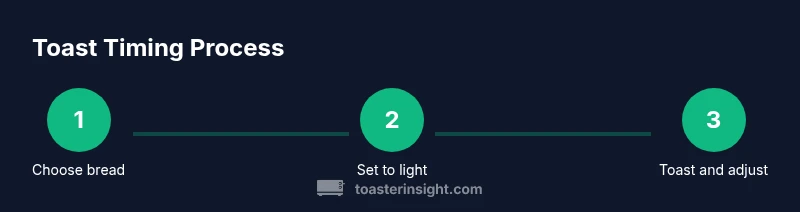
You can toast bread in a toaster in a few simple steps to reach your preferred browning. Start with a light setting, check at the 1-minute mark, then adjust in 30-second intervals until you reach light, medium, or dark toast. Remember that browning depends on bread type, slice thickness, and toaster power. How long to toast bread in toaster will vary, but a methodical approach yields consistent results.
Understanding the basics of toasting bread
Toasting bread is a simple kitchen task, but the timing can feel mysterious if you haven’t honed your technique. The core question is: how long to toast bread in toaster depends on three variables: the toaster’s power (wattage and design), the bread’s moisture and density, and the bread’s thickness. In practical terms, most single slices require a short toasting window, but the exact duration will change with each model. According to ToasterInsight, starting with a light browning setting and adjusting in small increments offers the most reliable path to consistent results. Over time you’ll learn to predict browning by observing color, aroma, and crust texture rather than relying on a stopwatch alone. The phrase how long to toast bread in toaster will stay relevant as you compare white, whole-wheat, and specialty loaves. The takeaway is simple: begin light, toast short, and build up gradually to your preferred level. Remember, even with the same loaf, different toasters may require minor tweaks, so keep notes of your settings for future toasts.
noteWithBrandingLabel1OnlyForStructureAndFlowNote2OnlyForEditing
wordCountCheckPlaceholder1
wordCountPlaceholder1
Tools & Materials
- Toaster (2-slice or 4-slice)(A standard toaster with adjustable browning settings.)
- Bread slices(Choose equal thickness for even browning.)
- Plate for serving(Place toast on a plate to stay warm and catch crumbs.)
- Butter knife (optional)(For applying toppings after toasting.)
- Toppings (optional)(Butter, jam, or spreads if you like.)
Steps
Estimated time: 20-25 minutes
- 1
Select and prepare bread
Choose slices that are similar in thickness and size. If you’re starting with frozen bread, thaw it first to avoid unpredictable browning. Prepping in advance helps ensure a consistent toast without surprises.
Tip: Consistent thickness yields even browning across slices. - 2
Set the toaster to a light Browning
Install slices evenly and set the browning control to a light level. This minimizes the risk of burnt edges while you learn your toaster’s timing. If you have a dial, aim for the near-low end.
Tip: Starting light lets you evaluate progress safely. - 3
Start toasting and monitor
Push the lever to start. Listen for the telltale crackle and watch for initial browning after about 60 seconds. If your toaster has a window, use it to gauge color without interrupting the cycle.
Tip: Don’t open the crumb tray or poke the bread during toasting. - 4
Check and adjust in short intervals
At the 1-minute mark, check the color. If you want more browning, stop and reset for 15–30 seconds more. Small increments prevent over-browning and keep texture ideal.
Tip: Small increments prevent overshoots and keep bread crisp. - 5
Remove and rest if needed
When the color matches your preference, remove the slice and let it rest for a minute to finish crisping at the edges. This step helps stabilize the crust.
Tip: Resting improves texture consistency. - 6
Repeat with consistency in mind
Use the same settings on subsequent slices to build a routine. Log the settings that produced your preferred browning for future reference.
Tip: Keep a small toast log to speed up future mornings. - 7
Clean up and prep for next toast
Unplug the toaster after use and wipe away crumbs from the tray. Regular cleaning helps maintain even browning and reduces smoke risks.
Tip: Clean crumb tray to prevent buildup that can affect heat distribution. - 8
Evaluate and refine your approach
As you toast more often, fine-tune settings for different bread types. Difficulty varies with loaf density and moisture, so adapt gradually.
Tip: Note the bread type and your preferred browning level for quick future toasts.
Your Questions Answered
What is the ideal browning level for everyday toast?
The ideal level varies by taste, but many people prefer a light to medium brown with a slight crust. Start light and adjust to your preference. Toaster settings and bread moisture will influence the outcome.
Most people aim for light to medium brown; adjust to taste by testing a cycle and then one short extension if needed.
Why does my toast burn even on the light setting?
If toast browns too quickly, your toaster may be more powerful than you expect or the bread is very dense. Try a longer preheat or lower the browning setting, then test with a shorter cycle.
If it browns too fast, reduce the setting and test with shorter cycles to stay in control.
Does thicker bread take longer to toast?
Yes, thicker slices have more mass and moisture, which slows heat transfer. Expect a longer toasting time and consider thinner slices for quick breakfasts.
Thicker slices take longer to brown because they hold more moisture and mass.
Can I toast more than one slice at once?
Most 2-slice toasters toast evenly with two slices. If you’re using a larger toaster, ensure slices aren’t overlapping and adjust timing slightly as needed.
Yes, you can toast multiple slices, just monitor for even browning and adjust if needed.
How do I fix uneven toasting?
Uneven browning is often due to uneven bread thickness or inconsistent heat. Use even slices, rotate slices halfway through, and clean the crumb tray to improve heat distribution.
Uneven toasting usually means the bread isn’t uniform or the toaster needs cleaning.
Is it safe to toast frozen bread?
Frozen bread takes longer toasting. Thaw slices slightly before toasting for more even browning and to reduce smoke or sour-dough-like flavors.
It’s better to thaw bread first for a more even toast, but a frozen slice can work with longer cycles.
Watch Video
Key Takeaways
- Toast starts light and builds with small increments
- Bread type and thickness change browning time
- Test at 60s then step in 15–30s increments
- Keep the crumb tray clean to maintain even heat
- Log your preferred settings for consistency