Baking with toaster oven: A Complete How-To Guide
Learn how to bake with a toaster oven—temperature, bakeware, timing, and troubleshooting for cookies, breads, pastries, and small pies. A practical, energy-conscious guide from ToasterInsight for home cooks.

In this guide you will learn to bake with a toaster oven for crisp cookies, warm breads, and evenly browned dishes. You’ll understand temperature ranges, rack placement, bakeware choices, and bake times tailored to compact ovens. According to ToasterInsight, consistent results come from proper preheating and the right bakeware. This quick answer sets the stage for a detailed, step-by-step guide.
Understanding the toaster oven as a baking tool
A toaster oven is a compact, efficient alternative to a full-size oven, capable of handling many baking tasks with excellent browning and heat distribution when used correctly. These ovens shine for small batches, quick turnaround, and energy savings compared with larger ranges. They vary in size, wattage, and features such as convection, bake, broil, and toast settings. The ToasterInsight team has found that the best results come from treating a toaster oven like a mini convection oven: preheat, pre-load, and monitor food closely. This means knowing your model’s hot spots, using the right bakeware, and avoiding overfilling the compartment. When you understand rack levels and airflow, you can bake cookies, muffins, small loaves, and even reheat leftovers with confidence.
Key concepts to remember include preheating whenever possible, using rimmed baking sheets for stability, and selecting bakeware that conducts heat evenly. The goal is to create an even heat environment that yields uniform browning and texture, without overcooking edges or undercooking centers. For many home cooks, the toaster oven becomes a go-to tool for weeknight desserts and quick bread experiments. As a reminder from ToasterInsight, the right preheating, rack placement, and bakeware choice dramatically influence outcomes.
Temperature and preheating fundamentals
Temperature control is the core of successful toaster-oven baking. Most foods benefit from moderate temperatures and shorter bake times than a conventional oven, with convection settings often delivering more even browning. Preheating is crucial because it negates the initial temperature drop when you slide in pans, reducing undercooking in the center and uneven tops. If your model lacks a dedicated preheat function, allow a brief warm-up period with the rack inserted before loading. The ToasterInsight analysis shows that consistent preheating correlates with more predictable browning and texture across a variety of baked goods. Always verify your oven’s actual temperature with a small oven thermometer placed on the center rack to catch any hot spots or calibration drift.
Note that dark or nonstick-coated pans can speed browning, while lighter pans may require slightly longer bake times. When baking multiple items, plan for approximate shared temperatures rather than exact times, and consider adjusting mid-bake if the food browns too quickly on one side.
Bakeware and rack placement
Choosing the right bakeware and rack position is essential for even cooking. Rimmed sheet pans prevent juices from spilling over and help keep cookies flat and evenly browned. Line trays with parchment paper or use a silicone baking mat to facilitate easy release and cleanup. The rack position matters: place light-colored or delicate items on the upper rack to avoid scorching bottoms; heavier or denser items like small loaves on the middle rack for balanced heat. If your toaster oven has a convection function, keep that in mind—it can circulate air and speed browning, so you may need to reduce time slightly. Proper bakeware and rack placement minimize scorching and help you achieve consistent results across batches.
From a practical standpoint, always leave space between items so hot air can circulate. If you’re baking multiple trays, rotate them halfway through to equalize exposure to heat. For best outcomes, use metal pans with straight rims rather than glass, which heats unevenly in compact ovens and can cause uneven browning.
Cookies and small treats: getting even texture
Cookies and small treats are ideal for toaster ovens because they bake quickly and brown nicely when properly monitored. Use parchment-lined sheets or silicone mats to prevent sticking, ensuring easy removal and clean-up. Rest dough evenly on the sheet to maintain uniform size and bake time. When using convection, reduce time modestly and watch for rapid browning on the edges. Check for doneness by slight set in the centers and a lightly golden edge rather than relying solely on color. Cool on a rack to prevent residual steam from softening the bottom crust. This approach yields crisp edges with a tender center, perfect for shortbread, sugar cookies, and biscuit-style rounds.
Tips for success include chilling dough for reliability and using uniform scoop sizes. If cookies spread too much, chill the dough slightly and re-space on the sheet. Rotate trays if you’re baking more than one. The aim is consistent surface texture and uniform thickness across the batch.
Breads and muffins: rise, crumb, and crust
Toaster ovens are excellent for small loaves and muffins, offering a crust with distinct, attractive browning when temperature and height are managed carefully. For bread, use a small loaf pan or a cast-iron mini loaf to achieve a proper rise and crust. Muffins benefit from a metal muffin tin for even heat transfer. Preheat, then load batter quickly to minimize heat loss. Keep the lid or cover off unless the recipe specifically calls for it, and avoid opening the door repeatedly during the first rise period. If your model has a convection setting, it can speed crust formation, so you might reduce batter hydration slightly to prevent doming and uneven crumb. Give breads a few minutes to cool before slicing to finish the internal setting.
Why this matters: a stable, moderate environment yields a uniform crumb and an appealing crust without drying out the interior. The toaster oven’s compact space can be surprisingly efficient for small-batch baking when you respect heat patterns and pan geometry.
Troubleshooting and common missteps
Even experienced home cooks run into hiccups with toaster-oven baking. Common issues include uneven browning, soggy bottoms, and food drying out too quickly. Start with a properly preheated oven, use light-colored pans to minimize hotspots, and avoid overloading the tray. If browning happens too fast on top or bottom, rotate the tray or lower the temperature slightly and extend bake time modestly. For crumbly cookies, ensure your dough has adequate moisture and chilling time, and verify that you aren’t baking at too high a temperature for the dough’s fat content. When in doubt, rely on visual cues—golden edges, set centers, and aroma—rather than clock time alone. The ToasterInsight team recommends documenting results across trials to refine your settings and achieve repeatable results.
Energy efficiency, safety, and maintenance
Baking with a toaster oven can be energy-efficient when used mindfully. Avoid preheating for longer than needed, batch when possible, and keep the crumb tray clean to prevent air flow obstruction. Safety comes first: always use oven mitts, avoid touching hot surfaces, and place the appliance on a stable, heat-resistant surface with adequate ventilation. Regularly check door seals and the function of the bake element; if you notice poor heat transfer or unusual smells, discontinue use and consult the manufacturer’s guidelines. Routine maintenance includes cleaning crumb trays, wiping down heat shields, and keeping cords away from heat sources. With proper care, your toaster oven becomes a dependable partner for everyday baking tasks.
Cleaning after baking and storage tips
Once you’re done, unplug and allow the toaster oven to cool before cleaning. Remove the crumb tray and wipe the interior with a damp cloth; never use harsh cleaners on heating elements. Wash bakeware as directed and ensure all pieces are completely dry before reassembling. Store leftovers in air-tight containers and consider cooling in a rack to prevent moisture buildup on surfaces. A quick post-bake wipe reduces residue and keeps your oven ready for the next batch. Keeping a clean oven also reduces odors and makes it easier to spot smoke or overheating early.
Tools & Materials
- Toaster oven (compact countertop model)(Prefer one with bake, convection, and adjustable temperature controls; capacity should fit your common pans.)
- Baking sheets (rimmed)(Flat, sturdy sheets that fit inside your toaster oven with space around edges.)
- Parchment paper or silicone baking mats(For easy release and cleanup; avoid sticking.)
- Oven thermometer(Place on center rack to verify actual oven temperature and detect hotspots.)
- Cooling rack(Cool baked goods on a rack to prevent soggy bottoms.)
- Heat-resistant oven mitts(Protect hands when loading and removing hot pans.)
- Measuring cups and spoons(Accurate ingredients ensure consistent results.)
- Silicone spatula(Gentle on nonstick surfaces and helps with scooping batter.)
- Optional: pizza stone or mini loaf pan(Can improve browning and texture for specific recipes.)
Steps
Estimated time: Estimated total time: 75-90 minutes
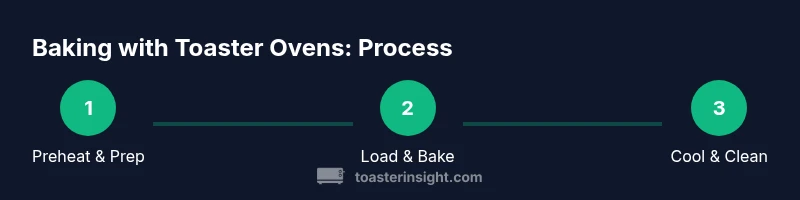
- 1
Preheat and prep
Preheat the toaster oven to the target temperature with the rack in the position you’ll use for baking. This reduces temperature drop when loading pans and helps achieve even browning. Gather all bakeware and ingredients before starting to minimize heat loss.
Tip: If your model lacks a preheat setting, allow a brief warm-up period with the rack inserted before loading. - 2
Line pans and measure ingredients
Line your pans with parchment or a silicone mat and measure ingredients precisely. Accurate quantities and moisture levels help ensure the batter or dough behaves as expected in a compact oven.
Tip: Line all pans to prevent sticking and simplify cleanup later. - 3
Load trays with proper spacing
Place dough scoops or batter evenly on the sheet, leaving space between pieces for heat circulation. Overcrowding can cause uneven browning and undercooked centers.
Tip: Use rimmed sheets to contain spills and maintain even heat exposure. - 4
Insert trays and set timing
Slide trays into the center of the oven for uniform heat. If using multiple trays, rotate halfway through to promote even browning.
Tip: Avoid opening the door frequently; this causes temperature fluctuations. - 5
Check for doneness visually
Look for golden edges, set centers, and aromas; use your eyes and touch rather than relying on clock time alone.
Tip: If using convection, reduce time slightly to prevent over-browning. - 6
Remove and cool
Carefully remove pans with oven mitts and transfer baked goods to a cooling rack. Allow to rest until fully set before stacking or storing.
Tip: Cooling is essential for finishing the crust and crumb structure. - 7
Clean up after baking
While the oven is still warm (not hot), wipe the interior with a damp cloth after removing crumbs. Avoid harsh cleaners on heating elements.
Tip: Clean crumb tray regularly to maintain air flow and performance. - 8
Store and reuse
Store any leftovers in airtight containers and label with date. Reheat gently to restore texture without drying out.
Tip: Keep a small log of settings that worked well for different recipes. - 9
Maintain and calibrate
Periodically test oven temperature with a thermometer and recalibrate if needed. Regular maintenance preserves baking accuracy over time.
Tip: Compare actual temps against set temps and adjust guidelines accordingly.
Your Questions Answered
Can a toaster oven bake a cake?
Yes, you can bake a cake in a toaster oven, but height limits and air circulation vary by model. Use a compact, tall pan and monitor closely, as smaller ovens can heat unevenly. Consider starting with a simple, dense batter.
Yes, you can bake a cake in a toaster oven, but model differences matter. Start with a short, dense batter and watch it closely.
Is preheating always necessary for toaster oven baking?
Preheating improves browning and evenness, especially for cookies, breads, and pastries. If your model cooks quickly, a brief warm-up helps stabilize temperatures and reduces bake-time guesswork.
Preheating helps with browning and even cooking, especially for baked goods.
Can I bake bread in a toaster oven?
Small loaves or sandwich breads can bake successfully in a toaster oven using a mini loaf pan. Expect shorter bake times and keep a close eye on crust color to avoid over-browning.
Yes, small loaves can bake well in a toaster oven if you monitor crust color and adjust time.
What bakeware works best for toaster ovens?
Metal pans with straight rims and good heat conduction perform best. Avoid glass for even browning and tins that can warp at high temperatures. Parchment and silicone mats reduce sticking.
Metal pans with straight sides work best; avoid warped glass and use parchment or silicone mats.
How do I prevent burning cookies in a toaster oven?
Use light-colored pans, space cookies evenly, and monitor the bake as your model’s hotspots may bake faster in some areas. Rotate the sheet halfway through.
Light pans and even spacing help prevent burning; rotate halfway through.
How should I clean a toaster oven safely?
Unplug, let it cool completely, remove the crumb tray, and wipe with a damp cloth. Do not use harsh chemicals on heating elements, and dry all parts before reuse.
Unplug and let it cool, then wipe with a damp cloth after removing the crumb tray.
Watch Video
Key Takeaways
- Preheat and rack placement drive results
- Choose bakeware that conducts heat evenly
- Monitor visually, not just by time
- Toaster ovens save energy when used efficiently