How to Toast in the Oven: A Practical Guide for Toasting
Discover how to toast bread, bagels, and snacks in a standard or convection oven with precise temperatures, even browning, and practical tips from ToasterInsight.

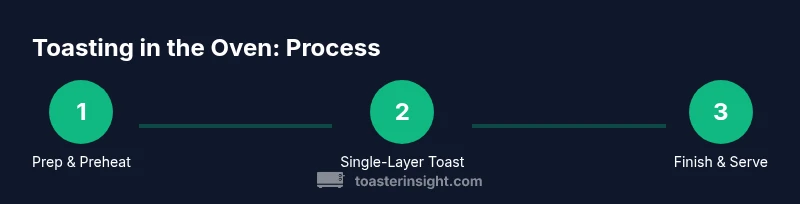
Toast in the oven by using a single layer on a middle rack, with a preheated oven and careful timing. Convection helps browning, while standard bake works well too. This guide covers temperature, rack placement, and browning cues for bread, bagels, and toppings with practical safety tips.
Understanding Oven Toasting Basics
Toasting in an oven uses radiant heat from the metal walls and, if you have a convection setting, air movement to remove moisture and promote browning. The key is even heat distribution across a single layer of bread or food. The oven can simulate a toaster by browning from the outside without soggy interiors, provided you manage temperature, rack position, and time. According to ToasterInsight, the simplest path to consistent results is to single-layer the items, keep them dry, and avoid crowding. Convection helps when you want faster browning, but it can also dry out surfaces if used at very high temps. Start with a modest temperature and watch closely the first few batches, then adjust to your specific oven’s quirks.
Prepping Your Oven and Bread
Prep starts with a hot, safe workspace. Preheat the oven for 5–10 minutes, place the rack in a middle position, and line your baking sheet with parchment or a silicone mat. Choose bread slices about 1/2 inch thick and pat them dry if they feel damp. For bagels or English muffins, slice and pat dry before toasting. Keep ingredients dry to avoid steam that softens browning. Remember, even spacing matters: a single layer with a little air around each piece yields crisper edges. As you practice, note how your oven responds to thin versus thick slices and adjust accordingly.
Temperature and Time Guidelines
There isn’t a one-size-fits-all number, but there are solid starting points. Bread slices commonly toast well at 350–400°F for about 4–6 minutes, then check and rotate the sheet for even browning. Bagels or thicker items may need 6–8 minutes at 375–425°F, with a flip halfway through. English muffins often require 4–6 minutes at 350–375°F. If your oven has convection, you can shave 1–2 minutes off these times, but monitor closely the first few batches to prevent burning. Use a timer and visually assess browning rather than relying solely on minutes.
Techniques for Different Toastable Foods
Bread slices respond best to a flat, single layer and even heat. Bagels develop a denser crust and benefit from a brief initial heat to set the outside before drying the interior. English muffins should be split and toasted cut side down for even browning, then flipped if needed for uniform color. Tortillas, pita, or crouton-like toppings can be crisped at slightly lower temps with shorter times to avoid burning. For delicate toppings like cheese, prefer a finishing broil in short bursts rather than long exposure to direct heat.
Achieving Even Browning and Avoiding Burn
Key to success is airflow and placement. Use a middle rack for consistent heat on all items, and avoid stacking pieces. If browning is uneven, rotate the sheet 180 degrees halfway through. Convection bake can speed browning but may dry surfaces faster, so reduce time slightly if you notice excessive dryness. If you notice edge scorching, lower the temperature by 25°F and extend the time modestly. A light mist of water on very dry bread can help prevent excessive browning when using high heat.
Finishing Touches and Reheating
Toast is often best enjoyed immediately, but you can reheat leftovers safely. After toasting, add butter, jams, or savory toppings while still hot so flavors melt in. For leftovers, re-toast on a lower rack with lower heat for a shorter time to refresh texture. If reheating multiple items, create a small, staggered batch approach so you’re not overloading the sheet. Cooling on a rack prevents steam from softening the crust and helps you maintain crunch.
Troubleshooting Common Problems
If edges burn before the centers brown, you’re likely at too high a temperature or too crowded a sheet. If the centers stay pale, the heat may be too low or the items too thick. Spongy interiors usually indicate moisture remains; pat items dry or pat them with a dry towel before toasting. A smoky oven usually means crumbs or butter residues present; clean the crumb tray and wipe the interior after toasting to prevent future smoke. For uneven browning across a batch, invest in a better rack and rotate the sheet during toasting.
Safety and Maintenance
Always use oven mitts when handling hot trays and racks. Keep flammable items away from the heating elements and avoid leaving the oven unattended while toasting. Regularly empty the crumb tray to reduce smoke risk and clean spatulas or tongs after use. If you notice unusual smells or smoke, turn off the oven and inspect for burnt food residues that can flare up on subsequent toasts.
Quick Start Checklist and Common Mistakes
A concise checklist helps you start fast and avoid common missteps. Ensure items are dry, use a single layer, preheat the oven, and choose the middle rack. Avoid overcrowding the sheet, skip damp or overly thick slices, and don’t increase temperature to compensate for under-browning. Keep a timer handy and monitor browning closely rather than relying solely on minutes.
Creative Toasting Ideas and Variations
Use this technique to expand your repertoire beyond plain toast. Finish bread with a light brushing of olive oil and herbs for a savory snack, or sprinkle cinnamon sugar on buttered slices for a quick dessert toast. Toast bagels with cream cheese or avocado for a simple open-face sandwich. For croutons, toss bread cubes with olive oil and a pinch of salt, then toast until golden. The oven’s gentle heat allows you to experiment safely with new toppings and textures.
Practice Journal: Track Your Oven’s Browning Profile
Maintain a small log of your experiments: bread type, slice thickness, temperature, time, and final color. Note how long you left slices on the sheet and whether you rotated halfway. Over several batches, you’ll build a personal reference that helps you dial in ideal settings for your specific oven and bread. This practice reduces guesswork and improves consistency over time.
Tools & Materials
- Baking sheet (rimmed)(Use a sturdy sheet to support even baking and catch crumbs.)
- Oven-safe wire rack(Elevates items for better air circulation and browning.)
- Parchment paper or silicone mat(Prevents sticking and makes cleanup easier.)
- Tongs or spatula(Turns slices safely without crushing.)
- Timer(Keep track of toast timing for even browning.)
- Oven mitts(Protect hands during handling of hot trays.)
- Cooling rack(Cool toast to maintain crispness after removing from oven.)
- Butter, toppings, or spreads(Optional extras to enhance toasted items.)
Steps
Estimated time: 25-40 minutes
- 1
Preheat the oven and position rack
Begin by preheating the oven to your starting temperature, typically 350–400°F. Place the rack in the middle so heat circulates evenly around the food. This baseline avoids underdone centers and overbrowned edges.
Tip: Preheating ensures consistent browning from the first bite. - 2
Prepare bread and other items
Slice bread to about 1/2 inch thick and pat dry if needed. For bagels or muffins, slice and pat dry the cut surfaces. Arrange items in a single layer on the prepared sheet with 1/4 inch to 1/2 inch of space between pieces.
Tip: Dry surfaces toast more evenly and prevent soggy edges. - 3
Choose temperature and start time
Set the oven to 350–400°F depending on your item. Start with shorter times (4–6 minutes) and check; you can extend in small increments if browning isn’t complete.
Tip: Better to under-brown and retry than burn; you can always toast longer. - 4
Rotate for even browning
Halfway through the timer, rotate the sheet 180 degrees to promote uniform color across all pieces.
Tip: Rotation helps if your oven has hot spots. - 5
Check color and flip when needed
For thicker items, flip once to ensure both sides brown evenly. If using a rack above the sheet, you may alternate positions for different textures.
Tip: Flipping at the right moment prevents over-crisp edges. - 6
Finish and remove
When browning reaches your target shade, remove the sheet with oven mitts and transfer toast to a cooling rack to prevent steam from softening the crust.
Tip: Cooling restores crunch by allowing moisture to escape. - 7
Reheat or toast additional items
If toasting multiple batches, keep batches separate and reuse the same technique, adjusting time slightly for quantity differences.
Tip: Avoid overcrowding to maintain airflow. - 8
Add toppings while hot
Apply butter, jams, or savory toppings immediately after removing from the oven so flavors melt in.
Tip: Warm toppings fuse with toast for maximum flavor. - 9
Clean up and reset
Brush crumbs from the crumb tray and wipe down the rack after use to prevent smoke or odors from lingering.
Tip: A clean oven toasting environment yields better results next time. - 10
Experiment with new items
Try pita, tortillas, or flatbreads; experiment with herbs, cheese, or cinnamon for variety.
Tip: Small batch experiments teach you preferred timings for each item. - 11
Record your results
Log temperatures, times, and outcomes to build a personal guide for future toasts.
Tip: A simple notebook speeds up consistent results. - 12
Safe storage of leftovers
Store toasts in an airtight container to maintain crispness; reheat gently when serving later.
Tip: Recrisp in the oven briefly to revive texture.
Your Questions Answered
Can I toast in a conventional oven, or do I need a toaster oven?
Yes. A conventional oven can toast effectively with a single-layer setup, proper preheating, and attentive timing. A toaster oven can offer faster, more targeted results for small batches but requires the same principles.
Yes, you can toast in a conventional oven with the right setup and timing.
What temperature is best for toasting bread in the oven?
A safe starting range is 350–400°F. Adjust by 25-degree increments based on thickness and desired browning, then monitor closely during the first batches.
Start at 350–400 degrees and watch how it browns to adjust next time.
Is it safe to toast directly on a baking sheet without a rack?
Using a rack improves air circulation and browning on all sides. If you don’t have one, a perforated sheet or flipping the bread helps, but results may vary.
A rack helps; if you don’t have one, flip pieces to help browning.
How do I toast a bagel without making it soggy?
Slice bagels and toast cut sides first for a crispy crust. If you prefer darker crust, extend time slightly, but monitor to avoid burning the interior.
Slice, toast cut sides first, and monitor for even browning.
How can I reheat toast without burning it?
Toast leftovers at a lower temperature (about 325–350°F) for a shorter time and flip if needed. This restores crispness without scorching.
Reheat on a lower heat for a short time so it stays crisp.
Should I use a toaster oven or a full-size oven for small batches?
For small batches, a toaster oven offers precise control and quicker results. A full-size oven works well for larger batches, but preheating can take longer.
Toaster ovens are great for small batches; full ovens work for big batches but take longer to preheat.
Watch Video
Key Takeaways
- Toast with a single, dry layer for even browning
- Preheat, use the middle rack, and rotate during cooking
- Adjust temperature and time to bread type and thickness
- Finish with toppings while hot for best flavor
- Maintain a clean oven and crumb tray to prevent smoke