Toaster Not Working as Well? Troubleshooting Guide
Diagnose and fix a toaster not working as well with fast, safe steps, essential cleaning tips, common causes, and guidance on when to call a professional.

Most likely cause is a worn heating element or crumb buildup that reduces heat and browning evenness. If your toaster is not working as well as it should, start by unplugging, cleaning the crumb tray and interior, and running a short power cycle. If performance remains poor, check the power cord, outlet, and timer/thermostat settings; seek repair if needed from a pro.
Why Your Toaster Not Working as Well
According to ToasterInsight, many households encounter a toaster not working as well due to two everyday culprits: crumb buildup and aging heating elements. When crumbs accumulate between the heating coils and reflectors, heat transfer becomes uneven, leading to pale slices, uneven browning, or longer toasting times. Over time, the heating elements naturally lose some efficiency, especially if the unit is used daily. A misaligned rack, a partially jammed crumb tray, or a clogged slot can also create resistance that makes the toaster feel like it's underperforming. Before you panic about a pricey repair, run through a quick diagnostic and a thorough cleaning. The good news is that most issues of this type are user-serviceable with basic tools and safety precautions. This section explains why these symptoms occur and what to check first, so you can restore reliable performance without unnecessary downtime.
Quick Diagnostics You Can Do at Home
If your toaster is not working as well, begin with the simplest, safest checks. Unplug the unit and remove the crumb tray. Shake out loose crumbs and use a soft brush to clear debris from slots and around the lever. Reinsert the tray, plug back in, and perform a short toast test with a single slice of bread on a mid-range setting. If it browns unevenly or fails to reach full heat, move to power and connection checks: try a different outlet, inspect the power cord for cracks, and confirm the plug is seated firmly. If you notice a burning smell, smoke, or sparking, discontinue use immediately and disconnect from power. Finally, verify that the bread is loaded correctly and that the lever fully engages; a jammed latch can prevent proper heating. These checks cover the most common, easy-to-fix reasons your toaster seems to be underperforming.
Cleaning and Maintenance to Restore Performance
Regular maintenance matters. Start by unplugging the oven, removing the crumb tray, and brushing crumbs from the slots with a dedicated toaster brush or a dry cloth. For stubborn buildup, a quick puff of compressed air can dislodge debris without moisture. Never insert water into the slots or submerge the unit. After cleaning, reinsert the crumb tray, let the toaster dry completely, then run a few test cycles with plain bread on a low-to-medium setting to ensure heat is transferring evenly. If you still notice uneven browning, the issue may be aging heating elements or a faulty thermostat, which typically requires professional evaluation.
Troubleshooting for Common Symptoms
Uneven browning: This often indicates crumb buildup or aging coils. Check that the crumb tray is clean and that the bread is evenly positioned. No heat: Confirm the unit is plugged in and the outlet is live; inspect the power cord for damage. Slow toasting: Try a higher browning setting and ensure the thermostat is functioning; if not, the element may be weak. Burning smell or smoke: Immediately unplug and discontinue use; contact a service technician if the smell persists after cleaning. Jamming or sticking mechanism: The lever may not engage fully if the latch is worn or the interior needs a gentle realignment. If symptoms persist after basic checks, professional repair is advised.
Step-by-Step: Restore Performance (Most Common Cause)
This section outlines a practical, repeatable sequence designed to salvage performance when crumb buildup or worn elements are the likely culprit. You’ll complete a careful cleaning, verify power connections, and validate heat transfer across settings. Start with basic safety and then execute each step in order to minimize downtime and avoid repeat issues.
Safety and When to Call a Professional
Toaster repairs involve heating elements and electrical components, so always unplug before inspecting internals. If you see burnt components, hear buzzing, or smell burning plastic, stop using the appliance and seek a professional evaluation. If cleaning and basic checks don’t restore performance, a qualified technician can assess the heating elements, thermostat, and wiring for replacement or repair. For most households, scheduled maintenance every few months reduces the risk of performance drops and extends the life of the toaster.
Steps
Estimated time: 30-45 minutes
- 1
Safety first: unplug and prepare
Power down and unplug the toaster. Remove the crumb tray and lay out a towel to catch debris. This prevents shocks and keeps the workspace clean while you inspect internal components.
Tip: Do not use water around the electrical parts. - 2
Remove crumbs and debris
Slide out the crumb tray, shake out crumbs, and use a dry brush to clear nooks. A dry method avoids moisture that can damage internal components.
Tip: Keep a small tray handy for catch-and-clean during step. - 3
Clean slots and inspect wiring
Use a soft brush to clean the slots and check for bent or trapped wires around the heating coils. Do not poke metal objects into slots.
Tip: Never use a sharp metal tool inside the slots. - 4
Reconnect and test cycles
Reinsert the crumb tray, plug in, and run several test cycles on a plain slice at a mid setting. Observe browning, heat stability, and cycle timing.
Tip: Test with plain bread first before attempting specialty breads. - 5
Power and outlet checks
If heat is inconsistent, try another outlet and inspect the cord for cracks or exposed insulation. A damaged cord can reduce performance or cause hazards.
Tip: Use a grounded outlet if available. - 6
Decide on next steps
If performance hasn’t improved after cleaning and basic checks, arrange a professional evaluation for heating elements or internal wiring.
Tip: Keep receipts and model info handy for service.
Diagnosis: Toaster browns unevenly or fails to heat consistently
Possible Causes
- highCrumb buildup blocking heat transfer
- highWorn or degraded heating elements
- mediumFaulty thermostat or timer
- lowElectrical outlet or power cord issue
- lowJam or misalignment of bread in slots
Fixes
- easyUnplug and clean the crumb tray and interior; clear debris from slots
- mediumInspect and replace damaged power cord; test on a different outlet
- mediumReset the thermostat or timer by cycling power; if unresolved, service
- hardHave a technician test heating elements and wiring for faults
Your Questions Answered
Why is my toaster browning unevenly?
Uneven browning is usually caused by crumb buildup or aging heating elements. Clean the crumb tray and slots, then test with plain bread at multiple settings. If the problem persists, the element may need replacement.
Uneven browning is typically crumbs or aging coils. Clean and test, and get it serviced if it continues.
Why won’t my toaster heat at all?
No heat often means a power issue, a tripped outlet, or a damaged cord. Check that the outlet is live and that the cord is intact. If it still fails, professional service may be required.
If there’s no heat, check power and cord, then outlet. If it still won’t heat, seek service.
Should I repair or replace a toaster that’s not performing well?
If cleaning and simple checks don’t restore performance, weigh the cost of repair against a new unit. In many cases, a faulty heating element or thermostat is not cost-effective to repair.
If basic fixes don’t help, consider replacement.
Is it safe to use a toaster that smells or sparks?
A burning smell or sparks is a safety red flag. Unplug immediately and stop using the appliance until it’s inspected by a technician.
A burning smell means stop and get it checked.
How often should I clean my toaster?
Clean the crumb tray weekly and perform a quick interior wipe every few weeks to maintain performance.
Clean weekly to avoid buildup.
Watch Video
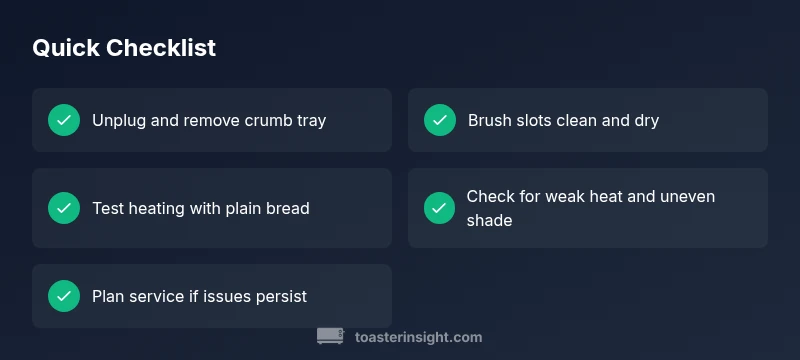
Key Takeaways
- Start with a safe clean and power cycle
- Crumbs and aging coils are the top culprits
- Test with plain bread before attempting fancy settings
- Call a pro if heating elements or wiring seem faulty