What Is Wrong With Toast? A Troubleshooting Guide
Urgent, practical guide to diagnose and fix common toast issues. Learn quick checks, a diagnostic flow, and maintenance tips to restore even browning in toasters and toaster ovens. ToasterInsight provides expert steps for safe, effective fixes in 2026.

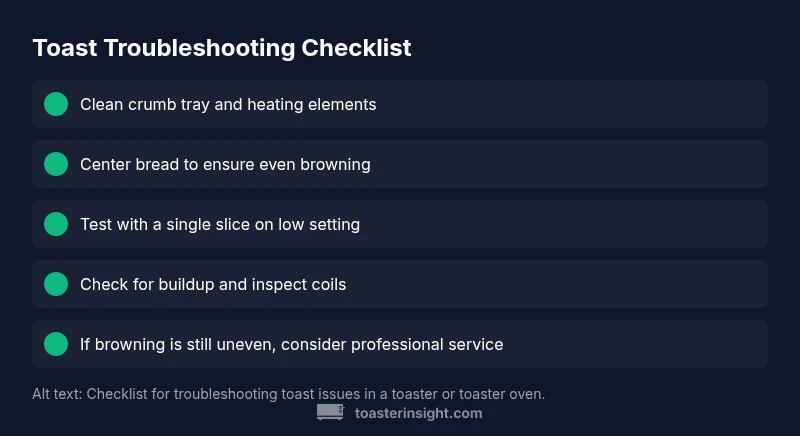
According to ToasterInsight, most toast issues come from uneven heat or a dirty crumb tray. The quickest fix is a thorough cleaning of the heating elements and crumb tray, followed by a test toast on a low setting. If browning remains uneven, the element may be weak and require replacement or professional service.
Quick diagnostics: the most common culprits
When toast refuses to brown evenly or fails to toast at all, the symptoms point to a handful of predictable culprits. According to ToasterInsight, the most common causes are dirty heating elements, crumb tray buildup, and misaligned bread position. A failing thermostat or aging coils can also create inconsistent browning, especially in older models. Understanding these patterns helps homeowners approach troubleshooting without guesswork. Start with the easiest checks and move toward maintenance tasks that have a real impact on browning quality. In this guide you’ll learn what to inspect first, how heat is supposed to travel through the toaster, and how to tell whether grime or wear is the root issue.
Check basics before disassembly
Before you reach for screwdrivers, confirm the simplest possibilities. Ensure the toaster is plugged into a live outlet and that the cord is undamaged. Verify the power switch (and any toast shade setting) is set for browning; for toaster ovens, confirm the bake/toast setting is selected and the timer is not stuck in a paused position. Check bread type and thickness; very cold or very dense slices can require longer browning times. If you have a delayed start feature, disable it while testing. These quick checks often resolve the majority of toast problems without tools, and they keep you safe by avoiding unnecessary disassembly.
The heating element and browning control explained
To understand what is wrong with toast, you need to know how heat is delivered and controlled. Most pop-up toasters use coiled elements that radiate heat; toaster ovens rely on coils and a thermostat. Browning is achieved by cycling power via a thermostat or a sensor that regulates timing. Over time, coils can drift or the thermostat can wear, causing under-browning, over-browning, or uneven browning. Dust and crumbs that fall behind the tray can also insulate coils or block airflow, making the heater less efficient. We'll also discuss calibration tips to help you spot when a unit is out of spec and when it’s time to replace worn parts rather than chasing a ghost in the controls.
Symptoms and what they imply for your toaster
Different browning symptoms map to different root causes. If the bread is pale in the center but darker on the edges, heat is uneven or circulation is blocked. If the outer crust browns quickly while the center remains undercooked, the thermostat may be failing or the elements are unevenly powered. If toasting never progresses beyond a pale shade despite higher settings, there could be a weak coil or a failing switch. If smoke or a burning smell appears, unplug immediately and inspect for melted insulation or burnt crumbs. Each symptom should trigger a specific check list that moves you from cleaning to calibration to, if necessary, component replacement.
Diagnostic flow: from symptom to solution
Create a simple flow in your mind: identify the symptom, perform a quick test, inspect for grime, and test again. If browning is inconsistent, start with cleaning and centering the bread, then re-test at the lowest setting. If browning improves but remains inconsistent, check the element wires and crumb tray positioning, then consider a thermostat check. If the toast never browns, verify the outlet and reset the unit, then test with fresh bread. If you observe smoke, unusual heat, or smells, stop and seek professional help.
Step-by-step diagnosis you can perform at home
- Unplug and remove the crumb tray; inspect for heavy buildup and scrape loose crumbs using a dry brush. 2) Clean the crumb tray, slots, and accessible interior surfaces with a slightly damp cloth, then dry completely before use. 3) Reinsert the tray and run a single-slice test on the lowest setting to observe browning. 4) If browning remains uneven, check alignment of the bread and ensure it sits centered in the slots. 5) If issues persist, inspect the coils for visible residue and consider professional service if signs of wear appear.
Maintenance fixes that prevent future problems
Set a simple maintenance routine to keep toast consistent. Weekly, brush crumbs from the crumb tray and wipe the exterior. Monthly, perform a gentle interior check: dust the elements with a dry brush and inspect the wiring for cracks or loose parts. Avoid using water near electrical components, and never submerge the unit. If you notice reduced browning efficiency after maintenance, test again with a fresh bread slice and consider a longer-term service plan for aging coils.
Quick prevention tips tailored for toaster ovens and pop-up toasters
- Clean the crumb tray and interior after heavy use to prevent heat blockages.
- Use bread of consistent thickness and avoid freezing or extremely cold slices.
- Don’t overload the slots; ensure proper centering for even browning.
- Schedule routine calibration checks if your model has a browning or timer adjustment.
- Consider professional servicing for aging devices older than 5–6 years to avoid unexpected failures.
Steps
Estimated time: 15-25 minutes
- 1
Unplug and prepare for cleaning
Always unplug the unit before touching any interior parts. Remove the crumb tray and inspect for large clumps or stuck crust. This step reduces shock risk and prevents crumbs from becoming airborne during cleanup.
Tip: Safety first: never clean while plugged in. - 2
Remove crumb tray and clean thoroughly
Slide out the crumb tray, shake off loose crumbs, and wipe with a dry microfiber cloth. If needed, wash with mild soap and water, then dry completely before reusing. Don’t soak the toaster body.
Tip: Dry completely to prevent moisture from reaching electrical components. - 3
Clean heating elements and interior surfaces
Gently brush along the exposed heating coils and interior walls with a soft brush. Avoid liquids near coils and never use abrasive tools. Ensure there is no loose debris that could fall into the mechanism.
Tip: Keep a light touch to avoid coil damage. - 4
Center bread and test on a low setting
Place a single slice centered in the slots and run a low-temperature toast to observe browning. If the color is uniform, you’ve narrowed the issue to load and alignment rather than hardware failure.
Tip: Testing with a single slice reduces waste if settings are off. - 5
Evaluate results and decide on repairs
If browning improves after cleaning but remains uneven, check power to coils and potential thermostat wear. If the problem persists, plan for a professional inspection or replacement.
Tip: Document symptoms to share with a technician.
Diagnosis: Toast browns unevenly or fails to brown
Possible Causes
- highDirty heating elements or crumb tray
- mediumMisaligned bread position or blockages
- lowThermostat drift or worn coils
Fixes
- easyUnplug, remove the crumb tray, and clean heating elements and tray; reinsert and dry completely
- easyCenter bread in the slots and test with a single slice on the lowest setting
- mediumIf browning remains uneven, have the thermostat calibrated or coil replaced; consult a professional if needed
Your Questions Answered
Why is my toast browning unevenly?
Uneven browning is most often caused by dirty heating elements or crumb buildup that blocks heat. Clean the coils and tray, re-test with a centered slice, and ensure settings are appropriate. If the issue persists, the coil or thermostat may be wearing.
Uneven browning usually means grime or wear. Clean, center the bread, and test. If it continues, consider service.
Should I replace my toaster if browning is inconsistent?
If cleaning and calibration don’t fix the browning, weighing the cost of repair versus replacement is wise. Older models may benefit from a newer design with improved browning control.
If cleaning doesn’t help, it may be time to replace or repair the unit.
How often should I clean my toaster?
Clean crumbs weekly and perform a deeper interior check monthly. Regular maintenance keeps heat flow predictable and reduces fire risk.
Clean weekly, with a deeper clean monthly to prevent buildup.
Can a toaster oven burn bread even if I set low heat?
Yes. A faulty thermostat or uneven coil power can burn bread even at low settings. Check calibration and consider professional service if temperatures seem wrong.
A faulty thermostat can cause burning even at low settings.
Is it safe to try repairs myself?
Electrical appliances carry shock and fire risks. If you’re not sure about wiring or internal components, stop and seek a professional repair.
Self-help repairs can be dangerous; call a pro if in doubt.
When should I seek professional help?
If cleaning and basic fixes don’t restore browning quality, or if you notice smoke, unusual smells, or tripped breakers, stop using the unit and contact a repair technician.
If you see smoke or smell burning, stop and get professional help.
Watch Video
Key Takeaways
- Clean heat areas and crumbs regularly.
- Center bread for even browning.
- Test settings with a single slice first.
- Consider element wear if browning is consistently off.
- Seek professional service if safety concerns arise.