Toast Not Working: Urgent Troubleshooting for Toasters
Urgent guide to fix toast not working: quick checks, safe steps, and practical fixes for common toaster problems. Learn how to diagnose, clean, test, and restore your toaster for reliable browning.

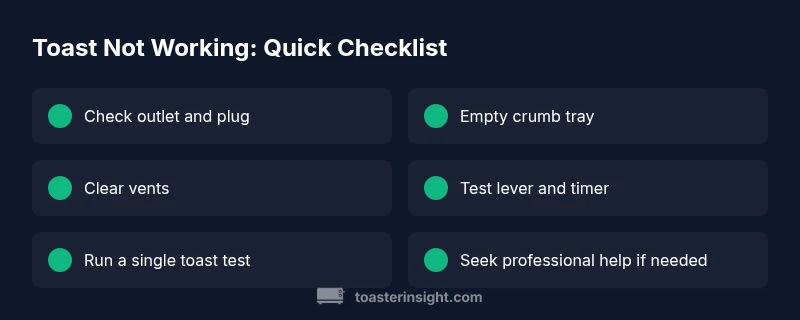
The most likely reason toast not working is a simple power or settings issue. Start by verifying the outlet is live and the toaster is properly plugged, then check the lever, timer, and crumb tray. If power and basics check out, move to cleaning and testing heating elements. This quick check resolves many issues without tools.
Common causes at a glance
Toast not working typically stems from power or basic mechanical issues rather than a complex failure. Common culprits include a dead outlet or faulty plug connection, a lever not fully engaged, a mis-set timer, or crumbs blocking ventilation. In many homes, these simple factors are enough to stop browning altogether. Additionally, temporary faults like a blown thermal fuse or a stuck switch can masquerade as a simple nuisance. By understanding these everyday causes, you can triage quickly and safely, saving time and avoiding unnecessary replacements.
Safety first: unplugging and handling
Before you touch any internal parts, unplug the toaster from the wall and remove the crumb tray. Let the appliance cool completely if it has been in use. Never insert metal objects into slots or use the toaster with the housing damaged. Safety is non-negotiable when dealing with electrical appliances. If you notice frayed cords, warm smells, or sparking, stop immediately and consult a professional.
Power and outlet checks you can do now
Verify the outlet is energized by plugging in another device, like a lamp or phone charger. If the outlet is dead, reset the circuit breaker or replace the fuse if you’re comfortable; otherwise, call an electrician. Inspect the power cord for visible wear or kinks. A loose connection at the plug or a damaged cord can prevent power from reaching the heating elements, resulting in no heat or uneven browning.
Lever, timer, and settings sanity check
Make sure the toast lever is fully down and clicks into place, which allows power to reach the heating coils. Check that the browning dial or smart timer is set appropriately; a misaligned dial can cause under-toasting or no toast at all. If you’re using a bagel or defrost setting, ensure the selected mode is compatible with the bread type. Some models have a child-lock or reheat mode that may interfere with normal operation.
Cleaning and crumb blockage: why it matters
Crumbs and debris can insulate heating elements or block airflow, preventing proper toasting. Empty the crumb tray and clean the slots and surrounding vents with a soft brush or compressed air. Use a damp cloth to wipe the exterior and a dry cloth to finish. Avoid getting water into electrical components. Regular cleaning reduces the risk of shorts and improves performance over time.
Inspect heating elements and thermal fuse concept
If basic checks don’t solve the issue, inspect the visible heating elements for obvious breaks or darkened sections. While many toasters have sealed elements, some models expose them behind the housing; never disassemble beyond what the manufacturer permits. A blown thermal fuse or a failed control circuit can stop heating altogether. In such cases, replacement parts or professional service may be required.
Troubleshooting flow you can follow
Follow a logical sequence: confirm power, verify basic mechanical engagement, clean and inspect, test with a single slice, and then test again with different bread sizes. If there is heat but uneven browning, focus on a possible drift in the thermostatic control. Maintain a calm, step-by-step approach to avoid overlooking simple fixes.
Quick fixes and when to replace vs repair
Many toast issues are fixable with cleaning or replacing a faulty crumb tray, cord, or plug. If power and basic settings are correct but there’s no heat, the fuse or control board may be at fault—these parts often require a professional or manufacturer replacement. For older units, weigh repair costs against a budget-friendly replacement.
Long-term care to prevent toast not working again
Establish a regular cleaning routine, including crumb tray emptying and slot brushing every few weeks. Avoid using metal utensils in the slots, use the correct settings for different bread types, and store the toaster in a dry, cool place. Keeping the appliance clean and well-maintained extends its life and reduces the chance of repeated failures.
Steps
Estimated time: 30-60 minutes
- 1
Unplug and prepare
Unplug the toaster and remove the crumb tray. Allow any hot surfaces to cool completely before inspection. Gather a soft brush and a damp cloth for safe interior and exterior cleaning.
Tip: Always unplug first to prevent electric shock. - 2
Inspect crumb tray and vents
Take out the crumb tray and shake out crumbs. Use a brush to clean the slots and vents. Reinsert tray after the interior is dry to avoid moisture contact with electrical parts.
Tip: Crumbs are the leading cause of poor airflow and uneven toasting. - 3
Test the outlet and cord
Plug a different low‑wattage device into the same outlet to confirm power. Inspect the cord for cuts or fraying; replace if damaged. If the outlet is controlled by a switch, ensure it is ON.
Tip: A faulty outlet can mimic more complex failures. - 4
Check lever and timer
Make sure the lever engages fully and the timer/browning dial is set to a configured level. Listen for a firm click when the lever is pressed. If the timer seems unresponsive, the control may be faulty.
Tip: A misadjusted dial can make even functional toasters seem dead. - 5
Run a test with a single slice
Toast a single slice on a low setting to observe heat and browning. If there’s heat but uneven browning, consider testing with a different bread type or size to rule out bread-specific issues.
Tip: Testing with a single slice minimizes waste while you diagnose. - 6
Decide if professional help is needed
If there’s still no heat after these checks, the fault is likely beyond a simple reset or cleaning. Consider contacting the manufacturer for parts or a repair service.
Tip: Electrical components have safety limits; don’t attempt dangerous repairs.
Diagnosis: Toast slips or fails to toast; no heat or inconsistent browning
Possible Causes
- highPower issue (outlet, plug, or circuit)
- mediumCrumb buildup blocking vents
- lowThermal fuse or control fault
- mediumStuck lever or faulty timer switch
Fixes
- easyTest outlet with another device; check cord connection
- easyEmpty crumb tray and clean slots
- mediumReset or replace fuse/thermal fuse or control board if accessible
- hardReplace faulty lever or timer switch via manufacturer guidance
Your Questions Answered
Why won't my toaster turn on at all?
First check the outlet and cord for power. Ensure the plug is firmly seated and the circuit is not tripped. If power is reaching the toaster but it still does nothing, inspect the lever and timer for proper engagement before moving to cleaning or professional service.
Check the outlet and plug for power, then verify the lever and timer engagement; if it still won’t turn on, continue with safe cleaning and professional help if needed.
There is heat but no browning, or uneven browning. What now?
Uneven browning often points to a drifting thermostat or airflow issue due to crumbs. Clean the crumbs, verify the slots are clear, and test with different bread thickness. If the problem persists, the thermostat might need replacement.
If heat exists but browning is uneven, clean the slots and try different bread sizes; persistent issues may require thermostat replacement.
I cleaned the crumbs; the toaster still doesn’t work. What’s next?
After cleaning, recheck the lever engagement and timer settings. If there’s still no heat, the fault could be a damaged fuse or internal switch, which typically means repair or replacement. Do not attempt risky internal repairs yourself.
If cleaning didn’t fix it, recheck engagement and settings; if still faulty, consider professional service.
Can I replace a fuse myself if the toaster has a blown fuse?
Many toasters have non-user-serviceable fuses. If you’re not experienced with appliance electronics, contact the manufacturer for a service or replacement part. Do not improvise with generic fuses or wire splices.
Fuse work is best left to pros or manufacturer service to avoid shock or fire risk.
Is it safe to repair a toaster's internal components?
Opening the housing can expose live parts and may void warranties. If you’re not trained in appliance repair, seek professional help. Use manufacturer-authorized parts for safety.
Internal repairs can be dangerous; consult a professional if you’re unsure.
How often should I clean my toaster?
Clean the crumb tray and slots every 1-2 weeks, more often if you use the toaster daily. Regular cleaning helps maintain performance and reduces fire risk.
Clean the crumbs every couple of weeks to keep your toaster performing at its best.
Watch Video
Key Takeaways
- Verify power and basic settings first
- Clean crumbs to restore airflow and heat
- Use step-by-step checks before replacing parts
- Know when to seek professional help
- Practice regular maintenance to prevent future issues