Why Do Toasters Toast Unevenly: Troubleshooting Guide
Discover practical steps to diagnose and fix uneven browning in toasters and toaster ovens. From bread size to crumb buildup, learn safe, proven fixes to restore even toast fast.

Uneven toasting is usually caused by inconsistent bread thickness, grill element wear, or crumbs blocking heat flow. Start with simple fixes: use evenly sized slices, rotate or reposition slices mid-cycle, and clean the crumb tray. If browning remains lopsided, recalibrate settings or replace worn heating elements. For persistent issues, consult a pro to inspect the interior.
Understanding How Toasters Toast
If you're wondering why do toasters toast unevenly, the short answer is heat flow. In most household toasters, two electric coils radiate heat toward the bread. Browning depends on how evenly those heat paths reach both sides of each slice, how long the bread stays in contact with heat, and how the bread's moisture and density interact with the air gaps inside the cavity. Bread thickness and placement matter because thicker or denser pieces soak up heat differently than thin slices. Over time, elements can shift slightly or collect crumbs, which disturbs heat distribution. According to ToasterInsight, small misalignments and build-up are frequent culprits behind uneven browning. Recognizing these dynamics helps you target fixes quickly rather than guessing.
Common Causes of Uneven Toasting
Uneven browning is rarely a single mystery. It usually results from a mix of bread factors, toaster design, and maintenance habits. Key contributors include slice thickness variance, improper placement on the carriage, crumb buildup choking airflow, and wear or sagging of heating elements. Different settings (light vs. dark) interact with these causes in predictable ways, so understanding your model’s quirks is essential. In many cases, simply rotating slices or using evenly sized bread fixes the issue. In others, the problem lies with the appliance’s interior or calibration. By keeping these causes in mind, you’ll have a clear checklist for diagnosis rather than a series of trial-and-error attempts.
Quick Checks You Can Do Before Dismantling the Unit
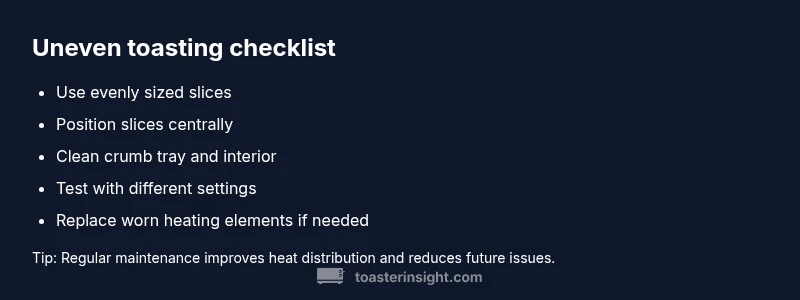
Before you think about repair, run through a short, safe checklist. Ensure you’re using evenly sized bread slices, and place them so they aren’t touching each other or the edges of the slot. Clean the crumb tray and wipe down the interior’s accessible surfaces to improve airflow. Check the settings against the bread type (light for delicate bread, darker for dense loaves). If you notice one side is browning faster, swap to a different setting and test with a single slice to observe heat behavior. These checks are inexpensive and non-destructive, and they address the most common causes of uneven toasting.
Diagnostic Flow Overview: Symptom-Driven Troubleshooting
When you see uneven browning, start with the simplest explanations and progressively test more complex possibilities. Step 1: confirm bread size and placement. Step 2: inspect airflow by cleaning the crumb path. Step 3: compare browning on multiple slices to isolate a single bad piece vs. a systemic issue. Step 4: test with a different bread type. Step 5: evaluate whether the problem persists across settings or only on one program. This flow helps you separate user-error from appliance wear without disassembly.
Step-by-Step Fixes You Can Try Right Now
- Unplug the toaster and remove the crumb tray; dump crumbs and brush the interior gently to clear airflow paths. 2) Reinsert slices with equal thickness and ensure they’re not crowded or touching the walls. 3) Clean the lever mechanism and carriage to ensure consistent feed and contact. 4) Run a test with a single slice and a lower setting, then compare results to a second test with a thicker slice. 5) If browning remains uneven, switch to the other heat setting or a different program, and consider professional service if the problem recurs after cleaning and recalibration.
Safety, Maintenance, and When to Replace
Safety first: unplug before any cleaning, never poke metal objects into the slots, and avoid getting water on exposed elements. Regular maintenance is the best prevention: clean the crumb tray weekly during heavy use, wipe interior surfaces with a dry or slightly damp cloth (avoid soaking or rinsing), and replace toaster coils only through proper service channels. If uneven toasting persists after comprehensive cleaning and setting adjustments, the heating elements may be failing or misaligned, requiring professional inspection or replacement. Don’t delay replacement if your toaster is old or emits abnormal smells or sparks.
Extra Tips for Toaster Ovens and Modern Models
Toaster ovens often distribute heat more evenly than pop-up toasters, but results vary by model and rack position. Use the middle rack for bread slices and allow for adequate air circulation around foods. For models with convection or specialized browning controls, experiment with lower temperatures and longer preheating to achieve uniform browning. When upgrading, look for consistent heating elements and test results from independent reviews, not just marketing claims.
Steps
Estimated time: 15-30 minutes
- 1
Unplug and Inspect Crumb Tray
Pull out the crumb tray and dump the contents. Use a dry brush or cloth to remove stubborn crumbs from the interior crevices. This clears airflow paths and reduces hot spots that cause uneven browning.
Tip: Avoid washing the interior; moisture can damage electrical components. - 2
Clean and Dry Interior Surfaces
Wipe accessible interior surfaces with a lightly damp cloth if needed, then dry thoroughly. Keep heating elements and springs untouched. This step helps maintain even heat distribution and prevents crumb-induced browning variance.
Tip: Never use harsh chemicals near electrical parts. - 3
Check Bread Alignment
Place slices so they are centered and not touching the element walls. If your toaster has a carriage guide, adjust for symmetric contact. Misalignment often explains uneven browning across slices.
Tip: Test with one piece to isolate issues fast. - 4
Test with Different Settings
Run a test with a different browning level and bread type. If one side browns more slowly, adjust to a lighter or darker setting to balance heat exposure across the slice.
Tip: Record which settings gave best results for future reference. - 5
Assess for Recurrent Issues
If browning remains inconsistent after cleaning and repositioning, run a diagnostic test with multiple slices and consider a professional inspection or coil replacement.
Tip: Document symptoms and settings to share with a technician.
Diagnosis: Bread browns unevenly in a pop-up toaster
Possible Causes
- highUnequal bread thickness or density
- mediumSlices touching sides or crowding the slot
- highCrumb buildup obstructing airflow to heating elements
- lowWorn or sagging heating elements affecting heat path
- mediumImproper settings or inconsistent preheating
Fixes
- easyUse evenly sized slices and rotate/move slices if browning is uneven
- easyClean crumb tray and interior surfaces to restore airflow
- easyRealign bread and avoid crowding the cavity during toasting
- easyTest with other settings or a different bread type to verify heat path
- hardReplace worn heating elements or seek professional service if the issue persists
Your Questions Answered
Why does my toaster toast unevenly even when the bread seems uniform?
Uneven browning often traces to bread moisture, density, or small internal variations. It can also be caused by crumbs blocking airflow or worn heating elements. Start with simple checks before assuming a replacement.
Uneven browning usually comes from bread differences, crumbs, or aging elements. Begin with simple checks before replacing anything.
Can a dirty crumb tray affect browning?
Yes. Crumbs can block airflow and create hot spots, leading to uneven browning. Regularly cleaning the tray and interior improves heat distribution.
A dirty crumb tray can definitely cause uneven browning by blocking airflow.
Is it safe to repair heating elements myself?
Professional service is recommended for heating element repair or replacement. DIY repairs can pose electrical hazards and may void warranties.
Heating elements should be handled by a professional. Safety first.
When should I replace my toaster?
If browning remains inconsistent after cleaning, if the toaster emits unusual smells, sparks, or the coils look damaged, replacement is often the safest option.
If inconsistent browning persists after fixes or you notice damage, consider replacement.
Is a toaster oven more even than a pop-up toaster?
Toaster ovens can offer more uniform browning due to larger elements and convection options, but results depend on rack position, settings, and bread type.
Toaster ovens can be more even, depending on the model and how you use it.
Watch Video
Key Takeaways
- Identify whether the issue is bread or appliance-related
- Keep the crumb path clear for even heat flow
- Use evenly sized slices and correct placement
- Always unplug before maintenance and cleaning
- Consult a professional if browning remains uneven after DIY fixes