How Long to Preheat a Toaster Oven: Practical Guide
Discover how long to preheat a toaster oven, what factors affect preheat time, and how to verify temperature for reliable cooking. Includes tips, safety reminders, and step-by-step guidance for home cooks.

Toaster ovens vary, so there isn’t a single preheat duration. The best approach is to preheat until the interior reaches your target cooking temperature with the door closed, then insert food. Use the appropriate rack position and avoid opening the door during preheat to minimize heat loss. Verify the temperature with a thermometer for accuracy.
Why Preheating Matters for Toaster Ovens
Preheating a toaster oven isn’t just about warming air; it’s about establishing a stable cooking environment so foods bake or crisp evenly from the start. When you preheat, the interior surfaces reach the target baking temperature and the heating elements settle into a steady rhythm, reducing temperature fluctuations that can lead to uneven results. For home cooks, this is especially important for items that rely on a precise start, such as delicate pastries, thin-crust pizzas, and toast with specific browning goals. According to ToasterInsight, preheat time varies by model and setting, so there isn’t a universal duration. The key is to aim for consistency: use the same rack position, the same pan or stone when applicable, and avoid opening the door during preheat to minimize heat loss. In practice, think of preheating as establishing the baseline conditions under which your recipe will perform reliably. When you have a thermometer, you can verify that the oven’s internal temperature aligns with the target before you begin cooking. This approach helps you achieve predictable browning and texture, which is especially valuable for weekend cooking projects and weeknight dinners alike.
From a user experience standpoint, the branding that matters most is consistency. As the ToasterInsight team notes, minor differences between models are normal, but you can rely on reproducible results by standardizing rack height, pan type, and preheat procedure. If you frequently bake items with similar requirements, adopting a repeatable routine reduces guesswork and improves outcomes over time.
Factors That Affect Preheat Time
Preheat time is not a fixed value; it depends on several interacting factors. First, the size and power of the toaster oven influence how quickly heat builds. Larger capacities with higher wattage tend to reach temperature faster, but they can also have more thermal mass, which moderates rapid changes. Second, convection plays a role. Model variants with a built-in convection fan often distribute heat more evenly and can reduce the visible warm-up phase for some foods, though this is not universal across all recipes. Third, rack placement matters. Placing a tray too close to the heating elements or at an unusual height can alter how quickly the target temperature is reached and how heat is imparted to the food once cooking begins. Fourth, the door state affects preheat. Opening and closing the door during preheat causes heat to escape and extend the time needed to reach the goal temperature. Ambient room temperature and the cookware you select also influence how fast the chamber heats. Finally, the type of food you plan to cook matters in the sense of how tolerant your recipe is to slight temperature deviations. For best results, keep a consistent setup and verify temperatures with a thermometer when precision is important.
How to Measure Preheat Easily
Measuring preheat accurately is the most reliable way to ensure your toaster oven is ready for cooking. Start with an oven thermometer placed away from the heating coils and the door to avoid skewed readings. Set the oven to the recipe’s target temperature and close the door. Allow several minutes for the temperature to stabilize; use the thermometer reading to determine when you’ve reached the intended set point. If your thermometer shows a different value than the display, you can recalibrate your expectations or adjust jacketed cooking times accordingly. For best results, document the actual preheat time you observe for each temperature setting and model you own, then reuse that benchmark for future cooking sessions. If you rely on the convection setting, remember to account for the fan’s impact on heat distribution, since this can slightly shift when the thermometer reads the target temperature. Lastly, use consistent cookware and a similar load size each time you preheat to keep results repeatable.
Practical Preheat Scenarios: Common Foods
Different foods benefit from different preheat approaches. When warming toast or bagels, you might start with a moderate setting and monitor browning closely, using a shorter preheat phase if you’re aiming for crisp edges. For frozen pizzas, preheating helps crust crispness and even cheese melt, but you may need to adjust based on crust thickness and toppings. Baked goods, like cookies or pastries, usually require precise target temperatures and careful timing. For thicker items, you may choose a slightly longer preheat or a higher initial bake temperature to ensure the interior cooks evenly without burning the exterior. In all cases, avoid overcrowding the chamber, and if you’re using parchment, ensure it doesn’t extend into the heating elements. With practice, you’ll discover a reliable preheat rhythm that suits your favorite recipes and daily routines.
Common Myths Debunked
A frequent myth is that longer preheat always yields better results. In reality, excessive preheating wastes energy and can over-dry foods on the surface while not improving internal doneness. Another misconception is that all toaster ovens require the same preheat duration as conventional ovens. The truth is that toaster ovens have different heat distribution patterns and thermal mass, so their preheat times differ. Finally, some cooks believe that opening the door during preheat is harmless. Opening the door interrupts the heat flow and increases the total preheat time, which can lead to uneven cooking. By confronting these myths with a thermometer-based, model-specific approach, you’ll achieve consistent outcomes.
Energy Efficiency and Quick Tips to Cut Preheat Time
If you’re aiming to be energy-conscious, consider using the convection setting when appropriate, which can distribute heat more evenly and reduce the need for extended preheating. Keep the oven door closed during preheat and avoid sudden temperature changes by planning your menu ahead. Using the right rack height and keeping cookware sized to fit the interior ensures heat travels efficiently to the food. For batch cooking, preheat once and cook several items in succession to maximize efficiency. If your model supports it, preheating with a stone or a heavy baking sheet can help stabilize heat and shorten subsequent bake times. Always prioritize safety and avoid placing metal objects near the heating elements if they are not heat-safe.
Safety Considerations During Preheating
Safety starts with setup. Place the toaster oven on a stable, heat-resistant surface away from flammable materials, and never leave it unattended while heating. Use heat-resistant gloves when handling hot racks or trays, and keep cords away from the front of the appliance where they can be pulled. If you notice unusual smells, smoke, or overheating, turn off the unit and unplug it before inspecting. Maintain clearances around the appliance, and ensure the interior is clean and free of crumbs that could ignite. If you rely on an oven thermometer, keep it away from direct flame or heating elements to prevent heat distortion.
Authority Sources and How We Verify Information
To ensure accuracy, we consult a mix of government, educational, and reputable industry sources. For general safety guidelines and temperature practices, see consumer safety pages on government sites and university extension resources. These sources help validate our recommendations on preheating dynamics, temperature verification, and safe operation. While ToasterInsight provides practical, AI-assisted guidance, always compare with manufacturer specifications for your specific model and use your thermometer for the final confirmation of temperature targets.
Tools & Materials
- Toaster oven(Choose a model you trust; ensure it heats evenly and is clean.)
- Oven thermometer(Place away from coils and door; use for accurate readings.)
- Rack or baking sheet(Position according to recipe and avoid overcrowding.)
- Timer or smartphone(Track preheat duration and cooking times for consistency.)
- Heat-resistant oven mitts(Protect hands when handling hot racks or trays.)
- Parchment paper or silicone mat(Optional for preventing sticking and easy cleanup.)
- Pan or baking stone (optional)(Can help with heat distribution for certain recipes.)
Steps
Estimated time: 15-25 minutes
- 1
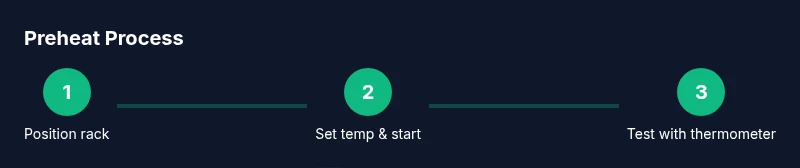
Position rack and prep heat source
Place the rack at the height you’ll use for the recipe and remove any obstructions. If you’re using a stone or heavy pan, position it securely before turning the oven on. This reduces heat loss and ensures the target temperature is reached evenly.
Tip: Use a middle rack for most baked items to balance heat from top and bottom. - 2
Set target temperature and start preheating
Input the recipe’s temperature and start the toaster oven with the door closed. Avoid opening the door during preheat, because every door opening disrupts heat build-up and can extend preheat time.
Tip: If your model has a convection option, decide whether to use it based on the recipe and your tray size. - 3
Verify the temperature with a thermometer
After a few minutes, check the interior temperature with your oven thermometer. If the readout is lower than the target, wait a little longer; if higher, reduce the time or adjust the temperature for subsequent batches.
Tip: Keep the thermometer away from coils for an accurate reading. - 4
Insert food when target temperature is reached
Carefully place your food on the rack or tray once the oven stabilizes at the target temperature. Close the door promptly to maintain heat and avoid temperature drift.
Tip: Even small adjustments to positioning can impact browning; maintain consistent placement every time. - 5
Adjust for convection or bake mode
If you’re using convection, you may need to adjust cooking times slightly since heat is distributed differently. For bake mode, keep an eye on edge browning and rotate the tray if needed.
Tip: Record any adjustments you make for future reference. - 6
Power down and allow cooling
When cooking finishes, turn the oven off and let it cool while you finish up cleaning and plating. Don’t force cool-down with water or cold air, which can stress components.
Tip: Wipe crumbs and wipe the interior after use to maintain performance.
Your Questions Answered
What factors influence preheat time on a toaster oven?
Model size, wattage, convection, rack height, and door handling all affect preheat time. Consistency in setup helps you predict performance across meals.
Preheat time depends on your oven’s power, convection, rack height, and whether you open the door. Keep variables consistent for predictable results.
Is preheating always necessary for toaster oven cooking?
Not every dish requires long preheating, but many baking and crisping tasks benefit from a stable start. For some quick reheats, a short warm-up window may suffice.
Preheating isn’t always required, but for crispy tops or even browning it helps to stabilize the temperature.
How does convection affect preheat time?
Convection can distribute heat more evenly and may shorten overall cook times, but it doesn’t guarantee a shorter preheat time in every model. Always verify with a thermometer.
Convection often changes preheat timing and cooking, so check with a thermometer to be sure.
What’s the best way to preheat for frozen foods?
Preheat to the recipe’s temperature, then add frozen items. They usually require a longer total cooking time, but preheating helps ensure crisp surfaces and even doneness.
Preheat to the target temperature, then cook; frozen items may need extra time but start with a hot oven.
Are there safety tips specific to preheating?
Keep the appliance on a stable surface away from flammables, monitor for smoke, and unplug if you notice any unusual smells or overheating.
Always stay nearby during preheat, and unplug if you see smoke.
Watch Video
Key Takeaways
- Preheat until target temperature is reached.
- Use thermometer to verify accuracy.
- Keep door closed during preheat for consistency.
- Convection affects heat distribution and may alter timing.
- Document observations for repeatable results.